
Desserts
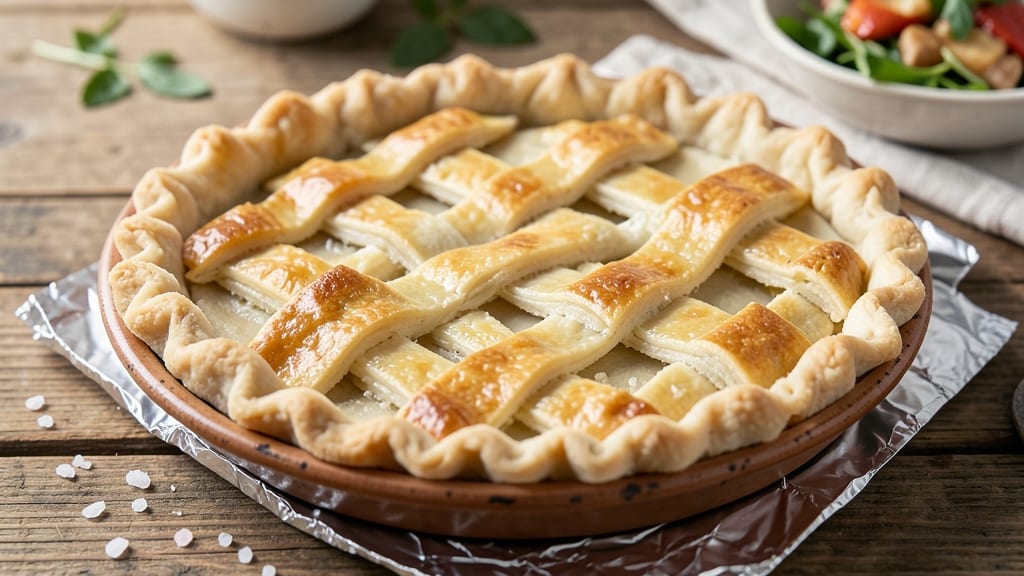
A 9 1/2-inch pie crust that bakes up perfectly golden without shrinking or cracking is the foundation of every great dessert. ✨ The foil-sealed secret I’ve perfected over years of baking ensures your crust holds its shape while developing that ideal flaky, buttery texture—no more soggy bottoms or uneven edges.
This recipe delivers professional results with simple techniques, whether you're making a classic apple pie, a rich quiche, or a delicate tart.
The key to success lies in proper rolling, gentle handling, and a strategic foil barrier during blind baking. I’ll walk you through every step—from chilling the dough to fitting it seamlessly into your pie dish—so you can achieve that restaurant-quality finish at home.
No more guessing whether your crust will shrink or puff up; this method guarantees a sturdy, even base every time.
What you’ll end up with is a crisp, golden crust with tender layers that hold their own against fillings, whether sweet or savory. The foil trick prevents over-browning while keeping the crust firm, so it supports even the heaviest fillings without collapsing.
This is the crust that makes your desserts look—and taste—like they came from a bakery.
Once mastered, this technique works for pies, tarts, and quiches alike. Ready to elevate your baking game? Let’s get started with the perfect foundation for any pie.
Ingredients for 9 1/2 inch pie crust
Simple ingredients for a foolproof crust—no fancy tools needed, just patience and precision.
| Ingredient | Amount | Notes |
|---|---|---|
| All-Purpose Flour 🌾 | 2 ½ cups | Sifted for even texture |
| Unsalted Butter 🧈 | 1 cup | Cold, cubed, not softened |
| Ice Water 💧 | ½ cup | Chilled for proper dough consistency |
| Diamond Crystal Kosher Salt 🧂 | ½ tsp | Fine grain preferred |
| White Vinegar 🍶 | 1 tbsp | For tenderizing the dough |
| Aluminum Foil 📄 | 1 sheet | Heavy-duty for blind baking |
| Pie Weights or Dried Beans 🌾 | 1 cup | For blind baking support |
| Granulated Sugar 🍚 | 1 tbsp | For sprinkling on edges |
The butter matters most here. European-style butter has more fat content, making the crust extra flaky, but any good unsalted butter works. Grab it from Whole Foods or your local grocery store—just make sure it's cold when you measure it. The flour should be all-purpose, not self-rising or cake flour. King Arthur or Gold Medal are my go-tos for consistent results. Keep everything chilled until you're ready to roll, or the butter will start to melt and ruin your layers.
No ice water? Chilled water from the fridge works in a pinch, but ice keeps things cold longer. Running short on vinegar? Lemon juice at the same amount does the trick. The foil is non-negotiable for blind baking—heavy-duty aluminum foil prevents over-browning while keeping the crust firm. For pie weights, I use dried beans (they're free and reusable), but store-bought ceramic weights work too. If you're in a hurry, frozen peas in a bag also work—just don't forget to remove them before adding filling.
Store the rolled-out dough between parchment paper in the fridge for up to 2 days. The foil-sealed crust keeps perfectly for 3 days before baking, so you can prep ahead. Once baked, it stays crisp at room temperature for 2 days, or freeze for 3 months. I always make an extra crust—it's perfect for quiches or savory tarts later in the week.
Why You'll Love This Recipe
- Cold Butter Hack: I swear by this method—cutting that unsalted butter into the flour with a pastry cutter (or even two forks) until it’s pea-sized. No food processor? No problem. The texture comes out buttery perfection every single time, and it’s half the work of kneading.
- Vinegar Secret: Honestly, that splash of white vinegar? It’s the game-changer. It tenderizes the dough just enough so it doesn’t toughen up when you roll it out—plus, it keeps the crust from shrinking like my first attempts did. (Yes, even on a Tuesday night.)
- Foolproof Freezer: Between us, this crust is my go-to for meal prep. Roll it out, wrap it tightly, and freeze it for up to three months. When I’m craving a pie but don’t want to bake, I just thaw it, fill it, and pop it in the oven. No stress, no last-minute scrambling.
- Budget-Friendly Staples: All-purpose flour, butter, salt—these are ingredients I already have. No fancy shortcuts, no specialty items. The kosher salt and vinegar? They’re cheap and make all the difference. This crust costs pennies but tastes like it belongs in a bakery.
Step-by-step instructions for perfect 9½-Inch pie crusts
Here's how to build a foolproof pie crust that bakes up golden and sturdy every single time.
👨🍳 Step 1: Cut and Mix the Dough
Cut the 1 cup unsalted butter into ¼-inch cubes and place them in the freezer while you prepare the rest. In a large bowl, whisk together the 2.5 cups all-purpose flour and 0.5 tsp diamond crystal kosher salt until evenly combined. This ensures your crust won't taste flat or overly salty in any spot.
Make a well in the center and add the 1 tbsp white vinegar and 0.5 cup ice water. The vinegar helps tenderize the dough while the ice water keeps the butter cold longer during mixing. Use a fork to gently combine until the mixture comes together in clumps. Don't overmix—just until the dough holds together when pressed.
🥘 Step 2: Form and Chill the Dough
Turn the dough onto a lightly floured surface and gently press it into a 1-inch thick disk. Wrap it tightly in plastic wrap and refrigerate for at least 1 hour (or up to 2 days). This chilling step is crucial—it prevents the butter from melting too quickly during baking and ensures your crust holds its shape beautifully.
I like to divide the dough into two equal disks if I'm making a double-crust pie. This makes rolling out each layer easier and more manageable. The cold dough is firm enough to handle without sticking, which makes the rolling process much smoother.
🍳 Step 3: Roll and Fit the Crust
On a lightly floured surface, roll the chilled dough into a 12-inch circle (about ⅛-inch thick). To keep it from sticking, I flip it over every few turns and re-flour the surface. Gently fold the dough in half, then in half again to make a compact square for easier handling.
Unfold the dough and carefully transfer it to your 9½-inch pie dish, letting it drape over the edges. Press it gently into the bottom and up the sides, leaving about ½-inch overhang. Trim the excess dough with a sharp knife, leaving a clean edge. The key here is to avoid stretching the dough—just press it into place.
🔥 Step 4: Blind-Bake with Foil Trick
Preheat your oven to 375°F. Line the crust with the 1 sheet aluminum foil and fill it with the 1 cup pie weights or dried beans. This creates a perfect, flat surface for baking and prevents the bottom from puffing up. Bake for 15 minutes until the edges start to turn golden.
Here's the secret: Remove the weights and foil, then sprinkle the crust edges with 1 tbsp granulated sugar. Return it to the oven for 5-8 minutes until the edges are beautifully golden brown. The sugar caramelizes for that perfect bakery finish. Real talk: This step makes all the difference for that restaurant-quality look!
⏰ Step 5: Cool and Prepare for Filling
Let the crust cool completely on a wire rack before adding your filling. This prevents the bottom from becoming soggy when the hot filling goes in. The crust should be completely cool to the touch—usually about 30-45 minutes depending on your kitchen.
If you're making a double-crust pie, repeat the rolling process with the second disk of dough. Keep it chilled until you're ready to use it. The beauty of this method is that your crust will hold its shape perfectly, even when filled with juicy fruit or creamy custard. You've earned that golden, sturdy crust!
Pro Tips For Making 9 1/2 Inch Pie Crust
- CHILL THE BUTTER FIRST: I learned this the hard way—taking cold butter straight from the fridge and cutting it into flour makes the dough tough. Let that butter sit in the fridge for 30-45 minutes before measuring, so it’s firm but not rock-hard. You want it to hold shape when you cut it, not crumble like a sad snowball.
- MEASURE FLOUR LIKE A PRO: Spoon that flour into the measuring cup, then level it off with a knife—don’t scoop directly from the bag. Packing it down gives you a dense crust, and using too much flour makes it dry and crackly. This recipe is delicate; treat the flour like you’re measuring gold.
- WORK FAST WITH ICE WATER: The second you add ice water, the clock starts. This dough doesn’t like to wait, and warm hands or a slow mix will turn it gummy. Keep your mixing bowl and tools icy cold, and cut the butter into the flour quickly—think 2-3 minutes max. Once the dough comes together, stop. Overworking it kills the flaky layers.
- REST THE DOUGH (YES, EVEN IF YOU’RE IMPATIENT): I know, I know, but trust the process. Wrap that dough in plastic and let it rest in the fridge for at least 1 hour—overnight is better. This relaxes the gluten and makes rolling it out a breeze. Skipping this step? You’ll fight the dough like it’s a toddler refusing naptime, and the crust will shrink in the oven.
Creative variations of this recipe
Sweet vs. Savory
This versatile crust works for both sweet pies and savory tarts—just adjust your fillings! For apple or berry pies, I brush the cooled crust with a thin layer of egg wash (1 egg + 1 tbsp water) before adding filling.
For quiches or spinach tarts, I skip the egg wash and focus on a crisp, sturdy base. The foil trick ensures the crust stays firm enough to handle even heavy fillings like ricotta cheese or chopped mushrooms. 🍏
Gluten-Free Adaptation
Swap the all-purpose flour for a 1:1 gluten-free flour blend like Bob’s Red Mill or King Arthur Measure for Measure. Add ½ tsp xanthan gum to help bind the dough. Chill the dough 30 minutes extra since gluten-free doughs can be trickier to handle.
I’ve found almond flour crusts work too—just replace the flour with 2 cups finely ground almonds and reduce the butter to ½ cup. These alternatives still yield a golden, flaky result! 🌾
Herb-Infused Crusts
For a savory twist, mix 1 tbsp fresh rosemary or thyme into the flour before mixing. For garlic lovers, finely chop 2 garlic cloves and mix them into the butter cubes before chilling.
These subtle flavors shine in savory galettes or cheese-stuffed tarts. I also love adding 1 tsp smoked paprika to the flour for a smoky depth—perfect with pork or chicken fillings. 🌿
Mini Crusts for Tarts
Divide the dough into 4 equal balls and roll each into a 6-inch circle for individual tarts. Press into ramekins or mini tart pans, then blind-bake with ¼ cup pie weights per tart.
These are ideal for appetizers or dessert toppings. For extra flair, brush the edges with melted butter and sprinkle with crushed pistachios or sesame seeds before baking. 🍽️
Freezer-Friendly Prep
Roll out the dough, wrap it tightly in plastic wrap, and freeze for up to 3 months. When ready to use, thaw in the fridge for 2 hours before fitting into your pie dish.
This is a game-changer for busy bakers—I often prep crusts on weekends for pies during the week. For double-crust pies, freeze both layers separately. Just
Nutrition facts
Frequently asked questions
Why does the dough need to chill for so long?
Chilling the dough for at least 1 hour (or up to 2 days) is essential for two reasons: it prevents the butter from melting too quickly during baking, which keeps the layers crisp and flaky, and it makes the dough easier to handle without sticking. This step ensures your crust holds its shape perfectly in the 9½-inch pie dish and doesn't shrink or puff up unexpectedly.
Can I use this crust for a double-crust pie?
This recipe makes enough dough for two 9½-inch crusts—just divide the dough into two equal disks before chilling. The same rolling and blind-baking techniques apply. For a classic double-crust pie, like apple or cherry, keep the bottom crust chilled while you roll the top layer. The foil trick works perfectly for both layers to ensure a sturdy base and golden edges.
What if my crust shrinks during baking?
Shrinking usually happens when the dough isn't chilled enough or the butter melts too quickly. To fix this, always keep the dough cold, avoid over-handling, and use the foil barrier during blind baking. If your crust shrinks slightly, don't panic—it can still hold fillings well. For next time, chill the dough longer (up to 2 days) and preheat your oven fully before baking.
Do I need pie weights, or can I use something else?
Pie weights are ideal, but you can substitute with dried beans, frozen peas (in a bag), or even uncooked rice. The key is to create even pressure on the crust to prevent puffing. Just make sure whatever you use fits snugly inside the crust and doesn't leave gaps. Remove them before adding filling to avoid soggy spots.
How do I store a pre-baked crust?
Let the crust cool completely, then store it at room temperature in an airtight container for up to 2 days. For longer storage, wrap it tightly in plastic and freeze for up to 3 months. Thaw overnight in the fridge before adding filling. The foil-sealed edges stay crisp even after reheating, making this crust perfect for make-ahead baking.