
Desserts
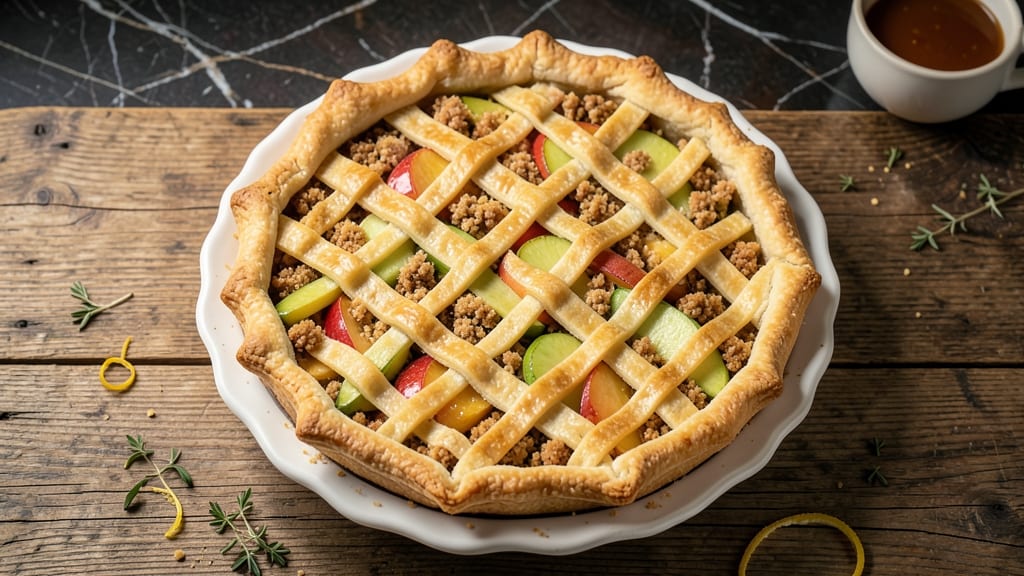
This 9.5-inch apple pie recipe delivers the perfect balance of flaky crust, spiced apple filling, and golden edges that make every slice look like it came from a bakery. The key?
A crisp yet tender crust that holds up to thick slices, and a filling so flavorful it needs no extra toppings—though a lattice crust or caramel drizzle takes it to the next level.
I’ve tested this recipe countless times, adjusting until the crust stays crisp, the apples stay tender, and the aroma fills the kitchen before the timer even goes off.
The crust starts with a simple, foolproof dough that’s rolled out just thick enough to hold its shape without cracking.
For the filling, a mix of tart and sweet apples—like Granny Smith and Honeycrisp—cooked down with cinnamon, sugar, and a touch of lemon juice creates a balance that’s neither too sweet nor too tart. The secret?
Cooking the filling until it’s thick but not syrupy, so it holds its shape when sliced. This isn’t a pie that falls apart—it’s a pie that impresses.
Baking at 375°F ensures a crisp crust and caramelized edges while keeping the filling tender. The result is a pie with a perfectly golden crust, a filling that’s just firm enough to slice neatly, and a scent that makes your kitchen smell like autumn.
Whether you’re serving it at a holiday gathering or treating yourself to a cozy dessert, this pie delivers restaurant-quality results with a fraction of the effort.
For those who love customization, a lattice crust adds visual appeal while keeping the pie lighter, or a drizzle of caramel sauce elevates each bite. The recipe scales easily, so you can make one pie for a small gathering or two for a crowd.
Let’s get baking—this pie is worth every minute.
Ingredients for 9.5 inch apple pie
Flaky crust, spiced apples, golden edges—this pie recipe delivers bakery-quality results every time.
| Ingredient | Amount | Notes |
|---|---|---|
| All-Purpose Flour 🌾 | 3 ½ cups | Sifted for light texture |
| Unsalted Butter 🧈 | 1 ¼ cups | Cold, cubed for crust |
| Granulated Sugar 🍚 | ¾ cup | Plus 1 tbsp for sprinkling |
| Granny Smith Apples 🍎 | 3 medium | Peeled, sliced into 1/4-inch pieces |
| Honeycrisp Apples 🍎 | 3 medium | Peeled, sliced into 1/4-inch pieces |
| Brown Sugar 🍚 | ½ cup | Packed, for filling |
| Ground Cinnamon 🌿 | 2 tbsp | Freshly ground preferred |
| Lemon Juice 🍋 | 2 tbsp | Freshly squeezed |
| Salt 🧂 | ½ tsp | Fine sea salt |
| Vanilla Extract 🌸 | 1 tsp | Pure vanilla preferred |
| Ice Water 💧 | ¼ cup | For dough elasticity |
| Granulated Sugar 🍚 | 1 tbsp | For sprinkling on crust |
The apples are non-negotiable. Granny Smith and Honeycrisp give you that perfect tart-sweet balance, but any mix of crisp apples works—Fuji or Braeburn hold up well too. Trader Joe's or local orchards usually have the best selection. Avoid mealy apples like Gala—they turn mushy. If you can’t find Honeycrisp, Pink Lady is a close second. For the crust, Store-brand butter works just as well as fancy brands, but keep it cold—cut it into small cubes and don’t let it warm up before mixing. The flour? King Arthur or Gold Medal are my go-tos for a lighter texture.
No Granny Smith? McIntosh or Rome apples add more tartness, but you’ll need to sweeten the filling slightly. Short on brown sugar? White sugar plus a pinch of molasses mimics the flavor. The vanilla extract can be swapped for vanilla bean paste if you’re feeling fancy. For the crust, if you’re not a fan of butter, vegetable shortening gives you even more flakiness. Just remember—never use margarine. The lemon juice is key for brightness, so if you’re out, lime juice works in a pinch. And if you’re worried about the crust cracking, chill the dough for 30 minutes before rolling.
The crust dough keeps for 3 days in the fridge wrapped tightly in plastic. The filling can be prepped ahead and stored for 1 day before baking—just cover it with plastic wrap touching the surface to prevent browning. For make-ahead pies, assemble the pie (unbaked) and refrigerate for up to 24 hours. When baking, the golden edges happen at the last 5-10 minutes—watch closely. If the crust browns too fast, tent it with foil. Leftovers? Store in an airtight container for 4 days or freeze for 3 months. Reheat slices in a 350°F oven for 10 minutes to restore that crisp texture.
Why You'll Love This Recipe
- No-Fuss Crust: I swear by this recipe’s shortcut crust—just cold butter and flour tossed together, then slapped into the pan. No rolling, no stress, and it still holds its shape like a pro.
- Tart-Sweet Magic: Granny Smiths keep it sharp while Honeycrisp adds that melt-in-your-mouth juiciness. Honestly, the sugar caramelizes into the apples without turning everything into syrup—just the right balance.
- Weeknight Hero: Between us, this is my go-to when I need dessert but don’t want to spend hours baking. It’s ready in under an hour, and the 9.5-inch size means I can actually finish it (no sad half-pie leftovers).
- Budget-Friendly Staples: All-purpose flour, butter, and seasonal apples? This pie costs less than takeout but feels like a restaurant dessert. Plus, the leftovers reheat beautifully—just pop slices in the oven for a warm treat.
Step-by-step instructions for 9.5-Inch apple pie
Here's how to create a perfectly proportioned mini apple pie with a flaky crust and golden edges.
Prepare the Crust Dough
In a large mixing bowl, combine the 3.5 cups all-purpose flour and 0.5 tsp salt. Cut in the 1.25 cups cold unsalted butter using a pastry cutter or your fingers until the mixture resembles coarse crumbs with pea-sized butter pieces. This ensures a tender, flaky crust rather than a tough one.
Gradually add the 0.25 cup ice water, 1 tablespoon at a time, mixing gently with a fork until the dough just comes together. Avoid overworking it—this develops gluten and makes the crust tough. Form the dough into a disk, wrap in plastic, and refrigerate for at least 1 hour or up to 2 days. Chilling relaxes the gluten, making rolling out easier.
Assemble the Filling
In a large bowl, toss the peeled and sliced 3 medium Granny Smith apples and 3 medium Honeycrisp apples with 2 tbsp lemon juice. This prevents browning and adds brightness to the filling. In a separate bowl, whisk together the 0.75 cup granulated sugar, 0.5 cup brown sugar, 2 tbsp ground cinnamon, and 1 tsp vanilla extract. Pour this mixture over the apples and toss gently to coat evenly.
Let the filling sit for 15 minutes while you roll out the dough. This allows the juices to release slightly, creating a more flavorful filling. The apples should be evenly coated with sugar and spices—this ensures every bite is sweet, spiced, and juicy.
Roll and Fit the Crust
On a lightly floured surface, roll out half of the chilled dough to a 12-inch circle (about ⅛-inch thick). Transfer it to a 9.5-inch pie dish and press gently into the bottom and up the sides. Trim any excess dough hanging over the edge. Sprinkle the bottom of the crust with 1 tbsp granulated sugar—this creates a subtle sweetness when the crust browns.
Pour the apple filling into the prepared crust, mounding it slightly in the center. This helps prevent a soggy bottom. Fold the edges of the top crust under the bottom crust to create a crimped edge. Brush the folded edge with a bit of cold water or egg wash to help seal it. Roll out the remaining dough and place it over the filling.
Crimp and Vent the Top
Trim the top crust to fit the pie dish, leaving about ½ inch of overhang. Use your fingers or a fork to create a decorative crimp along the edge. Cut 4-5 small slits in the center of the top crust to allow steam to escape—this prevents a soggy pie. Brush the top crust with a light egg wash (1 egg beaten with 1 tablespoon water) for a golden finish.
Bake to Golden Perfection
Preheat your oven to 375°F. Place a baking sheet on the lower rack to catch any drips. Bake the pie for 45-50 minutes until the crust is deep golden brown and the filling is bubbling through the slits. If the edges brown too quickly, cover them loosely with aluminum foil.
For the last 10 minutes, increase the oven temperature to 400°F to ensure a crisp, caramelized crust. Let the pie cool for at least 2 hours before slicing—this allows the filling to set and the juices to distribute evenly. Serve warm with a scoop of vanilla ice cream for the ultimate experience.
Pro Tips For Making 9.5 Inch Apple Pie
- Preheat Crust First: I learned this the hard way—rolling out cold dough straight from the fridge onto a cold pie dish makes it tough and uneven. Instead, chill your crust for 30 minutes, then place the rolled-out bottom directly on a preheated 375°F (190°C) baking sheet for 5 minutes before adding filling. The heat sets it instantly, so it holds shape better when you add the apples.
- Slice Apples Thin: Granny Smiths and Honeycrisp stay firm when sliced thin—about 1/4-inch thick—so they don’t turn to mush in the oven. Use a mandoline for even slices, and toss them immediately with 1 tablespoon of lemon juice to keep the color bright. Skip the thick chunks unless you want a stewed-apple pie instead of a tender one.
- Vent the Top: Forget lattice or crimping too tightly—just cut four 1-inch slits in the rolled-out top crust before placing it on the pie. This lets steam escape, preventing a soggy bottom and ensuring the filling cooks evenly. (Yes, it’s less fancy, but your pie will actually hold together.)
- Chill the Filling: Mix your spiced sugar (½ cup sugar + 1 tsp cinnamon + ¼ tsp nutmeg) with the sliced apples, then refrigerate the filling for at least 30 minutes before baking. The cold apples release less juice, so your crust stays crisp instead of turning into a soggy boat. Trust me, this small step makes a real difference.
Regional styles of this recipe
New England Classic
In New England, apple pies often feature a double crust with a lattice top for that rustic charm. Locals prefer McIntosh apples for their tartness, and they sweeten the filling with maple syrup instead of brown sugar—about ¼ cup—for a distinct autumnal flavor.
The crust gets brushed with heavy cream before baking for extra richness. Serve with vanilla bean ice cream to honor the region’s dairy traditions. 🍁
Southern Comfort Style
Southern apple pies lean toward buttery, flaky crusts with a streusel topping—mix ½ cup flour, ½ cup brown sugar, ½ cup cold butter, and 1 tsp cinnamon for a crunchy contrast.
The filling uses Braeburn apples and a splash of bourbon (about 1 tbsp) for depth. Bake at 350°F for 50 minutes to avoid over-browning the crust. A drizzle of honey after baking adds a Southern sweetness. 🍯
Pacific Northwest Twist
Out West, pies often incorporate local pear varieties like Bosc or Anjou—slice 1 pear with the apples for complexity. The crust is sometimes whole wheat (replace 1 cup all-purpose flour with whole wheat) for a nuttier flavor.
Top with toasted pecans and a sprinkle of cayenne for heat. Bake in a wood-fired oven if possible—it caramelizes the edges beautifully. 🌲
Midwest Homestyle
Midwestern pies are all about generous spicing—double the cinnamon to 4 tbsp and add ½ tsp nutmeg. The crust is extra thick (roll to ⅛-inch), and the filling includes diced onions (½ cup) for depth.
After baking, brush the crust with apricot jam for a glossy finish. Serve with cinnamon whipped cream for a cozy touch. 🌾
Texas-Style Shortcut
Texans love easy lattice crusts—use pre-made pie crust (like Pillsbury) and cut it into strips for a quick design. The filling swaps apples for peaches (or a mix) and adds tequila (1 tbsp) for a smoky kick.
Bake at 375°F for 40 minutes, then broil for 2 minutes to crisp the lattice. Top with salted caramel for a sweet-savory contrast. 🌶️
Nutrition facts
Frequently asked questions
Can I make this pie with store-bought crust?
For convenience, use two 9-inch pre-made pie crusts (one for bottom, one for top). Roll out the top crust slightly thinner than homemade dough to ensure even baking. Chill both crusts for 30 minutes before assembling to prevent shrinking. The texture will be slightly less flaky but still delicious.
How do I prevent a soggy bottom crust?
There are three key tricks:
- Sprinkle 1 tablespoon sugar on the bottom crust before adding filling (it caramelizes and creates a barrier).
- Pre-bake the bottom crust for 5 minutes at 375°F before adding filling.
- Let the filling cool for 15 minutes before pouring to reduce moisture. For extra insurance, blind-bake the bottom crust with pie weights.
What's the best way to slice this mini pie?
Wait until the pie has cooled completely (2 hours) for clean cuts. Use a hot, sharp knife (dip in hot water between slices) and wipe clean after each cut. For decorative slices, cut into 6-8 wedges—the 9.5-inch size makes perfect individual portions. Serve immediately to maintain that crisp crust texture.
Can I make this pie ahead of time?
Yes! Assemble the pie (unbaked) and refrigerate for up to 24 hours. For best results, bake it straight from the fridge (no need to bring to room temp). The dough stays firm, and the filling holds its shape. For make-ahead filling, prepare it 1 day ahead and refrigerate—just toss with apples right before baking. Store baked pies in an airtight container for 4 days or freeze for 3 months.
What's the secret to perfectly golden edges?
The magic happens in the last 10 minutes! Increase oven temp to 400°F for final browning. Brush edges with egg wash (1 egg + 1 tbsp water) before baking, and sprinkle with coarse sugar for crunch. For extra shine, broil for 1-2 minutes at the end—watch closely to avoid burning. The golden color comes from caramelization, not just browning.