
Desserts
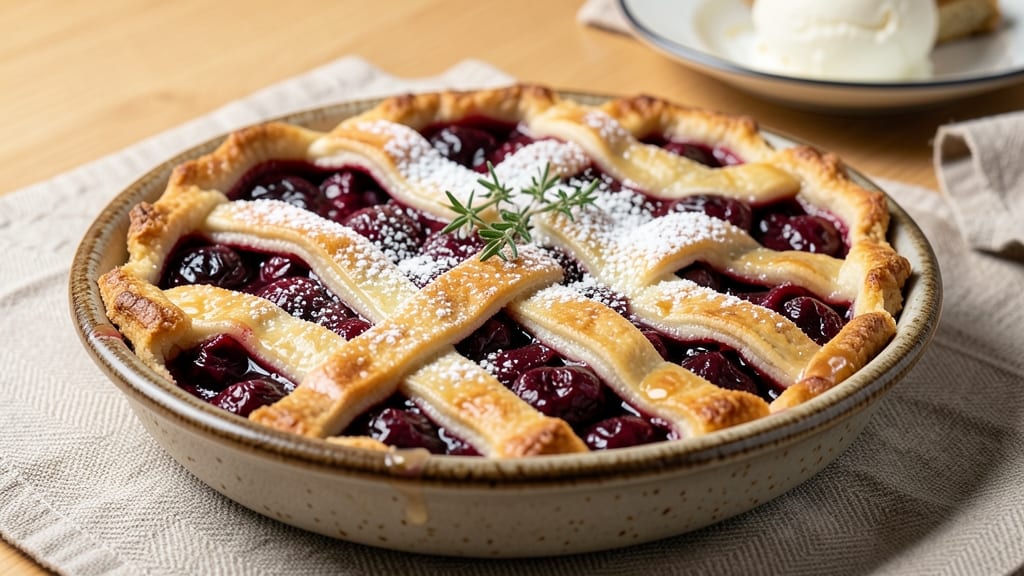
This Aldi cherry pie recipe delivers the perfect balance of tart cherries and buttery crust—all without breaking the bank. 💛 The secret lies in a simple, foolproof filling that highlights the natural sweetness of fresh or frozen cherries, while a classic lattice crust adds that restaurant-worthy touch.
With just a few affordable ingredients and a little patience, you'll create a pie that tastes like it came from a bakery, not your kitchen.
The filling starts with pitted cherries (fresh or frozen work equally well) simmered with sugar, cornstarch, and a splash of lemon juice to create a thick, glossy mixture that's neither too sweet nor too tart.
Meanwhile, the crust gets its signature beauty from a simple folded lattice pattern—no special tools required. The key to success? A well-chilled dough and gentle handling to avoid tearing.
By the time it emerges from the oven, your pie will have a golden, flaky crust and a filling that's just thick enough to hold its shape.
The aroma alone will have everyone gathering in the kitchen, and the first bite delivers that perfect mix of juicy cherries and buttery pastry. This is the kind of dessert that makes holidays feel special, even on a budget.
Serve it warm with a scoop of vanilla ice cream or whipped cream for the full experience. The lattice crust not only looks impressive but also allows for easy slicing—no messy crumbs here. Ready to bake a pie that'll impress? Let's get started.
Ingredients for aldi cherry pie
Tart cherries, buttery crust, and a lattice that looks fancy but isn't hard—just budget-friendly staples.
| Ingredient | Amount | Notes |
|---|---|---|
| Fresh or Frozen Pitted Cherries 🍒 | 4 cups | Use tart cherries (like Montmorency) |
| Granulated Sugar 🍚 | 1 ¼ cups | Light brown sugar for depth |
| Cornstarch 🌾 | ¼ cup | For thick, glossy filling |
| Lemon Juice 🍋 | ¼ cup | Freshly squeezed, not bottled |
| Unsalted Butter 🧈 | 1 cup | Cold, cubed for crust |
| All-Purpose Flour 🌾 | 2 ½ cups | Plus 1 tbsp for rolling |
| Diamond Crystal Kosher Salt 🧂 | ½ tsp | Adjust to taste |
| Ice Water 💧 | ½ cup | For dough binding |
| Vanilla Extract 🍯 | 1 tsp | Pure, high-quality |
| Egg 🥚 | 1 whole | For egg wash |
| Heavy Cream 🥛 | ½ cup | For egg wash richness |
The cherries make or break this pie. Aldi's frozen tart cherries (the ones in the red bag) are perfect—no pitting required. Fresh work too, but frozen save time. Sugar is key: light brown sugar adds depth, but white works if that's what you've got. Cornstarch thickens the filling beautifully, but if you've only got flour, use half the amount. The butter? Cold and cubed is non-negotiable for flaky layers—don't let it soften before mixing. I always grab the store-brand butter at Aldi—it's perfect for this.
No lemon juice? Substitute bottled lemon juice (though fresh is better), or even a splash of apple cider vinegar in a pinch. Short on vanilla? Almond extract works too—just cut the amount to half. For the crust, if you can't find Diamond Crystal salt, Morton kosher salt is fine, but measure carefully—it's saltier. The heavy cream in the egg wash adds that golden sheen, but whole milk works in a bind. And if you don't have a lattice cutter? Cut strips freehand—it's easier than you think. The dough should be cold but manageable—if it's too sticky, chill it another 15 minutes.
This pie tastes even better the next day, so bake it ahead if you can. Store leftovers in the fridge for 3-4 days, covered tightly. To reheat, warm slices in the oven at 350°F for 5-10 minutes—just until the filling is hot. The crust gets crispy again fast. Freeze individual slices between parchment paper for up to 2 months. The filling keeps for 1 week in the fridge if you make it ahead—just pour it into a jar and refrigerate.
Why You'll Love This Recipe
- No Pitting Hassle: I’ll be real—frozen pitted cherries are my kitchen MVP. No sink full of seeds, no sticky fingers, just dump and stir. That lemon juice? It brightens the whole filling while you’re at it, cutting through the sugar like a pro.
- Sweet-Tart Magic: The sugar and cornstarch combo thickens those cherries into a glossy, jammy filling that’s just sweet enough—especially when the butter melts into the crust. Honestly, the first bite makes me pause mid-slice. That’s the kind of pie people linger over.
- Potluck Star: This pie travels like a champ. The filling’s sturdy enough to handle a drive, the crust stays crisp (if you chill it first), and it’s the kind of dessert that gets passed around with zero guilt. Bonus: it’s the one dish I always bring that disappears first.
- Budget-Friendly Luxury: Aldi cherries and butter keep costs low, but the result tastes like a bakery showstopper. I’ve made this for birthdays, holidays, and even just because—I’ve got leftovers for days, and they’re just as good reheated with a scoop of ice cream. Practical? Yes. Worth it? Absolutely.
Step-by-step instructions for Aldi cherry pie
Here's how to make a showstopping cherry pie with a buttery lattice crust—no fancy tools needed.
🍳 Step 1: Cook the Cherry Filling to Thick Perfection
In a large saucepan, combine the 4 cups fresh or frozen pitted cherries, 1.25 cups granulated sugar, 0.25 cup cornstarch, and 0.25 cup lemon juice. Stir well to distribute the sugar evenly—this prevents clumping later. Place the pan over medium-high heat and bring to a boil, stirring constantly for 2-3 minutes until the sugar dissolves completely.
Once boiling, reduce heat to medium-low and let it simmer for 15-20 minutes, stirring occasionally, until the filling thickens to a jam-like consistency. You'll know it's ready when it coats the back of a spoon and the cherries are tender. The filling should be glossy and hold its shape when you run a spoon through it. Remove from heat and stir in 1 tsp vanilla extract. Let it cool completely before filling the crust—this prevents a soggy bottom.
👨🍳 Step 2: Make the Pie Crust Dough
In a large mixing bowl, combine 2.5 cups all-purpose flour and 0.5 tsp diamond crystal kosher salt. Cut in 1 cup cold unsalted butter using a pastry cutter or your fingers until the mixture resembles coarse crumbs with pea-sized butter pieces. Add 0.5 cup ice water, 1 tsp vanilla extract, and 0.5 cup heavy cream all at once. Mix gently with a fork until the dough just comes together—don't overwork it.
Turn the dough onto a lightly floured surface and knead it 4-5 times until smooth. Divide it into two equal discs, wrap each in plastic wrap, and refrigerate for at least 1 hour (or up to 2 days). Chilling relaxes the gluten, making it easier to roll out and preventing shrinking. Here's the thing—don't skip this step. Cold dough is your friend for a crispy, flaky crust.
🥘 Step 3: Assemble the Pie with a Classic Bottom Crust
Preheat your oven to 375°F. On a floured surface, roll out one disc of dough into a 12-inch circle, about 1/8-inch thick. Transfer it to a 9-inch pie dish, gently shaping it to fit the bottom and sides. Trim any excess dough hanging over the edge, leaving about 1/2-inch overhang. Prick the bottom crust all over with a fork to prevent puffing.
Pour the cooled cherry filling into the crust, mounding it slightly in the center. Roll out the second disc of dough for the lattice top. Cut it into 12 strips, about 1/2-inch wide, alternating between long and short strips for a classic pattern. Weave them over the filling, leaving the center open—this creates beautiful windows while keeping the filling contained. Brush the lattice with a little water to help it stick.
🔥 Step 4: Bake Until Golden and Bubbly
Place the pie on a baking sheet (to catch any drips) and bake for 45-50 minutes until the crust is deep golden brown and the filling is bubbling through the lattice. The edges should be crisp, and the center should jiggle slightly when you shake the pie. If the lattice starts browning too quickly, tent it loosely with foil after 30 minutes to prevent burning while the filling finishes cooking.
Remove from the oven and let the pie cool for at least 2 hours before slicing. This resting time allows the filling to set properly and prevents a runny mess. The crust will firm up as it cools, and the flavors will meld beautifully. Serve warm with vanilla ice cream or whipped cream for the ultimate dessert experience.
Pro Tips For Making Aldi Cherry Pie
- Simmer Cherries Slow: If you’re using frozen cherries straight from Aldi’s bag, don’t rush the simmer—give them a full 8–10 minutes over medium heat. I learned this the hard way when my pie filling stayed watery because I skimped on the cook time, and now I swear by this: the longer they simmer, the thicker and more flavorful the filling becomes.
- Drain, Don’t Rinse: After simmering, drain the cherries and reserve the juice—but skip rinsing the fruit. That juice holds the natural sweetness and acidity that balances the sugar. I used to rinse them to "clean up" the filling, and the pie tasted dull. The juice is your friend here.
- Skip the Extra Sugar: Aldi’s frozen cherries are already sweetened, so taste before adding all the sugar in the recipe. I’ve found that cutting the sugar by ¼ to ½ cup makes a real difference—especially if you’re using tart cherries. Start with less and adjust; you can always add more, but you can’t take it out.
- Prevent Butter Lumps: When mixing the butter into the filling, let it cool slightly first—just until it’s warm to the touch. Cold butter clumps like a stubborn grease stain, and no one wants to scrape that out later. A splash of the reserved cherry juice while stirring also helps emulsify it smoothly. Trust me, your pie crust will thank you.
Troubleshooting your aldi cherry pie
Filling Too Thin?
If your cherry filling isn't thickening enough, you're likely undercooking it. The filling needs to simmer until it reaches a jam-like consistency—test this by placing a spoonful on a chilled plate. If it doesn't wrinkle when pushed with your finger, it needs more time.
For extra insurance, mix 1 extra tablespoon of cornstarch with 1 tablespoon cold water, then stir it into the simmering filling. This slurry thickens instantly. 💡
Soggy Bottom Crust?
A soggy bottom happens when moisture from the filling seeps into the crust. Always cool the filling completely before pouring it into the crust—this prevents steam buildup. For extra protection, sprinkle 1 tablespoon of all-purpose flour over the bottom crust before adding the filling.
You can also blind-bake the bottom crust for 10 minutes at 375°F with pie weights or dried beans before adding the filling. Trust me, this is a game-changer. ⏰
Lattice Not Holding Shape?
If your lattice strips keep curling or collapsing, your dough might be too warm. Roll out the second dough disc right before assembling the pie—it should be cold but pliable. Brush the strips with egg wash (1 egg + 2 tablespoons water) instead of plain water for extra adhesion.
For a foolproof method, cut the strips just before weaving them over the filling. If they still won't stay, chill the pie in the fridge for 15 minutes before baking to help the lattice set. 🥧
Filling Too Sweet?
Taste your filling before baking—if it's too sweet, reduce the sugar next time by 1-2 tablespoons. The natural tartness of cherries (especially Montmorency) balances the sweetness, so don't overcompensate. For a more balanced flavor, add 1 extra tablespoon of lemon juice to brighten the filling.
If your cherries are particularly sweet (like fresh Bing cherries), use 1 cup sugar instead of 1.25 cups. The goal is a tart-sweet harmony, not cloying sweetness. 🍋
Crust Burning Before Filling Cooks?
This is a classic timing issue. If your lattice is browning too fast, tent the pie loosely with aluminum foil after 30 minutes of baking. Focus on the filling first—it needs 15-20 minutes of gentle cooking to thicken properly.
For extra insurance, bake the pie on the lower oven rack for the first 20 minutes to protect the bottom crust. Once the filling is bubbling, move the pie to the middle rack to finish browning the lattice. 🔥
Pie Filling Too Runny After Baking?
If your filling is still liquidy after baking, it likely didn't thicken enough before going into the oven. Next time, simmer the filling until it coats the back of a spoon and holds its shape when chilled.
For a quick fix, mix 1 tablespoon cornstarch with 1 tablespoon cold water, then stir it into the filling right before baking. The heat will activate the cornstarch and thicken the filling as it bakes.
Avoid overfilling the crust—leave ½ inch of space at the top to prevent spillage. 💫
Nutrition facts
Frequently asked questions
Can I use frozen cherries instead of fresh?
Aldi's frozen tart cherries work perfectly—no pitting required. Just thaw them completely before measuring, and drain any excess liquid. The filling will still turn out thick and flavorful. For best results, use the red bagged frozen cherries from Aldi's freezer section.
How do I make the lattice crust without a cutter?
No special tools needed! Roll out the second dough disc and cut it into 12 strips with a sharp knife—alternate between long and short strips for the classic pattern. Brush them with water or egg wash before weaving. If the strips curl, chill the pie for 15 minutes before baking to help them hold shape.
Can I make this pie ahead of time?
Yes! This pie actually tastes better the next day. Assemble the pie (unbaked) and refrigerate for up to 24 hours before baking. For make-ahead filling, cook it completely, cool, then store in the fridge for 1 week or freeze for 3 months. The crust can be pre-made and frozen for up to 2 days before rolling.
What's the secret to a flaky crust?
Keep everything cold! Use cold butter, chill the dough for at least 1 hour, and work quickly when rolling. The key is in the butter—cut it into small pieces and handle the dough as little as possible. If your kitchen is warm, chill the dough longer (up to 2 days) before using.
How do I fix a cracked lattice?
Don't stress—it's still delicious! If cracks appear, gently press the broken pieces back together with your fingers. For extra repair, brush the cracks with egg wash and sprinkle with extra flour. The pie will still bake beautifully, and the filling will shine through the gaps.