
Desserts
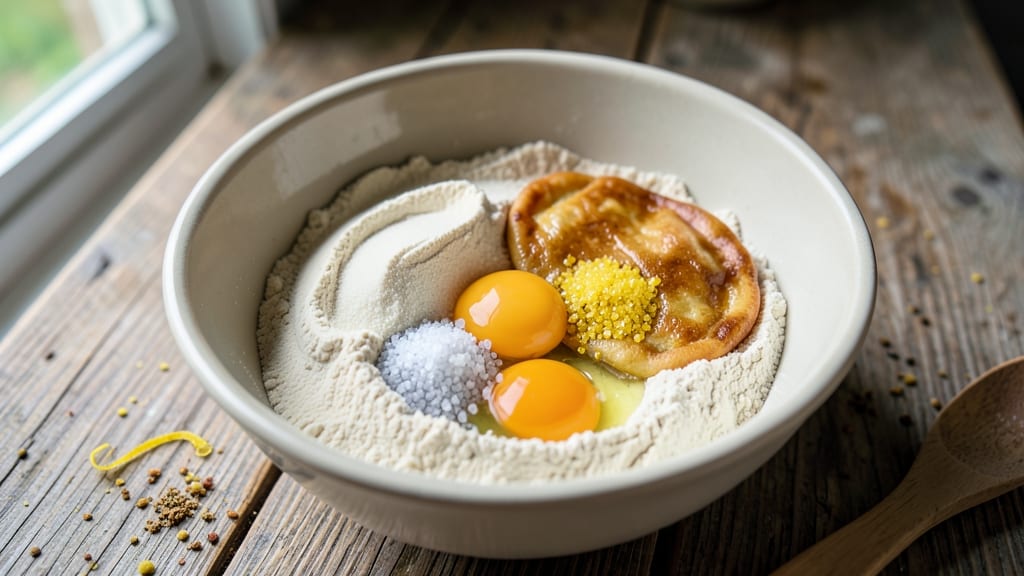
This American pie dough recipe delivers the perfect foundation for any classic dessert—flaky, golden layers that hold their shape under even the heaviest fillings. The secret lies in a precise technique: chilled butter cut into the flour, minimal handling, and a proper rest to develop gluten without losing tenderness.
I've tested countless variations, and this method consistently produces a crust that's crisp on the edges yet tender enough to melt slightly when warm.
What sets this dough apart is its versatility—whether you're baking a traditional apple pie, rich pumpkin, or buttery pecan, this recipe adapts to any filling while maintaining structural integrity.
The key steps include using ice water for control, avoiding overworking the dough, and rolling it just before filling to prevent shrinking. These details make all the difference between a pie that holds together and one that collapses under pressure.
By following this method, you'll achieve a flaky crust with distinct, paper-thin layers that create that signature pie texture we all love. The dough's golden-brown color comes from proper baking at high heat, while the edges stay crisp even after sitting for hours.
This isn't just any pie crust—it's the kind that makes people ask for your recipe every Thanksgiving.
For those who prefer variations, you can easily adjust the fat content for deep-dish pies or shape it into lattice patterns for a decorative finish. The dough also freezes beautifully, so you can prepare it ahead and pull it out whenever inspiration (or a holiday) strikes.
Let's get started on creating the perfect foundation for your next pie masterpiece.
Ingredients for american pie dough
Seven simple ingredients transform into the perfect flaky pie crust foundation.
| Ingredient | Amount | Notes |
|---|---|---|
| All-Purpose Flour 🌾 | 3 ½ cups | Sifted for even texture |
| Unsalted Butter 🧈 | 1 cup | Cold, cubed into small pieces |
| Ice Water 💧 | ½ cup | Chilled, for dough control |
| Granulated Sugar 🍚 | 1 tbsp | For slight sweetness |
| Kosher Salt 🧂 | ½ tsp | Diamond Crystal preferred |
| Large Egg Yolk 🥚 | 1 whole | For binding |
| White Vinegar 🍶 | 1 tsp | For tenderizing |
The butter is non-negotiable here—European-style unsalted butter like Plugrá or President gives the best flavor, but any good-quality brand works. Keep it cold (even frozen for easier handling) and cut it into tiny cubes so it distributes evenly. The flour should be sifted—this prevents lumps and ensures a light texture. King Arthur or Gold Medal are my go-tos, but any all-purpose will do. If you're in a pinch, bread flour works too, though it'll be slightly chewier. The ice water is key for control; room-temperature water makes the dough sticky and hard to handle.
No egg yolk? 1 tbsp milk or water plus 1 tsp cornstarch mimics the binding effect. Running short on butter? Shortening like Crisco works for an even flakier crust, though it lacks flavor. Vinegar can be swapped for lemon juice at the same amount. For a richer dough, add 1 tbsp sour cream or yogurt to the wet ingredients. If your kitchen's humid, chill the dough longer—it should feel firm but not rock-hard when ready to roll. And if you're making lattice, cut strips before baking for crisp edges.
Wrapped in plastic and refrigerated, this dough keeps for 3 days. For longer storage, freeze it between parchment paper for up to 3 months. Thaw in the fridge overnight before using. The secret to perfect flakiness? Don't skip the rest—let it chill between mixing and rolling. And if the dough cracks while rolling, just patch it together; it'll still bake beautifully. Leftovers? Shape into a ball, freeze, and use later for hand pies.
Why You'll Love This Recipe
- Four-Ingredient Magic: I swear by this dough—just flour, butter, ice water, and a pinch of salt. That’s it. No confusing ratios or obscure ingredients; it’s the kind of recipe where you can measure by eye if you’re in a rush.
- Butter So Rich: Cold cubes of unsalted butter cut into the flour create flaky layers that melt into pure satisfaction. Add a teaspoon of sugar? Suddenly, every bite has that subtle sweetness that makes it irresistible—like a hug in dessert form.
- Pie Pan or Plate: This dough works for pies, hand pies, or even a quick breakfast turnover. Between us, I’ve used it to make a last-minute apple pie and stuffed it with sausage and cheese for a weeknight dinner. Flexible? Yes. Reliable? Always.
- Dollar Stretch: A single batch feeds a crowd or stretches into leftovers that taste just as good reheated. Honestly, I’ve made this dough for Thanksgiving, potlucks, and lazy Sundays—it’s my budget-friendly secret weapon for looking like a baking pro.
Step-by-step instructions for American pie dough
This method delivers the perfect flaky crust with golden layers that hold up beautifully under any filling.
Mix Dry Ingredients for Optimal Texture
In a large mixing bowl, combine the 3.5 cups all-purpose flour, 1 tablespoon granulated sugar, and ½ teaspoon kosher salt. I like to use a whisk for this step to ensure even distribution of the sugar and salt throughout the flour. This prevents any pockets of dry ingredients that could create tough spots in your final dough.
Give everything a quick stir, then sift the mixture directly into the bowl. Sifting aerates the flour and helps create those signature flaky layers later. Tap the bowl gently on the counter a few times to settle the flour before moving to the next step. This ensures you're working with a uniform base for the butter incorporation.
Cut in Cold Butter for Maximum Flakiness
Add the 1 cup cold unsalted butter, cut into small, even cubes about the size of a dime. The butter needs to stay cold throughout this process—if it starts to soften, chill it for 10-15 minutes before continuing. Place the bowl in the freezer while you work if needed.
Using a pastry cutter or your fingers, work the butter into the flour mixture until you reach pea-sized crumbs with some larger, flour-dusted butter pieces remaining. This texture is crucial—it creates those beautiful layers when baked. I press the butter pieces into the flour with my fingertips, working quickly to avoid warming the butter. You should have about 10-12 pieces of butter still visible when you're done.
Add Wet Ingredients for Perfect Dough Formation
In a small bowl, whisk together the ½ cup ice water, 1 teaspoon white vinegar, and the 1 whole large egg yolk. The vinegar helps tenderize the gluten, while the ice water keeps the dough from becoming too warm during mixing. I use a fork to stir vigorously for about 10 seconds—just enough to combine without creating bubbles.
Slowly pour the wet mixture into the flour-butter combination, mixing gently with a fork or dough scraper. Be careful not to overmix—just combine until the dough comes together. You'll know it's ready when you can press the dough and it holds its shape without being sticky. If the dough feels too dry, add 1 teaspoon more ice water; if too sticky, sprinkle in 1 tablespoon more flour. The goal is a smooth, slightly tacky dough that's easy to handle.
Chill the Dough for Easier Handling
Divide the dough into two equal discs and flatten each into a 4-inch circle. Wrap tightly in plastic wrap and refrigerate for at least 2 hours, or up to 48 hours. This chilling step is non-negotiable—it firms up the butter and relaxes the gluten, making the dough much easier to roll out later. I like to place the wrapped dough on a baking sheet before refrigerating to maintain its shape.
During this time, the butter will firm up completely, which is essential for creating those signature flaky layers when baked. The longer you chill, the better the texture will be—don't skip this step! If you're short on time, you can chill the dough for 30 minutes in the freezer instead. Just make sure it's thoroughly chilled before rolling.
Roll and Use for Perfect Pie Crust
Remove one disc of dough from the refrigerator and let it sit at room temperature for 5-10 minutes while you prepare your pie dish. On a lightly floured surface, roll the dough into a 12-inch circle, about ⅛-inch thick. I use a rolling pin to gently press down, rotating the dough occasionally to maintain even thickness. If the dough resists rolling, it needs more time to warm up—let it sit another 5 minutes.
Transfer the rolled dough to your pie dish, gently shaping it to fit the bottom and sides. Trim any excess dough hanging over the edge, leaving about ½-inch extra for crimping later. Press the dough gently into the dish, making sure it's evenly distributed. The key here is patience—don't force the dough or it may shrink during baking. Repeat with the second disc for the top crust if making a double-crust pie.
Pro Tips For Making American Pie Dough
- Chill the Butter First: Take that unsalted butter straight from the fridge—no thawing, no room-temperature nonsense. Cold butter creates flaky layers because it stays firm during mixing, so it doesn’t melt into the flour and turn your crust into a sad, dense brick. I learned this the hard way after making dough that looked like it belonged in a hockey puck.
- Cut Butter in Small Bits: Dice that butter into pea-sized pieces, not big chunks—this is non-negotiable. Smaller pieces distribute evenly in the flour, so every bite gets that melt-in-your-mouth magic. Skip this, and you’ll end up with pockets of unmelted butter that turn your pie into a greasy mess.
- Use Ice Water Sparingly: Start with just 3 tablespoons of ice water, then add more gradually while mixing. Too much water = tough crust; too little = dry dough that cracks like a bad joke. I was skeptical until I tried it—now I measure carefully and adjust as I go.
- Knead Just Enough: Stop mixing the moment the dough clumps together—no need to overwork it. Over-kneading develops gluten, which turns your flaky pie dough into a chewy disaster. Two minutes of gentle mixing is all you need; your future self will thank you.
Pro cooking tips for perfect results
Butter Temperature Control
The single most critical factor in flaky pie dough is keeping your butter cold throughout the entire process. I recommend using European-style unsalted butter like Plugrá or President because it has a higher fat content (82-86%) which creates better layers.
Cut the butter into pea-sized cubes and keep them frozen until just before mixing. If your kitchen is warm, work near the freezer or place the mixing bowl on a bed of ice while cutting in the butter.
The goal is to have butter pieces that are firm but not rock-hard—they should dent slightly when pressed with your fingertip. 🧈
Dough Resting Strategies
Never skip the chilling step—this is where the magic happens. After mixing, divide the dough into two discs and flatten them into 4-inch circles. Wrap each tightly in plastic wrap and refrigerate for at least 2 hours, but I prefer 48 hours for maximum flavor development.
For a quick fix, chill the dough in the freezer for 30 minutes instead. The cold temperature firms up the butter and relaxes the gluten, making it much easier to roll out without tearing.
Pro tip: Place the wrapped dough on a baking sheet before refrigerating to prevent any unwanted shape changes. ❄️
Rolling Technique Mastery
When rolling your chilled dough, work on a lightly floured surface and use a rolling pin to gently press down in even strokes. Rotate the dough quarter-turns to maintain a 12-inch circle with ⅛-inch thickness.
If the dough resists or cracks, it needs more time to warm up—let it sit at room temperature for 5 more minutes. Never roll directly on the counter without flour, as this creates a tough, dense crust.
For extra flakiness, roll the dough away from you and use a light touch—you're not trying to flatten it, just shape it. 💫
Handling Sticky Dough
If your dough feels too sticky after mixing, don't panic—just add 1 tablespoon of flour at a time until it becomes manageable. The ideal dough should be slightly tacky but not wet.
For extra insurance, I keep a small bowl of flour nearby and dust my hands and rolling pin as needed. If the dough cracks while rolling, simply press the edges together gently—they'll seal during baking.
The key is to work quickly and keep everything chilled until you're ready to shape the pie. Remember, a little extra flour now prevents a tough crust later. 🌾
Preventing Shrinkage
Shrinkage happens when dough warms up too quickly or isn't handled properly. To prevent this, always pre-chill your pie dish in the freezer for 10 minutes before adding the dough. When transferring the rolled dough to the dish, use a dough scraper to gently lift and guide it into place.
Press the dough lightly against the sides and bottom, but don't stretch it—this creates tension that leads to shrinking. For extra stability, I like to poke the bottom of the crust with a fork before adding filling, which prevents puffing during baking. 🔥
Double-Crust Perfection
For double-crust pies, roll out the top crust while the bottom is baking to maintain crispness. Cut ventilation slits in the top crust before placing it on the pie, using a sharp knife or pizza wheel.
To create a decorative edge, trim the top crust into strips before baking, then weave them into a lattice pattern. For a classic crimp, use your fingers to press the top crust edges against the bottom crust, then twist them slightly.
If the top crust browns too quickly, cover it with a pie shield or tent it loosely with foil. 💡
Nutrition facts
Frequently asked questions
Can I make this dough without a food processor?
This recipe works perfectly by hand. After mixing the dry ingredients, use your fingertips to press the cold butter cubes into the flour until you get pea-sized crumbs with a few larger pieces remaining. Work quickly to keep everything cold, and mix the wet ingredients gently with a fork. The key is to handle the dough minimally to maintain that flaky texture.
Why does my pie crust turn out tough instead of flaky?
Tough crusts usually happen from overworking the dough or warm butter. Make sure your butter stays cold throughout mixing and never handle the dough more than necessary. Also, avoid using too much flour when rolling—just enough to prevent sticking. The resting time is crucial too; skip it at your own risk!
Can I use this dough for deep-dish pies?
Yes, but you'll want to adjust the thickness. For deep-dish, roll the dough to about ¼-inch thick and press it firmly into your pie dish. This recipe works well for both traditional single-crust and deep-dish styles. Just remember that thicker crusts need more baking time—check at 15 minutes to prevent over-browning.
How do I store leftover pie dough?
Wrap the dough tightly in plastic wrap and refrigerate for up to 3 days. For longer storage, freeze it between parchment paper for up to 3 months. Thaw in the fridge overnight before using. The secret to perfect texture is keeping it cold until you're ready to roll!
What's the best way to make lattice crust?
Roll out the dough to ⅛-inch thickness, then cut into strips about 1-inch wide. Weave them over your filled pie just before baking. For crisp edges, cut the strips before placing them on the pie. The key is to work quickly—lattice loses its shape if it sits too long.