
Desserts
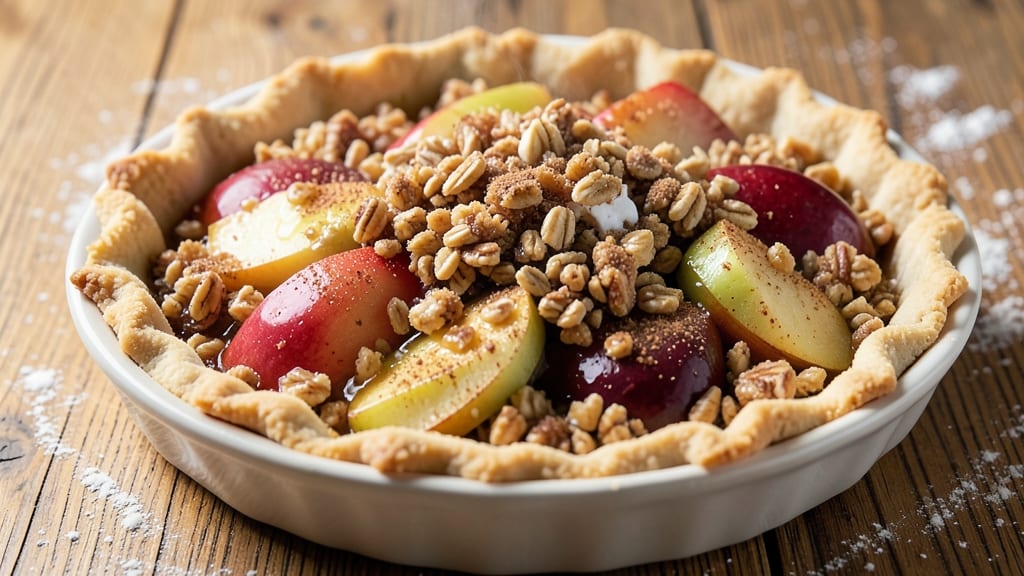
This apple crisp recipe with pie crust bottom transforms dessert into a buttery, textured masterpiece that combines the best of two worlds—tender spiced apples and a golden, flaky crust sandwiching every bite.
The secret lies in layering a pre-baked pie crust at the bottom, creating a crisp foundation that holds up to the warm, caramelized apple filling and crunchy oat topping. After perfecting this over countless weekends, I can confidently say this is the crisp that will become your new fall staple.
The magic happens in the layers: a pre-baked pie crust forms the sturdy base, while the apple filling—tossed with cinnamon, brown sugar, and lemon juice—softens just enough to release its juices without turning mushy.
The oat topping, mixed with melted butter and brown sugar, bakes into a golden, crumbly blanket that seals in all those warm apple aromas. This isn't just dessert; it's a textural experience that balances crisp, creamy, and chewy in every forkful.
Baking time is key—pre-baking the pie crust bottom ensures it stays crispy, while the apples cook through in the oven, absorbing the flavors of the spice blend.
The result is a dessert that's hearty enough for a family dinner but elegant enough for guests, with a caramelized top that begs for a scoop of vanilla ice cream. The pie crust adds an unexpected depth, making this crisp stand out from traditional recipes.
Perfect for autumn gatherings, holiday desserts, or a cozy weeknight treat, this recipe delivers restaurant-quality results with minimal effort. The combination of pie crust and crisp topping creates a dessert that's both impressive and comforting—ideal for those who love texture and flavor in every bite.
Let's get started on making this your new favorite dessert.
Ingredients for apple crisp recipe with pie crust bottom
Six ingredients transform this crisp into a buttery, layered masterpiece with pie crust magic.
| Ingredient | Amount | Notes |
|---|---|---|
| Pie Crust (Store-Bought or Homemade) 🥧 | 1 whole | Pre-baked for crisp foundation |
| Apples (Mixed Varieties - Honeycrisp, Granny Smith, Braeburn) 🍎 | 4 lb | Peeled, cored, sliced thin |
| Brown Sugar (Packed) 🍚 | 1 ½ cups | Light or dark brown preferred |
| All-Purpose Flour 🌾 | ½ cup | For apple filling texture |
| Ground Cinnamon 🌿 | 2 tbsp | Freshly ground for best flavor |
| Lemon Juice (Fresh) 🍋 | 2 tbsp | Brightens apple flavor |
| Salt 🧂 | ½ tsp | Kosher or sea salt preferred |
| Unsalted Butter (Melted) 🧈 | ¾ cup | Cold for crisp topping |
| Old-Fashioned Rolled Oats 🌾 | 2 cups | Not quick oats |
| Chopped Walnuts (Optional) 🥜 | ½ cup | For added crunch |
| Granulated Sugar 🍚 | ½ cup | For oat topping sweetness |
| Vanilla Extract 🌸 | 1 tsp | Pure vanilla for depth |
The pie crust is non-negotiable here—pre-bake it first to lock in that perfect crisp texture. Pillsbury or homemade both work, but avoid pre-made crusts with fillings already inside. For apples, Honeycrisp and Granny Smith are my go-tos—they stay firm while caramelizing. Trader Joe's has great pre-washed bags if you're short on time. If you can't find Honeycrisp, Fuji or Gala work too, but they get softer faster. The key is slicing them paper-thin—a mandoline makes this easier, but a sharp knife works if you're careful.
No brown sugar? White sugar plus 1 tsp molasses gets you close. Short on walnuts? Pecans or almonds add a different crunch, but walnuts are classic. The vanilla extract can be imitation, but pure Madagascar bourbon vanilla takes this to the next level. If you're making this ahead, prep the filling and topping separately—they keep 3 days in the fridge. The pre-baked crust? Store it in a cool, dry place for up to 2 days before baking. And yes, you can freeze the whole thing—just bake straight from frozen, adding 15-20 minutes to the time.
This dessert reheats beautifully—just 10 minutes at 350°F revives that crispy topping. Store leftovers in an airtight container for 4-5 days, or freeze for up to 3 months. I always make double batches because it disappears fast. The pie crust bottom? Slice it like pie for individual servings, or serve it whole with ice cream. Trust me, the first bite with that buttery crust and warm apples is worth every minute.
Why You'll Love This Recipe
- No-Pie-Dish Needed: I swear by this trick—just press store-bought pie crust into a baking dish, no rolling required. The buttery layers melt into a golden crust that holds up to the apples’ juices without falling apart. (Yes, even when my kids "help" by pressing too hard.)
- Crunch-Meets-Caramel Magic: That first bite—where the crisp topping shatters over warm, spiced apples—is why I make this weekly. The brown sugar and cinnamon turn the filling into a sticky, slow-simmered jam, while the pie crust adds a buttery crunch that’s impossible to resist. Honestly, the smell alone makes me want to skip dinner.
- Weeknight to Holiday Hero: I serve this for lazy Sundays, potlucks, or when unexpected company drops by. The mixed apples (tart Granny Smith + sweet Honeycrisp) balance perfectly, and the pie crust bottom means it stays sturdy enough to slice—no soggy bottoms here. (My mom still texts me for the recipe every Thanksgiving.)
- Leftovers That Don’t Suck: Unlike most crisps, this one reheats beautifully—just 10 minutes in the oven with a sprinkle of cinnamon, and it’s like fresh-baked again. Plus, the pie crust bottom turns cold slices into crispy-edged handheld treats. Between us, I’ve fed this to neighbors, coworkers, and my dog (okay, not the dog). It’s that good.
Step-by-step instructions for apple crisp with pie crust bottom
Here's how to create a decadent apple crisp with a crispy pie crust sandwiching warm spiced apples.
Prepare the Pre-Baked Pie Crust Foundation
Roll out the pie crust to fit a standard 9-inch pie dish, pressing it gently into the bottom and up the sides about 1 inch high. Chill the crust in the freezer for 15 minutes to firm up, then prick the bottom all over with a fork to prevent puffing. Line the crust with parchment paper, fill with pie weights or dried beans, and bake at 375°F for 10 minutes.
Remove the weights and bake for another 5 minutes until the crust is golden brown and just beginning to crisp. This pre-baking creates the perfect sturdy base for your crisp. Let it cool completely before adding the apple filling—this prevents soggy crust.
Assemble the Spiced Apple Filling
In a large mixing bowl, combine the peeled and thinly sliced 4 lb apples with the 1.5 cups packed brown sugar, 0.5 cup all-purpose flour, 2 tbsp ground cinnamon, 2 tbsp fresh lemon juice, 0.5 tsp salt, and 1 tsp vanilla extract. Toss everything together until the apples are evenly coated in the spiced mixture.
Here's the thing—don't skip the lemon juice. It brightens the apples and prevents them from turning mushy during baking. The flour helps thicken the filling so it holds its shape when baked. Spread the apple mixture evenly into the pre-baked crust, mounding it slightly in the center.
Create the Crispy Oat Topping
In a separate bowl, mix the 2 cups old-fashioned rolled oats, 0.5 cup granulated sugar, and 0.5 cup chopped walnuts (if using). Drizzle in the 0.75 cup melted unsalted butter and stir until everything is evenly coated and the mixture looks moist but not wet.
This topping should hold together when pressed—if it crumbles too much, add another 1 tablespoon of melted butter. Sprinkle the oat mixture evenly over the apple filling, pressing down lightly with your fingers. The walnuts add wonderful texture, but they're optional if you prefer a simpler version.
Bake Until Golden and Bubbly
Place the apple crisp in the preheated 375°F oven and bake for 45-50 minutes. You'll know it's ready when the topping is golden brown and the apples are bubbling around the edges. The center should still have some give—it will continue cooking as it rests.
I always check for doneness by looking for those telltale bubbles in the filling and a deep golden color on the topping. The crust should be crispy all the way through, not soft. Let it cool for 15 minutes before serving—this resting time lets the juices settle and makes the first bite even more delicious.
Serve Warm with Vanilla Ice Cream
Slice the crisp into wedges and serve immediately while still warm. The contrast of the crispy pie crust bottom, warm spiced apples, and crunchy oat topping creates the perfect texture combination. I always recommend serving with a scoop of vanilla ice cream to balance the warm dessert with something cool.
This crisp keeps well in the refrigerator for up to 3 days, though I doubt it will last that long. The flavors actually improve slightly as it sits, with the spices deepening and the crust becoming even more crispy. Store any leftovers covered to maintain freshness.
Pro Tips For Making Apple Crisp Recipe With Pie Crust Bottom
- Preheat Crust First: I learned this the hard way—skipping this step makes the bottom soggy. Roll out your pie crust, press it into the pan, then pop it in the oven at 375°F (200°C) for 5–7 minutes before adding the filling. That extra step guarantees a crisp base instead of a soggy mess.
- Slice Apples Thin: Uneven slices mean uneven cooking. Cut apples into ¼-inch thick pieces so they soften uniformly. Mix varieties—Granny Smith adds tartness, Honeycrisp keeps it juicy—then toss with lemon juice right away to prevent browning. (Yes, even if you're impatient like me.)
- Don’t Overmix the Topping: The topping should look like crumbly sand, not dough. Use your fingers to gently combine flour, brown sugar, cinnamon, and butter until it just holds together. Overmixing makes it dense and less golden. Spread it evenly—about ½-inch thick—and resist the urge to press down.
- Bake Until Bubbly: Take the dish out of the oven when the edges are golden but the center still looks slightly underdone. Tent it with foil and let it rest for 10 minutes—this lets the filling set properly. If you wait for the topping to turn deep brown, you’ll end up with a dry crisp instead of a perfectly caramelized one.
Wine and beer pairings for this apple crisp recipe with pie crust bottom
Crisp Apple Pairings
Start with a dry Riesling from Germany or Washington State—its bright acidity and honeyed notes complement the warm spices in the apples beautifully. I love Dr. Loosen Blue Slate for its crisp finish that cuts through the buttery crust.
For a budget-friendly option, Chateau Ste. Michelle delivers similar balance without breaking the bank. 🍷
Rich Dessert Wines
If you prefer something sweeter, Moscato d'Asti from Italy offers delicate bubbles and floral notes that pair wonderfully with the caramelized apples. For a bolder match, try a Tawny Port like Graham's 10-Year-Old—its nutty, caramel undertones mirror the walnuts in the topping. Serve slightly chilled for the best experience.
Beer Pairing Perfection
A Belgian-style witbier like Hoegaarden or Stella Artois brings refreshing citrus and spice notes that balance the dessert's warmth. For a darker option, amber ale from New Belgium Brewing (like Fat Tire) adds malty sweetness that stands up to the brown sugar.
Keep the beer well-chilled to contrast the warm dessert.
Creamy Contrasts
No dessert is complete without ice cream! Vanilla bean ice cream is the classic choice, but bourbon caramel or maple walnut flavors amplify the dessert's autumnal notes. For a lighter option, coconut sorbet adds a refreshing contrast to the rich pie crust and apples. 🍦
Coffee Pairings
If you're skipping wine or beer, a dark roast coffee with 1% milk enhances the cinnamon and walnut flavors. I recommend Peet's Major Dickason's Blend for its balanced bitterness that complements the dessert's sweetness. Serve the coffee slightly warm to maintain the cozy fall vibe.
Seasonal Spirits
For a festive touch, serve apple brandy or calvados (French apple cider brandy) alongside the crisp. The warm spices in the dessert echo the brandy's apple notes beautifully. If you prefer something lighter, sparkling cider like Woodchuck Hard Cider adds a festive, bubbly contrast. 🍏
Nutrition facts
Frequently asked questions
Why pre-bake the pie crust bottom?
Pre-baking creates a sturdy, crisp foundation that prevents sogginess when the juicy apples bake. The 15-minute pre-bake at 375°F ensures the crust stays golden and crunchy while the filling cooks through. Without this step, the bottom would absorb apple juices and turn mushy.
Can I use a different type of crust instead of pie crust?
Yes! A shortbread crust or even a graham cracker crust works beautifully for a sweeter, more delicate base. For extra crunch, try a gingersnap crust—just bake it until firm before adding the filling. The key is ensuring your crust is fully baked and cooled to prevent a soggy bottom.
How do I prevent the apples from turning mushy?
Slice apples paper-thin (about 1/8-inch) and toss them with 2 tbsp lemon juice and 0.5 cup flour to thicken the filling. Using a mix of firm apples like Granny Smith and sweet varieties like Honeycrisp also helps balance texture. Bake at 375°F for 45-50 minutes—the center should still have slight give when done.
Can I make this ahead of time?
Assemble the crisp (without baking) and refrigerate for up to 24 hours. Bake straight from the fridge, adding 10-15 minutes to the cooking time. For longer storage, freeze the unbaked crisp for up to 3 months. Thaw overnight in the fridge before baking. The flavors actually deepen as it sits!
What's the best way to reheat leftovers?
Slice the crisp and reheat individual portions at 350°F for 10-12 minutes until the topping is crispy again. For a quick fix, pop slices in a 300°F oven for 5 minutes to warm through. Microwaving works in a pinch (30 seconds), but it won't restore the crispy texture. Store leftovers in an airtight container for 4-5 days.