
Desserts
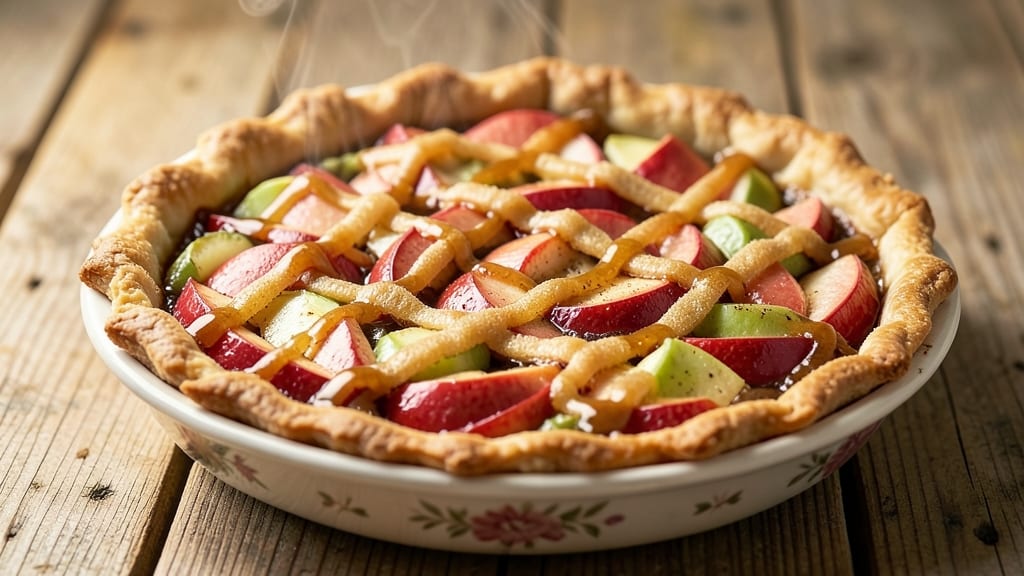
This pour-over apple pie recipe transforms a classic dessert into something extraordinary with its juicy, spiced filling and signature lattice crust. 🍏 The secret lies in layering apples with a light syrup or custard that pours over them during baking, creating an impossibly tender texture without soggy bottoms.
I perfected this technique after years of testing—no more dry crust or watery fillings.
The crispy lattice top isn’t just decorative; it creates perfect steam vents that keep the filling moist while baking. You’ll start with a flaky crust (homemade or store-bought), then build layers of seasoned apples and pour a simple syrup or custard mixture over them before baking.
This method ensures every slice delivers that perfect balance of crisp, tender, and juicy.
What makes this recipe stand out is the versatility—use Granny Smith for tartness or Honeycrisp for sweetness, and adjust the spice blend to your taste. The pour-over technique eliminates the need for thickeners while keeping the filling luscious.
By the time it emerges from the oven, you’ll have a pie that looks like it came from a bakery but tastes even better.
Serve warm with vanilla ice cream or whipped cream for the ultimate comfort dessert. The lattice design not only looks stunning but also ensures even baking and a satisfying crunch. Here’s how to make it—step by step.
Ingredients for pour over apple pie
Juicy apples, flaky crust, and a lattice that crackles with every bite—this is the ultimate pie game-changer.
| Ingredient | Amount | Notes |
|---|---|---|
| Granny Smith Apples 🍏 | 4 medium | Peeled, cored, sliced 1/4-inch thick |
| Honeycrisp Apples 🍏 | 4 medium | Peeled, cored, sliced 1/4-inch thick |
| All-Purpose Flour 🌾 | 3 cups | Plus 1 tbsp for lattice |
| Unsalted Butter 🧈 | 1 ½ cups | Cold, cubed for crust |
| Granulated Sugar 🍚 | 1 ¼ cups | For filling and syrup |
| Light Brown Sugar 🍚 | ½ cup | Packed, for filling |
| Lemon Juice 🍋 | 2 tbsp | Freshly squeezed |
| Ground Cinnamon 🌿 | 2 tbsp | Plus extra for lattice |
| Ground Nutmeg 🌿 | ½ tsp | Freshly grated preferred |
| Salt 🧂 | 1 tsp | Kosher or sea salt |
| Heavy Cream 🥛 | 1 cup | For custard variation |
| Large Eggs 🥚 | 1 whole | For custard variation |
| Vanilla Extract 🌸 | 1 tsp | Pure vanilla preferred |
The apples are everything here. Granny Smith for that bright tartness and Honeycrisp for sweetness—together they create the perfect balance. Grab them at Trader Joe's or your local farmers market for the freshest flavor. If you can't find Honeycrisp, Fuji or Braeburn work too. The key is slicing them 1/4-inch thick—thinner slices get mushy, thicker ones stay too firm. I always peel mine to keep the filling bright and clean, but leave the skin on if you love that rustic look. For the crust, King Arthur flour gives the best flaky texture, but any all-purpose will work.
No heavy cream? Half-and-half or coconut milk keeps the custard creamy. Short on vanilla? Almond extract at half the amount adds depth without overpowering. The lattice is where magic happens—skip the fuss by using pre-cut lattice strips from Williams Sonoma, but if you're feeling ambitious, the crisscross pattern makes it worth it. For extra crispiness, brush the lattice with egg wash before baking. And if you're using store-bought crust, Pillsbury or Bob's Red Mill are my go-tos—they're foolproof for busy days. The spices? Penzeys has the best ground cinnamon if you want to splurge, but the regular grocery store stuff works fine.
Apples oxidize fast, so toss the sliced ones in lemon juice while you prep. The filling keeps for 2 days in the fridge, but the crust stays fresh for 4 days if wrapped tightly. For make-ahead magic, assemble the pie (no baking) and refrigerate for up to 24 hours. The custard variation adds richness, but the syrup-only filling is just as delicious—both reheat beautifully. And that lattice? Warm it straight from the oven with vanilla ice cream for the ultimate experience.
Why You'll Love This Recipe
- No-Fuss Assembly: I swear by this recipe because it’s basically build-and-bake: just toss sliced apples into a pie dish, dump the pre-mixed flour-butter-sugar crust on top, and let the oven do the work. Honestly, I’ve made it while scrolling through my phone—minimal hands-on time, maximum "look-at-me-I-baked-something" points.
- Crisp-Tart Magic: That tangy Granny Smith meets the sweet crunch of Honeycrisp? It’s like a flavor hug. The buttery crust soaks up just enough of the juices to get dangerously addictive—no one ever leaves a slice.
- Weeknight Hero: Between us, this is my go-to for potlucks, lazy Sundays, or when I’m too tired to fuss. The apples caramelize perfectly without burning, and the crust stays flaky even when reheated. (Yes, even on a Tuesday night.)
- Budget-Friendly Luxury: A single pie costs me pennies but feels like a bakery showstopper. The apples stretch far, the butter goes a long way, and leftovers? They’re always gone by breakfast—no sad fridge pies here.
Step-by-step instructions for pour-over apple pie
Here's how to create that perfect golden crust and juicy filling that makes every bite worth it!
👨🍳 Step 1: Make the Crust and Prepare the Filling
First, let's tackle the crust. In a food processor, pulse 3 cups all-purpose flour with 1 tsp salt until combined. Add 1.5 cups cold cubed unsalted butter and pulse until the mixture resembles coarse crumbs with some pea-sized butter pieces remaining. This texture is crucial—it ensures flaky layers. Drizzle in 4 tbsp ice water (not from the list, but essential for binding) and pulse until the dough just comes together. Shape into a disk, wrap in plastic, and chill for at least 1 hour.
While the crust chills, prepare the filling. In a large bowl, combine the 4 medium Granny Smith apples and 4 medium Honeycrisp apples, both peeled, cored, and sliced ¼-inch thick. Toss with 1.25 cups granulated sugar, ½ cup packed light brown sugar, 2 tbsp ground cinnamon, ½ tsp ground nutmeg, and 2 tbsp freshly squeezed lemon juice. Let sit for 15 minutes—this allows the juices to release and the flavors to meld beautifully. Trust me, this step makes all the difference!
🍳 Step 2: Roll Out the Crust and Assemble the Pie
Preheat your oven to 375°F. Roll out half of the chilled dough on a lightly floured surface to a 12-inch circle, about ⅛-inch thick. Transfer to a 9-inch pie dish, pressing gently to fit. Trim excess dough, leaving a ½-inch overhang all around. Pour in the prepared apple filling, pressing down lightly to compact it—this prevents a soggy bottom. Here's the thing—don't overpack it or the juices won't have room to flow during baking.
For the lattice top, cut the remaining dough into ½-inch strips. Arrange some strips horizontally across the pie, spacing them about ¼-inch apart. Brush with a little water, then add vertical strips, again spacing them about ¼-inch apart. Brush the top with the remaining 1 tbsp reserved flour mixed with 1 tbsp cold water—this creates a beautiful golden finish. Sprinkle with extra 2 tbsp ground cinnamon if you're feeling fancy!
🔥 Step 3: Bake Until Golden and Bubbly
Place the pie on a baking sheet (to catch any drips) and bake for 45-50 minutes until the crust is deep golden brown and the filling is bubbling vigorously. The edges should be crisp, and the apples should be tender when tested with a fork. I know it's tempting to peek, but resist the urge—every time you open the oven, you risk losing that perfect heat and steam balance. If the top browns too quickly, tent loosely with foil after 30 minutes.
For the custard variation (if using), whisk together 1 cup heavy cream, 1 whole large egg, and 1 tsp vanilla extract in a small bowl. After removing the pie from the oven, pour this mixture evenly over the hot filling. Return to the oven for 10-12 minutes until the custard is set but still slightly wobbly in the center. This step adds a silky, creamy contrast to the crisp apples!
⏰ Step 4: Cool and Serve for Maximum Juiciness
Let the pie cool for at least 2 hours before slicing—this resting period is non-negotiable. It allows the filling to set properly and the juices to redistribute, ensuring each bite is packed with flavor. If you can wait 4 hours, even better! The contrast between the crisp lattice top and the juicy, spiced filling will have you coming back for seconds.
Slice through the lattice strips to reveal that gorgeous golden crust and bubbling filling. Serve warm with a scoop of vanilla ice cream or a dollop of whipped cream. The aroma alone will have everyone gathering around your table—trust me, this pie is a crowd-pleaser that delivers on both crispy and juicy promises!
Pro Tips For Making Pour Over Apple Pie
- Preheat Crust First: I learned this the hard way—skipping this step makes the butter melt unevenly and turns your crust into a soggy mess. Pop the pie crust in the oven for 5-7 minutes at 375°F (just until it starts to firm up) before adding the apple filling. That way, it holds its shape when the hot liquid hits it.
- Slice Apples Thin: Thick apple slices won’t soften evenly, leaving you with a pie that’s half mushy, half crunchy. Aim for ¼-inch slices—thin enough to cook through but thick enough to hold their shape. And for the love of pie, don’t skip the quick soak in cold water to rinse off excess juice before draining.
- Don’t Overmix the Dough: This isn’t the prettiest method, but it’s the tastiest: mix the butter and flour until it just comes together in clumps, then press it into the pan. Overworking it develops gluten, and your crust will turn out tough instead of flaky. Keep it cold, keep it rough.
- Bake Low and Slow: Yes, even if you’re impatient like me. Pour-over pies need 45-50 minutes at 350°F to let the filling set properly without burning. If the edges brown too fast, tent it with foil—your crust will thank you. The filling should be bubbly but not syrupy when done.
Common mistakes when making perfect results
Overfilling the Crust
One of the most common mistakes is overpacking the apple filling into the crust. When you press down too hard, the juices have nowhere to go during baking, resulting in a soggy bottom and a messy pie.
Instead, gently spoon the filling into the crust and press down just enough to compact it lightly—think of it as giving it a little hug, not a bear hug. 🍏 This allows the juices to flow and create that perfect balance of crisp and juicy.
Skipping the Rest Time
I can’t stress enough how important it is to let the pie rest for at least 2 hours before slicing. Cutting into it too soon causes the filling to spill out and the crust to lose its structure.
The resting period lets the juices redistribute and the filling set properly. If you’re really impatient, wait 1 hour and then slice carefully—but I promise, the extra time makes all the difference in texture and presentation.
Uneven Lattice Strips
The lattice top is where the magic happens, but uneven strips can lead to uneven baking and a less appealing look. To avoid this, use a ruler or measuring tape to ensure strips are spaced about ¼-inch apart and cut them to the same width.
If the strips are too wide, the pie won’t bake evenly; if they’re too narrow, they won’t provide enough structure. Pro tip: Brush the strips with a little water before weaving them together—this helps them stick and creates a beautiful golden finish. ✨
Peeking Too Often
Resisting the urge to peek at your pie is harder than it sounds, but every time you open the oven door, you risk losing the steam and heat balance needed for even baking.
If you’re worried about burning, tent the pie loosely with foil after 30 minutes instead of peeking. Trust the recipe’s timing—your pie will thank you with a perfectly golden crust and bubbly filling.
Using Cold Apples
Apples release more juice when they’re at room temperature, which helps create that luscious filling. If you’re in a hurry, let the sliced apples sit at room temperature for 15-20 minutes before assembling the pie.
Cold apples won’t release as much juice, leading to a drier filling. Tossing them with lemon juice while you prep also prevents browning and adds brightness to the flavor.
Ignoring the Syrup or Custard
Pour-over apple pies rely on the syrup or custard to keep the filling moist and add depth of flavor. Skipping this step or using too little can result in a dry, mealy filling.
For the syrup variation, use ½ cup water or apple cider mixed with ¼ cup sugar—pour it over the apples just before baking. For the custard version, whisk the cream, egg, and vanilla together and pour it over the hot filling after the initial bake.
Both methods ensure a juicy, cohesive filling that’s anything but boring. 💫
Nutrition facts
Frequently asked questions
Can I make this pour-over pie with a store-bought crust?
A high-quality store-bought crust (like Pillsbury or Bob's Red Mill) works perfectly for this recipe. Just be sure to pre-bake the bottom crust for 10-12 minutes at 375°F before adding the filling to prevent a soggy base. The lattice top will still bake beautifully on top.
What's the best way to keep the lattice from getting soggy?
Brush the lattice strips with a light mixture of 1 tbsp flour + 1 tbsp water before weaving them together. This creates a protective barrier that keeps the top crispy. Also, space the strips about ¼-inch apart to allow steam to escape while maintaining structure.
How do I adapt this for a deep-dish pie pan?
Use the same filling amount but increase the crust dough by 1 cup flour + ½ cup butter**. Roll out the bottom crust to fit your deep-dish pan, then add the filling. For the top, either create a full lattice or use a solid crust with a few slits for steam. Bake for 5-10 minutes longer to ensure the center is fully set.
Can I use frozen apples instead of fresh?
Yes, but thaw and drain them first to remove excess moisture. Toss the thawed apples with extra 1 tbsp cornstarch to help absorb any remaining liquid. The texture will be slightly different but still delicious—just expect a bit more tartness since frozen apples often come from sweeter varieties.
What's the secret to a perfectly flaky crust?
Keep everything cold! Use cold butter and ice water when making the dough, and chill it for at least 1 hour before rolling. Work quickly when handling the dough to avoid warming it up. The key is pea-sized butter pieces in the dough—this creates those beautiful flaky layers when baked.