
Desserts
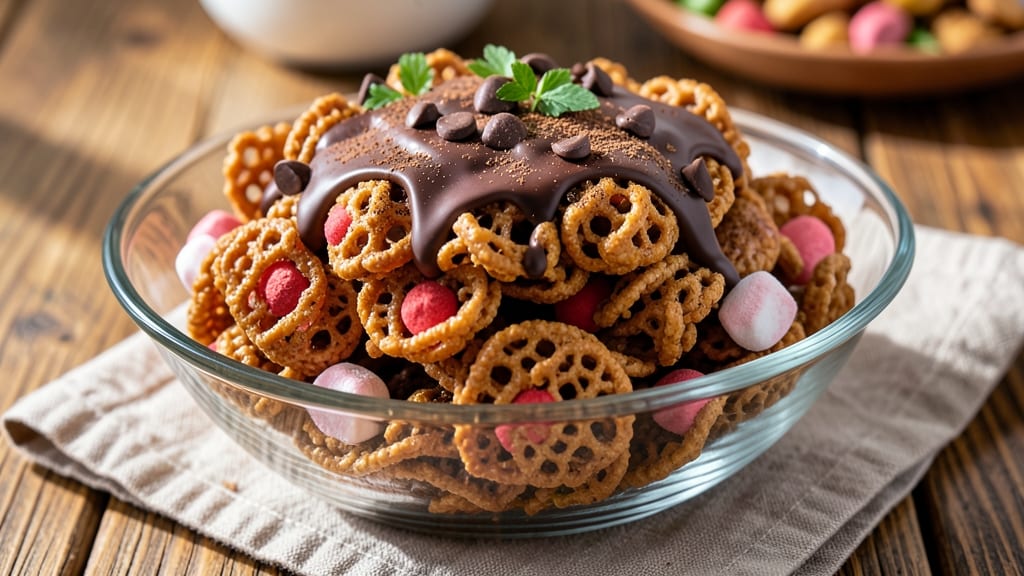
This Rice Krispie Clusters recipe delivers the perfect balance of crispy cereal and gooey marshmallow in just 5 minutes—no fancy equipment needed. The secret lies in melting butter and marshmallows together until silky smooth, then folding in Rice Krispies while still warm for that signature crunch.
I’ve made these countless times, and this method never fails to impress, whether you’re serving them at parties or sneaking a handful for yourself.
The beauty of this recipe is its simplicity—just three ingredients (butter, marshmallows, and cereal) create a nostalgic, crunchy treat that’s customizable with chocolate drizzle, cinnamon, or even dried fruit. The key to success? Working quickly while the mixture is still warm and gooey, ensuring every cluster gets that satisfying snap.
It’s the kind of dessert that feels indulgent but comes together faster than you can say “s’mores.”
What you’ll end up with is a batch of golden, crispy clusters that hold their shape perfectly—no soggy cereal here. The vanilla flavor shines through, but you can easily tweak it with extracts or mix-ins for a twist.
These treats stay fresh in an airtight container for days, making them ideal for meal prep or gifting. Once you try homemade, store-bought will never compare.
Perfect for satisfying sweet cravings, adding to ice cream sundaes, or packing in lunches, this recipe is a crowd-pleaser that proves dessert can be both easy and impressive. Let’s get started—your kitchen will smell like childhood nostalgia in no time.
Ingredients for rice krispie clusters
Three core ingredients plus optional extras—no fancy shopping needed.
| Ingredient | Amount | Notes |
|---|---|---|
| Unsalted Butter 🧈 | ½ cup | Cut into small pieces for easy melting |
| Mini Marshmallows 🍫 | 6 cups | Regular size works too (adjust quantity) |
| Rice Krispies Cereal 🥣 | 6 cups | Original flavor preferred (not chocolate) |
| Vanilla Extract 🌿 | 1 tsp | Optional for extra vanilla flavor |
| Dark Chocolate Chips 🍫 | ½ cup | For optional chocolate drizzle (optional) |
| Ground Cinnamon 🌶️ | ¼ tsp | For optional cinnamon sprinkle (optional) |
| Melted Butter 🧈 | 1 tbsp | For optional drizzle (optional) |
The butter is non-negotiable here—unsalted so you control the flavor. Wegmans or Trader Joe's have the best prices for bulk butter, and the mini marshmallows are a must for that perfect texture. Rice Krispies? Grab the original flavor—chocolate cereal changes the whole vibe. Pro tip: if you're nervous about melting butter perfectly, just cut it into tiny cubes. They melt faster and more evenly. The vanilla extract is optional but worth it if you love that extra vanilla punch—just a splash makes all the difference.
No mini marshmallows? Regular marshmallows work fine—just use about 4 cups instead of 6. Want to get fancy? Swap in white chocolate chips or dried cranberries for mix-ins. The chocolate drizzle is my favorite upgrade—just melt the chips with a splash of cream (or more butter) and drizzle over the clusters while they're still warm. Cinnamon lovers can sprinkle that on top right before serving. If you're making these for kids, skip the chocolate and go straight for the cinnamon—it's a winner every time.
These stay crispy for about 3 days in an airtight container, but honestly? They're gone in hours. For longer storage, freeze them in a sealed bag for up to 1 month. Just let them sit at room temp for 10 minutes before serving—they get even crunchier. I always double the batch because they disappear fast, especially when you're sneaking handfuls while 'helping' someone else make them. Perfect for parties, lunchboxes, or just munching while watching movies.
Why You'll Love This Recipe
- Five-Ingredient Magic: I swear by this combo—just melt butter, toss in marshmallows until they turn golden, then fold in cereal and chocolate. It’s the kind of recipe where you almost feel guilty for how little effort it takes to make something this good.
- Party Host Hack: Between us, this is my go-to for last-minute gatherings. It’s cheap, it’s easy to scale up, and no one ever leaves with leftovers—because they’ll all want seconds. (Yes, even on a Tuesday night.)
- Zero-Waste Winner: The best part? Every bite uses every ingredient efficiently. No sad half-stick of butter or lonely marshmallows left behind—just pure, delicious clusters until the bowl’s empty. Plus, it costs a fraction of store-bought treats.
Step-by-step instructions for crunchy vanilla rice krispie clusters
Here's how to make this nostalgic treat in minutes—creamy, crispy, and perfect every time.
Melt the Butter and Add Vanilla
Cut the 0.5 cup unsalted butter into small pieces for even melting. Place them in a large, heavy-bottomed pot over medium-low heat. Let the butter melt completely, stirring occasionally—this prevents burning. Once fully melted, reduce the heat to low and stir in the 1 teaspoon vanilla extract. The mixture should smell rich and aromatic, like warm vanilla bean. Keep it at a gentle simmer, not a boil, as we're about to add delicate marshmallows next.
This low-and-slow approach ensures the butter doesn't scorch, which would ruin the delicate flavor. If you see any browned bits forming at the bottom, stir them back in—they'll add depth to your clusters. The butter should be smooth and glossy, ready for the marshmallows to transform it into something magical.
Add Marshmallows Until Fully Melted
Working quickly but carefully, add the 6 cups mini marshmallows all at once to the melted butter. Stir constantly with a wooden spoon or silicone spatula, breaking up any large clumps as they melt. The mixture will bubble vigorously and thicken as the marshmallows transform into a glossy, golden syrup. This process takes about 3-4 minutes—don't walk away, as marshmallows can burn faster than you think.
You'll know it's ready when the mixture turns a deep golden color and pulls away from the sides of the pot in smooth sheets. The texture should be thick enough to coat the back of a spoon but still flow easily. If it starts to look too dry or grainy, add 1 tablespoon water to restore the right consistency. This is the moment everything comes together—creamy, sweet, and irresistible.
Stir in Rice Krispies Until Fully Coated
Immediately remove the pot from heat and quickly add the 6 cups Rice Krispies cereal. Stir vigorously for 1-2 minutes until every piece of cereal is fully coated in the marshmallow mixture. The clusters will form right before your eyes—creamy, sticky, and perfectly golden. Work fast here, as the mixture will start to set as it cools. If you notice any dry cereal pieces, add 1 teaspoon melted butter to help bind everything together.
The clusters should be moist but not dripping—think of them like little golden snowballs. If the mixture looks too wet, let it sit for 30 seconds to thicken slightly before shaping. The key is to get them off the heat and into a greased bowl or lined tray as soon as possible to prevent sticking. This step is where the magic happens—where crispy meets creamy in perfect harmony.
Shape and Cool the Clusters (Optional Extras)
Using a greased spoon or your hands (lightly greased with butter), scoop the mixture into small clusters and place them on a parchment-lined baking sheet. If you're adding the 0.5 cup dark chocolate chips or 0.25 teaspoon ground cinnamon, sprinkle them over the clusters now while they're still warm. For chocolate, let the clusters cool slightly before adding chocolate chips to prevent melting. For cinnamon, sprinkle it evenly over the top for a warm, spiced twist.
Let the clusters cool completely at room temperature for 1-2 hours—this allows them to set and develop their signature crunch. If you're in a hurry, you can speed this up by placing the baking sheet in the refrigerator for 30 minutes. Once fully cooled, they'll be firm, crispy on the outside, and gooey on the inside. Store them in an airtight container for up to 5 days, though they rarely last that long!
Pro Tips For Making Rice Krispie Clusters
- Melt Butter Low and Slow: I learned this the hard way—blasting butter on high turns it nutty and bitter. Use medium heat and keep an eye on it; you want it just melted and smooth, not golden or foamy. Once it’s liquid, remove from heat immediately to stop it from cooking further.
- Sort Marshmallows by Size: Mini marshmallows vary wildly in size, and that affects texture. Pick through them before melting—remove any that look too big or lumpy. Uniform size means even clusters, not a mix of gooey and dry spots.
- Work Fast After Mixing: The moment you fold in the cereal, the mixture starts setting up. Have your buttered pan ready and work in batches if needed—don’t linger stirring or you’ll end up with dense, chewy lumps instead of light, airy clusters.
- Add Vanilla Last, Stir Once: Splatter a few drops of vanilla directly over the melted butter before turning off the heat—this traps the flavor instead of letting it evaporate. Then, when you fold in the cereal, give it just one quick mix to distribute it evenly. Overstirring kills the airiness.
Dietary considerations for this rice krispie clusters
Dairy-Free Swaps
Since this recipe relies on butter, the first dietary consideration is dairy. For a dairy-free version, swap the 0.5 cup unsalted butter with 0.5 cup dairy-free margarine (like Earth Balance) or vegan butter (like Miyoko's).
These alternatives melt similarly and won’t compromise the texture. Just keep an eye on the heat—vegan butters can burn more easily than dairy butter, so reduce the temperature to medium-low and stir constantly. 🧈
Honey-Free Marshmallows
Many store-bought marshmallows contain honey, which isn’t suitable for vegan diets or those avoiding animal products. Look for vegan marshmallows like Dandies or Wholesome! brands, which use plant-based sweeteners like agave or maple syrup.
If you’re unsure, check the ingredient list—honey is often listed as "natural flavor" or "glucose syrup." For homemade marshmallows, use agar-agar or pectin as a vegan alternative to gelatin.
Gluten-Free Adaptations
Rice Krispies cereal is naturally gluten-free, but always double-check the packaging to ensure no cross-contamination. If you’re avoiding gluten entirely, this recipe is already safe! For extra caution, prepare it in a dedicated gluten-free kitchen area.
The butter and marshmallows are also gluten-free, so no other substitutions are needed—just stick to certified gluten-free brands for all ingredients.
Nut-Free Safety
This recipe is naturally nut-free, but always verify the brands of your ingredients. Some marshmallows or chocolate chips may contain traces of nuts due to shared processing facilities. For example, Enjoy Life chocolate chips are a safe bet if you’re avoiding nuts entirely.
If you’re making these for someone with severe allergies, prepare them in a nut-free environment and use dedicated utensils to avoid cross-contamination.
Lower Sugar Options
If you’re watching sugar intake, reduce the marshmallows to 4 cups and add 1-2 tablespoons of powdered erythritol or monk fruit sweetener to the melted butter mixture. This keeps the clusters sweet but with fewer calories.
For extra fiber, fold in 2 tablespoons of ground flaxseed with the cereal—it adds a subtle nutty flavor and helps balance blood sugar. Just be mindful that the texture may be slightly denser with these additions. 💫
Nutrition facts
Frequently asked questions
Why do my Rice Krispie clusters turn out sticky instead of crispy?
Overmixing after adding the cereal is the #1 culprit—work quickly to let the clusters set while warm. If they're still sticky after cooling, spread them on a baking sheet for 10-15 minutes at 200°F to crisp them up. Also ensure your butter and marshmallow mixture isn't too wet by adding 1 extra tablespoon of cereal if needed.
Can I make these without a stove?
Use the microwave-safe bowl method: melt 0.5 cup butter in 30-second bursts (stirring between each), then add marshmallows in 1-cup increments, stirring until smooth. Finish by folding in cereal immediately—just be extra quick since microwaves heat unevenly. For best results, use 70% power to prevent scorching.
What's the best way to store them for maximum freshness?
Keep them in an airtight container with parchment paper between layers to prevent sticking. They'll stay crispy for 5-7 days at room temperature, or freeze for up to 3 months in a sealed bag. For extra crunch, let them sit at room temp for 10 minutes before sealing—cold air makes them softer faster.
Why does my mixture separate or get grainy?
This usually happens when marshmallows burn or butter overheats. Keep heat at low-medium and stir constantly—never let it boil. If it gets grainy, whisk in 1 tablespoon warm water or melted butter to restore smoothness. For prevention, add marshmallows gradually (start with 3 cups) and keep the pot off direct heat sources.
Can I make these with other cereals?
While Rice Krispies are ideal for their light texture, you can experiment! Corn Flakes work well for a crunchier bite, while Cheerios add a sweeter flavor. Avoid heavy cereals like granola—they absorb too much liquid. For best results, use 10% less cereal (5 cups instead of 6) since different brands vary in density.