
Desserts
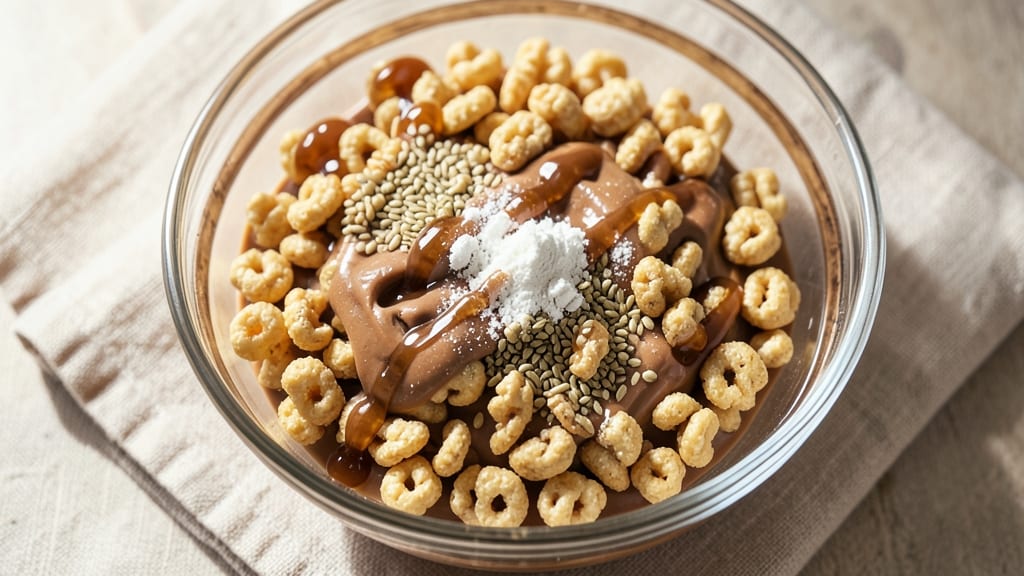
This vegan Rice Krispie protein bar recipe transforms a childhood classic into a high-protein powerhouse that’s perfect for meal prep, gym snacks, or satisfying sweet cravings.
The magic lies in blending crispy Rice Krispies with plant-based protein powder and nut butter, creating bars that deliver 10-15g protein per serving while keeping the nostalgic vanilla sweetness intact.
No fancy equipment or baking skills required—just mix, press, and chill for a no-fuss solution that’s as nutritious as it is delicious.
The secret to these bars lies in the binding agents: flaxseed "eggs" or chia gel ensure they hold together without crumbling, while vanilla extract and a touch of maple syrup enhance the classic Rice Krispie flavor.
For extra crunch, toast the cereal lightly before mixing, and don’t skip the cooling step—it’s what gives them that satisfying snap. Whether you’re fueling post-workout or craving a healthier dessert, these bars deliver restaurant-quality texture with a fraction of the guilt.
What sets these apart is their versatility—customize with chocolate chips, dried fruit, or a drizzle of melted peanut butter for added protein and flavor.
They’re freezer-friendly for up to 3 months, making them ideal for busy schedules, and the vegan, gluten-free option (with certified ingredients) ensures everyone at the table can enjoy them. The result? A snack that’s both indulgent and functional, proving healthy eating doesn’t have to mean sacrificing taste.
Perfect for meal preppers, fitness enthusiasts, or anyone who loves a sweet treat with substance, these bars are a game-changer for on-the-go nutrition. Let’s get started—your taste buds (and muscles) will thank you.
Ingredients for rice krispie protein bar
Twelve ingredients for bars that taste like nostalgia but pack protein power.
| Ingredient | Amount | Notes |
|---|---|---|
| Vegan Vanilla Protein Powder 🥛 | 1 ½ cups | Unflavored or vanilla, 20g+ protein per serving |
| Rice Krispies Cereal 🍞 | 6 cups | Lightly toasted for extra crunch |
| Peanut Butter 🥜 | ¾ cup | Creamy, natural, no added sugar |
| Ground Flaxseeds 🌾 | ½ cup | For flax egg binding agent |
| Pure Maple Syrup 🍯 | ¼ cup | Grade B for deeper flavor |
| Vanilla Extract 🌿 | 1 tbsp | Pure, alcohol-free preferred |
| Unsweetened Almond Milk 🥛 | ¼ cup | For flax egg mixture |
| Dark Chocolate Chips 🍫 | ½ cup | Vegan, 70% cocoa minimum |
| Dried Cranberries 🍇 | ¼ cup | Chopped for texture contrast |
| Sea Salt 🧂 | ¼ tsp | Fine grain for sprinkling |
| Coconut Oil 🥥 | 2 tbsp | For greasing pan and bars |
| Chia Seeds 🌱 | 1 tbsp | Optional for extra binding |
The protein powder is non-negotiable here—Orgain or Naked Nutrition are my go-tos for that clean vanilla flavor without artificial junk. Trader Joe's carries great options too, and their bulk bins let you sample before committing. For the Rice Krispies, toast them in a dry skillet for 3-4 minutes—this boosts the crunch dramatically. The peanut butter? Natural, no-sugar-added like Smucker's or Crazy Richard's. Pro tip: if your protein powder is unflavored, add an extra teaspoon of vanilla extract to the mix. The chia seeds are optional but worth it for bars that hold together like glue.
No peanut butter? Almond butter or sunflower seed butter works just as well—just add a splash more almond milk to thin it out. Running low on maple syrup? Agave nectar at the same amount keeps things vegan. The chocolate chips can be swapped for vegan white chocolate chunks or even crushed pretzels for a salty twist. For extra protein, stir in 1/4 cup vegan whey powder or hemp seeds. The dried cranberries? Dried cherries or blueberries add different flavors without compromising texture. And if you're gluten-free, make sure your Rice Krispies are certified GF—some brands process in shared facilities.
These bars need 2 hours in the fridge to set properly—don't rush it. For extra crunch, press them into a parchment-lined loaf pan instead of using a springform. Store in an airtight container with parchment between layers to prevent sticking. They keep for 1 week at room temperature or 3 months in the freezer. Portion into single servings before freezing for grab-and-go convenience. The chocolate chips might melt slightly during chilling, but that's what makes them irresistible.
Why You'll Love This Recipe
- I’ll be real: this recipe uses stuff I already have. Peanut butter, Rice Krispies, and maple syrup? Basic. The protein powder and flaxseeds stretch my grocery budget, and I can double the batch without breaking the bank. Plus, no weird ingredients to track down—just honest, tasty fuel.
- No-Fuss Mix-In: I swear by this recipe because it’s just stir, press, chill—no fancy techniques. The protein powder and flaxseeds blend right into the peanut butter and syrup, and the Rice Krispies just need a quick toast in the oven (or microwave, if you’re impatient) before pressing. Honestly, I’ve made these with my eyes closed.
- Creamy Crunch Magic: That peanut butter-maple combo? Chef’s kiss. The bars have this perfect contrast—the crispy Rice Krispies edges with a soft, almost fudgy center from the protein powder and flax. Between us, the vanilla protein powder makes it taste like a nostalgic treat, not some health food experiment.
- Lunchbox Hero: These are my go-to for meal prep—I cut them into squares and pack them in my kids’ lunches, my gym bag, or even as a quick snack when I’m running late. (Yes, even on a Tuesday night.) They hold up for days in the fridge, and the flaxseeds keep them from getting soggy.
Step-by-step instructions for crunchy protein-packed Rice Krispie bars
Here's how to transform simple pantry staples into chewy, protein-rich bars with perfect texture.
Create the Flax Egg Binding Agent
In a small bowl, whisk together the 0.5 cup ground flaxseeds and 0.25 cup unsweetened almond milk. Let this mixture sit for 10 minutes—you'll see it thicken into a gel-like consistency that acts as our egg substitute. This binding agent is what holds all the ingredients together without traditional eggs.
While waiting, I like to lightly toast the 6 cups rice krispies cereal in a dry skillet over medium-low heat for 3-5 minutes. This enhances their natural crunch and deepens their flavor. Stir constantly so they don't burn, and remove when they're just starting to smell toasty. Let them cool completely before using.
Melt and Combine Wet Ingredients
In a medium saucepan over low heat, gently melt the 2 tbsp coconut oil with the 0.75 cup peanut butter and 0.25 cup pure maple syrup. Stir constantly until smooth—this should take about 3-4 minutes. The mixture should be thick but pourable, with the peanut butter fully incorporated.
Remove from heat and stir in the 1 tbsp vanilla extract and 0.25 tsp sea salt. Add the cooled toasted rice krispies and the flax egg mixture, combining everything thoroughly. The batter will look thick and crumbly, but that's exactly what we want for that perfect chewy texture.
Mix in Add-Ins and Prepare the Pan
Fold in the 0.5 cup dark chocolate chips and 0.25 cup dried cranberries using a spatula. If using, sprinkle in the 1 tbsp chia seeds for extra binding and nutrition. The chocolate chips will start to soften slightly from the warm mixture, which helps distribute them evenly.
Line an 8x8-inch baking pan with parchment paper, leaving an overhang on all sides for easy removal. Lightly grease the parchment with a bit of coconut oil to prevent sticking. Spread the mixture evenly into the pan, pressing down gently but firmly with a spatula—this ensures the bars hold together well once cooled.
Chill and Set for Perfect Texture
Cover the pan tightly with plastic wrap and refrigerate for at least 2 hours, or until completely firm. This chilling time is crucial—it allows the flax egg to fully set and the bars to develop their signature chewy texture. Don't skip this step, or your bars might crumble when cutting.
For even better results, I recommend chilling overnight. The longer they set, the more compact and chewy they become. Once firm, use the parchment overhang to lift the entire slab out of the pan, then cut into 12 equal bars using a sharp knife dipped in hot water for clean edges.
Store and Enjoy Your Protein Bars
Store the bars in an airtight container in the refrigerator for up to 7 days, or freeze for up to 3 months. When ready to eat, let them sit at room temperature for 5-10 minutes—this makes them easier to handle and enhances the peanut butter flavor.
Each bar should have a perfect balance of crispy rice krispies, chewy peanut butter center, and bursts of chocolate and cranberry. The protein powder gives them a subtle vanilla sweetness without overpowering the other flavors. These bars make an excellent post-workout snack or on-the-go energy boost!
Pro Tips For Making Rice Krispie Protein Bar
- Mix the Dry First: Mix the vegan protein powder and ground flaxseeds with the Rice Krispies before adding wet ingredients—this prevents clumping and ensures even distribution of protein and fiber in every bite. I used to add the powder last and ended up with pockets of dryness that tasted like chalky disappointment.
- Heat the Peanut Butter: Warm the peanut butter in 10-second bursts in the microwave (just until it’s smooth and pourable) before mixing it with the syrup—this makes the binding sauce silky and prevents grainy texture. Cold peanut butter turns these bars into a chewy, uneven mess, and nobody wants that.
- Press Firmly: Pack the mixture into the pan with actual pressure—think of it like tamping down a burrito. The first layer might look uneven, but the next one will fill the gaps, and the bars won’t crumble when you cut them. I learned this after my first batch shattered like a house of cards.
- Chill Without Foil: Let the bars cool completely at room temperature for 15 minutes before refrigerating—this prevents condensation from turning your bars soggy when you slice them later. Wrapping them in foil too soon traps moisture, and nobody wants a protein bar that feels like a wet sponge.
Storing and reheating this rice krispie protein bar
Refrigerator Storage
Store your protein bars in an airtight container with parchment paper between layers to prevent sticking. They’ll stay fresh in the fridge for up to 7 days—perfect for meal prep.
I like using glass containers with snap-on lids (like Pyrex) because they’re easy to grab and keep flavors locked in. 💛
Freezer Prep Tips
For long-term storage, freeze individual bars wrapped in parchment paper or plastic wrap to prevent freezer burn. Stack them in a single layer in a freezer-safe bag (like Ziploc) with all air squeezed out.
Label with the date—they’ll keep their texture and flavor for 3 months. Thaw at room temperature for 10-15 minutes before eating.
Reheating Methods
These bars don’t need reheating, but if you prefer them slightly softer, microwave a single bar for 10-15 seconds on 50% power. For a warmer treat, pop them in the oven at 300°F for 2-3 minutes—just watch closely to avoid melting the chocolate chips.
I usually skip reheating and enjoy them straight from the fridge for that perfect crunch. ✨
Portioning for Convenience
Cut your bars into 12 equal squares before storing to make grab-and-go snacks effortless. Wrap each bar individually in parchment paper and store in a divided container (like a muffin tin) for easy access.
This also prevents them from sticking together when you’re in a hurry. Trust me, this small step saves time on busy mornings. 💡
Reviving Stale Bars
If your bars lose their crunch after a few days, don’t toss them! Place them in a single layer on a baking sheet and warm in the oven at 275°F for 5 minutes.
This revives the texture without making them gummy. For extra crunch, sprinkle with 1 tsp melted coconut oil and press gently before reheating. 🔥
Travel-Friendly Packing
Pack bars in a small cooler bag with an ice pack for road trips or gym sessions. They’ll stay cool for 4-6 hours without refrigeration. For extra protection, wrap each bar in plastic wrap before placing them in your bag.
I always pack a few in my gym bag—no soggy snacks here! 🚗
Nutrition facts
Frequently asked questions
Can I make these protein bars without peanut butter?
Swap peanut butter for almond butter or sunflower seed butter—just add an extra 1 tablespoon of almond milk to thin it out if needed. For a nut-free option, try tahini (sesame paste) or vegan yogurt mixed with 1 teaspoon of chia seeds as a binder. The texture will differ slightly but still hold together well.
Why do my bars keep crumbling when I cut them?
Crumbling usually means the flax egg didn't fully set or the mixture wasn't pressed firmly enough. Always chill for the full 2 hours (overnight is ideal) and press the batter firmly into the pan. For extra binding, add 1 extra tablespoon of chia seeds or 1/4 cup more protein powder to the mix. If using a springform pan, press the edges down more aggressively.
What's the best way to boost protein content?
For an extra protein kick, stir in 1/4 cup vegan whey powder or hemp seeds (adds 3-5g protein per bar). You can also replace 1/4 cup of the cereal with rolled oats or puffed quinoa, which add protein without changing texture much. Just be sure to keep the flax egg ratio the same for proper binding.
Can I make these bars gluten-free?
Yes! Use certified gluten-free Rice Krispies cereal (check the label—some brands process in shared facilities). For extra insurance, replace 1/2 cup of the cereal with gluten-free oats or puffed millet. The recipe remains completely gluten-free as long as all ingredients are certified. The texture stays the same as long as you maintain the same pressing technique.
How do I make these bars chocolate-coated?
Once your bars are fully set, melt 1/2 cup vegan chocolate chips with 1 teaspoon coconut oil in a double boiler. Dip each bar halfway into the chocolate, place on parchment paper, and chill for 10 minutes to harden. For extra decadence, sprinkle with crushed nuts or sea salt flakes before the chocolate sets. Store in the fridge to prevent melting.