
Desserts
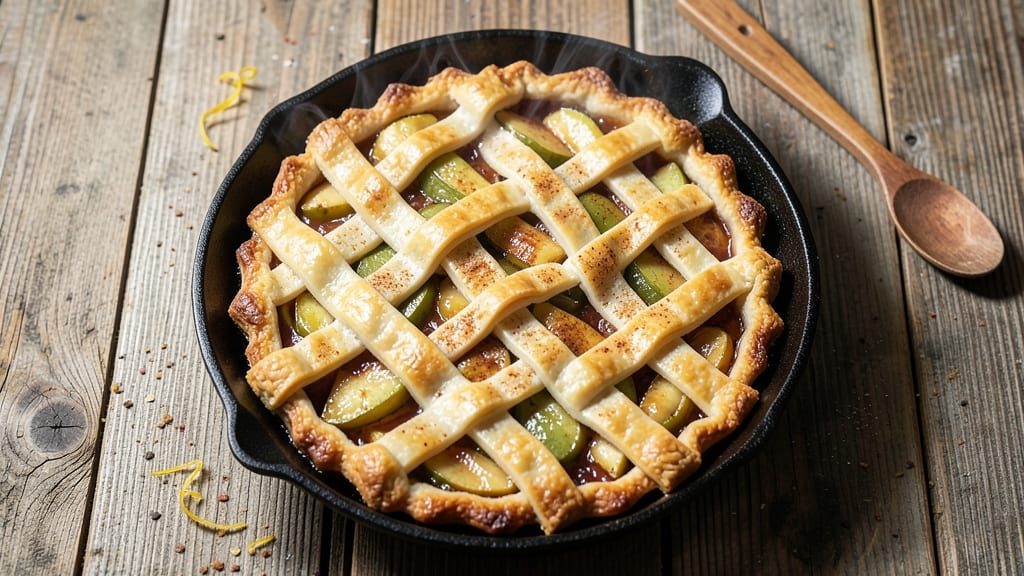
This rustic apple pie tart recipe delivers all the cozy comfort of classic apple pie in elegant, handheld portions. The secret lies in a flaky, hand-cut crust that encases tender apples and a rich caramel drizzle—no rolling pins required.
I developed this version after years of perfecting pie crusts, and it never fails to impress even when made during a busy weeknight.
The beauty of these tarts is their balance: crispy edges that give way to tender apple filling, all topped with a glossy caramel that ties everything together. You'll use simple ingredients like pie dough, apples, sugar, and spices, but the technique transforms them into something restaurant-worthy.
The crust gets its signature rustic look from hand-cut edges, while the apples caramelize just enough to stay tender.
By the time you pull these from the oven, you'll have golden-brown tarts with a perfect balance of textures—crispy crust, tender apples, and a glossy caramel that adds just the right amount of sweetness.
The aroma alone will have everyone gathering in the kitchen, and each bite delivers that perfect mix of spiced apple and buttery crust.
These tarts are ideal for holiday gatherings, potlucks, or even a special dessert when you want to impress without the fuss of a full pie. The recipe makes six individual tarts, so you can serve them as appetizers or share them as a centerpiece. Let's get started!
Ingredients for rustic apple pie tart
Simple ingredients transform into golden, crisp-edged tarts with tender apple filling and glossy caramel drizzle.
| Ingredient | Amount | Notes |
|---|---|---|
| Pie Dough 🍞 | 1 sheet | Store-bought or homemade, chilled |
| Granny Smith Apples 🍎 | 4 medium | Peeled, cored, sliced thin |
| Granulated Sugar 🍚 | ¾ cup | White or light brown |
| Unsalted Butter 🧈 | ½ cup | Cold, cubed for crust |
| All-Purpose Flour 🌾 | ½ cup | For crust reinforcement |
| Ground Cinnamon 🌿 | 1 ½ tsp | Freshly ground preferred |
| Ground Nutmeg 🌶️ | ¼ tsp | Freshly grated for warmth |
| Salt 🧂 | ½ tsp | Fine sea salt |
| Lemon Juice 🍋 | 1 tbsp | Freshly squeezed |
| Heavy Cream 🥛 | ½ cup | Full-fat for caramel |
| Light Corn Syrup 🍯 | ¼ cup | For caramel smoothness |
| Vanilla Extract 🌸 | ½ tsp | Pure vanilla preferred |
The pie dough is the foundation—store-bought works in a pinch, but homemade makes all the difference. I always grab Pillsbury Classic when I'm short on time, but for that signature flaky texture, King Arthur Flour pie crust mix is my go-to. If you're making your own, keep the butter cold and cut it into the flour quickly to avoid overworking. The apples? Granny Smith holds its shape best, but Honeycrisp adds natural sweetness. Peel them first—it keeps the filling from getting too watery. For the spice mix, Penzeys has the best ground cinnamon if you're willing to splurge, but the regular grocery store stuff works fine too.
No Granny Smiths? Fuji or Honeycrisp are great backups—just slice them slightly thinner. Short on cinnamon? Pumpkin pie spice at half the amount gives a similar cozy vibe. The caramel is where things get fun: no corn syrup? Maple syrup works too, but it'll be more syrupy than glossy. The heavy cream is non-negotiable here—it's what gives that silky finish. Want to make these ahead? Assemble the tarts, refrigerate overnight, then bake straight from cold. The crust gets even crispier that way.
Assembled tarts keep 2 days in the fridge, covered tightly. The caramel stays glossy if you store it separately and drizzle just before serving. For freezing, bake the tarts first, then freeze them (without the caramel). Reheat at 350°F for 10 minutes—the caramel reheats beautifully. I always make a double batch because these disappear faster than you can say 'holiday potluck'. Leftovers? They're even better the next day—trust me on that.
Why You'll Love This Recipe
- I’ll be real: I’ve never had a slice last more than a day in my house. But when it does, it reheats beautifully—just 10 minutes in the oven until the edges are crisp again. And because it’s a tart (not a pie), the portions are perfect for sharing, which means less guilt when someone else takes the last piece.
- No-Fuss Assembly: I swear by this recipe because it’s the kind of dessert that lets you skip the fuss. Roll out the dough, slice the apples, sprinkle sugar—no lattice, no fancy crust edges. That’s it. The Granny Smiths stay crisp while the butter weaves through the filling, and honestly? The mess is minimal compared to a full pie.
- Tart-Sweet Magic: Here’s what sold me—the way the sharp Granny Smiths cut through the buttery crust, then soften just enough to make every bite feel like a hug. A pinch of sugar on top caramelizes into this golden, crackly crust that tastes like autumn in a single forkful. (Yes, even on a Tuesday night.)
- Weeknight Hero: Between us, this is my go-to when I need something impressive but can’t justify a 3-hour pie. The dough’s already pre-made (or you can use store-bought), and the apples take 10 minutes to prep. Serve it warm with vanilla ice cream, or slice it cold for a picnic—it’s that adaptable.
Step-by-step instructions for rustic apple pie tarts
Here's how to create golden, flaky tarts with that perfect balance of spiced apples and rich caramel filling.
Prepare the Apple Filling
In a large bowl, combine the 4 medium Granny Smith Apples (thinly sliced), 0.75 cup Granulated Sugar, 1.5 tsp Ground Cinnamon, 0.25 tsp Ground Nutmeg, and 0.5 tsp Salt. Toss gently until the apples are evenly coated and the sugar begins to dissolve slightly. This helps tenderize the fruit while building flavor.
Transfer the mixture to a medium saucepan and cook over medium heat for 5-7 minutes, stirring occasionally. You'll see the apples release their juices and begin to soften. Once they're tender but still hold their shape, remove from heat and stir in the 1 tbsp Lemon Juice. This brightens the apples and prevents them from turning mushy. Let the mixture cool completely before using—this ensures the filling stays thick and stable when baked.
Assemble the Tarts
Preheat your oven to 375°F. Roll out the 1 sheet Pie Dough on a lightly floured surface to about 1/8-inch thickness. Cut the dough into six 4-inch rounds using a round cutter or glass. Place each round in a greased mini muffin tin, pressing gently to create a slight well in the center for the filling.
In a small bowl, whisk together the 0.5 cup Heavy Cream, 0.25 cup Light Corn Syrup, and 0.5 tsp Vanilla Extract. This mixture will create a glossy, caramel-like layer that ties everything together. Spoon about 1 tablespoon of the apple mixture into each tart shell, then top with 1 teaspoon of the cream mixture. Repeat until all tarts are filled, leaving a small border around the edges for the crust to expand.
Bake to Golden Perfection
Bake the tarts for 20-25 minutes until the crust is deep golden brown and the filling is bubbling gently at the edges. The crust should be crisp, while the filling should be set but still slightly jiggly in the center. If the crust browns too quickly, tent the tarts loosely with foil to prevent over-browning.
Remove from the oven and let the tarts cool in the pan for 5 minutes before transferring to a wire rack. The filling will continue to thicken as it cools, creating that perfect balance of tender apples and glossy caramel. Serve warm for the best experience—each bite delivers crisp crust, spiced apples, and a rich, creamy finish.
Pro Tips For Making Rustic Apple Pie Tart
- Preheat for 15 Minutes: I learned this the hard way—skipping the extra preheat time makes the crust soggy. That 15-minute oven warm-up (425°F) ensures the bottom gets crispy before the apples release their juices, not after.
- Slice Apples Thin, Toss Dry: Granny Smiths get mushy fast. Cut them ¼-inch thick, then toss with sugar and flour—no moisture. The flour absorbs juice while the sugar caramelizes, keeping the filling firm instead of gloppy.
- Vent the Dough: That pie dough’s edge is your enemy. Cut a few 1-inch slits before baking—it lets steam escape, preventing a burst crust. (Yes, even if you’re impatient to eat it.)
- Brown the Butter First: Sounds weird, but it works: melt the butter until nutty and golden before mixing with sugar. The depth of flavor cuts through the tartness of Granny Smiths, making the crust taste like a bakery’s—not just dough and sugar.
Dietary considerations for this rustic apple pie tart
Gluten-Free Adaptation
For a gluten-free version, swap the all-purpose flour in the crust for a 1:1 gluten-free flour blend like Bob's Red Mill or King Arthur Measure for Measure. I recommend adding ½ tsp xanthan gum per cup of flour to mimic gluten's binding properties.
For the dough, use a gluten-free pie crust mix like Pillsbury GF or make your own with almond flour and tapioca starch.
When rolling out the dough, handle it gently—gluten-free crusts are more delicate. Chill the dough for 30 minutes before cutting rounds to prevent cracking. The baking time remains the same, but watch closely after 18 minutes to avoid over-browning.
A light spray of apple cider on the crust before baking adds moisture and prevents dryness. 🌱
Vegan Caramel Option
To make the caramel vegan, replace the heavy cream with full-fat coconut cream (chilled overnight to thicken). Use ½ cup coconut cream plus 1 tbsp maple syrup for the same silky texture.
For extra richness, add 1 tbsp vegan butter to the cream mixture. The flavor stays creamy, though slightly coconut-forward.
For the crust, use a vegan pie dough made with coconut oil instead of butter. Brands like Joy of Kitchens offer ready-made options, or make your own with almond flour and flaxseed meal as a binder.
The tarts will still be crispy, though the crust may brown faster—reduce oven temp to 350°F if needed. 🥥
Lower-Sugar Version
Cut the sugar in the apple filling by ⅓ (use ½ cup instead of ¾ cup) and boost the spices with ½ tsp cardamom for depth.
Use unsweetened applesauce (½ cup) mixed into the filling to retain moisture without extra sugar. The tartness of Granny Smith apples balances the reduced sweetness beautifully.
For the caramel, reduce the corn syrup to 2 tbsp and add 1 tsp vanilla bean paste for extra flavor. The caramel will be less glossy but still delicious. Serve with a dollop of Greek yogurt or coconut whipped cream to add creaminess without sugar. 🍏
Nut-Free Safety
This recipe is naturally nut-free, but always check labels on store-bought pie dough and corn syrup for cross-contamination warnings. For extra caution, use sunflower seed butter (2 tbsp) mixed into the crust dough to reinforce structure—it adds richness without nuts. The texture stays flaky, though slightly denser.
When assembling, work in a clean space to avoid nut exposure. If sharing with nut-allergic guests, serve the caramel on the side so they can drizzle it themselves. The crust’s buttery flavor shines even without nut additions. 🛡️
Nutrition facts
Frequently asked questions
Can I make these tarts without a mini muffin tin?
Use a 9-inch tart pan or even individual ramekins for a single-serving presentation. For a rustic look, shape the dough into free-form tartlets on a parchment-lined baking sheet. Just reduce baking time by 2-3 minutes since the edges will cook faster without metal conduction.
How do I prevent the crust from getting soggy?
Prevent soggy bottoms by chilling the assembled tarts for 30 minutes before baking. Brush the crust with a light egg wash (1 egg + 1 tbsp water) for extra crispiness. For extra insurance, sprinkle ½ cup crushed cornflakes or almond flour on the crust before baking—it creates a delicious crunch barrier.
What's the best way to store leftover tarts?
Store tarts in an airtight container at room temperature for 2 days, or refrigerate for up to 5 days. For longer storage, freeze baked (but caramel-free) tarts for 3 months. Reheat at 350°F for 10 minutes—the caramel reheats beautifully when drizzled fresh.
Can I use canned apples instead of fresh?
Yes, but with adjustments! Drain and dry canned apples thoroughly, then toss with 1 extra tbsp cornstarch to absorb moisture. Reduce sugar to ½ cup since canned apples are pre-sweetened. Simmer for 3-4 minutes less to avoid mushiness. For best texture, use unsweetened applesauce mixed with fresh apples (½ cup applesauce + 3 cups fresh).
Why did my caramel turn grainy?
Grainy caramel usually means the corn syrup crystallized. Always use light corn syrup (not dark), and whisk the cream mixture vigorously before baking. If it happens, reheat the caramel gently with 1 tsp water to dissolve crystals. For a smoother finish, chill the cream mixture for 15 minutes before using—this helps prevent separation.