
Desserts
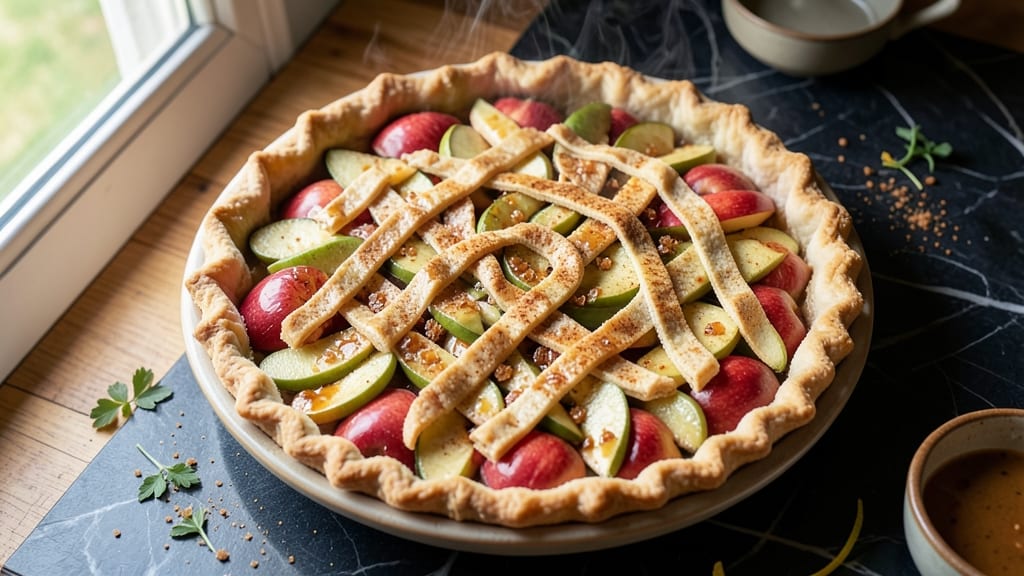
This semi-homemade apple pie recipe delivers all the comfort of a classic dessert with just one shortcut—the store-bought crust. The magic happens in the homemade spiced filling, where cinnamon, nutmeg, and brown sugar create that perfect balance of sweet and warm flavors.
I developed this recipe after years of testing, ensuring every slice has a flaky, golden crust and tender, juicy apple filling that practically melts in your mouth.
The best part? You get the convenience of pre-made dough without sacrificing the rich, aromatic filling that makes homemade pies so special.
The secret lies in a few simple techniques: tossing the apples with lemon juice to preserve their color and brightness, and baking the pie until the crust turns a beautiful golden brown with just a hint of caramelization. This recipe is foolproof for beginners but still impressive enough for gatherings.
By the time you pull it from the oven, your kitchen will smell like autumn, and every slice will be worth the wait—crisp edges, tender apples, and that perfect blend of spices. The filling stays moist and flavorful, while the crust achieves that ideal balance between flaky and sturdy.
Serve it warm with a scoop of vanilla ice cream or a dollop of whipped cream for the ultimate dessert experience.
Whether you're baking for a family dinner or a holiday celebration, this pie is sure to become a favorite. The recipe includes options for partial shortcuts, so you can adjust based on your time and comfort level.
Here’s how to make it—step by step—for a dessert that tastes homemade, even with the store-bought crust.
Ingredients for semi homemade apple pie
Familiar pantry staples plus a few apples for that perfect spiced filling magic.
| Ingredient | Amount | Notes |
|---|---|---|
| Store-Bought Pie Crust 🍞 | 1 package | Unrolled, refrigerated dough |
| Granny Smith Apples 🍎 | 4 medium | Peeled, cored, sliced thin |
| Honeycrisp Apples 🍎 | 4 medium | Peeled, cored, sliced thin |
| Granulated Sugar 🍚 | 1 ¼ cups | White or light brown |
| Light Brown Sugar 🍚 | ½ cup | Packed tightly |
| Ground Cinnamon 🌿 | 2 tbsp | Freshly ground preferred |
| Ground Nutmeg 🌿 | ½ tsp | Freshly grated is best |
| Allspice 🌶️ | ¼ tsp | Optional but adds depth |
| Lemon Juice 🍋 | 2 tbsp | Freshly squeezed |
| Unsalted Butter 🧈 | ½ cup | Cold, cubed for lattice |
| Vanilla Extract 🍯 | 1 tsp | Pure vanilla preferred |
| Salt 🧂 | ½ tsp | Fine sea salt |
| Egg 🥚 | 1 whole | For egg wash |
| Turbinado Sugar 🍚 | ¼ cup | For crust sprinkle |
The apples are the heart of this pie—Granny Smith and Honeycrisp give you that perfect balance of tart and sweet. Local farmers markets often have the best selection, but grocery store bins work too. Look for firm apples with no bruises. I usually buy a few extra and keep them in the fridge for snacks—they stay crisp for weeks. If you can't find Honeycrisp, Fuji or Braeburn are great substitutes. Just make sure they're juicy, not mealy. The secret to juicy slices? Slice them right before tossing with lemon juice—it keeps them bright and prevents browning.
No vanilla extract? Vanilla bean paste or even vanilla sugar works in a pinch. The spices are non-negotiable though—freshly ground cinnamon and nutmeg make all the difference. Pre-ground spices lose their punch fast, so if yours is over a year old, toss it. For the crust, Pillsbury or Whole Foods store-bought are my go-tos—they're foolproof. Want to make it extra fancy? Add a lattice crust using the cold butter strips. It looks gorgeous and keeps the filling juicy. The egg wash is key—beat the egg with a splash of water for that golden, glossy finish.
This pie keeps beautifully—3-4 days in the fridge, 2 months frozen. Wrap it tightly in foil and plastic wrap for freezing. The filling stays moist, and the crust reheats perfectly. I always make a double batch because it disappears fast. Serve warm with vanilla ice cream or whipped cream—trust me, it's worth the wait. Leftovers? Slice and reheat at 350°F for 10 minutes to revive that bakery-fresh taste.
Why You'll Love This Recipe
- No Crust Struggles: I’ll admit it—I used to dread rolling out pie dough. But store-bought crust? Game over. Just unfold, press, and fold. The flaky layers handle the apples (and my lack of patience) perfectly.
- Tart-Sweet Magic: Granny Smiths add that bright, almost-sour punch, while Honeycrisp melts into buttery perfection. The brown sugar caramelizes just enough to make every bite feel like a hug—especially with that first forkful of warm filling.
- Weeknight to Holiday: This pie works when I’m exhausted (Tuesday nights) or when company’s coming (Sunday brunch). The same filling, same crust, but it feels special either way. (Pro tip: Serve with vanilla ice cream—always.)
- Leftovers That Last: Bake one, eat two. The crust stays crisp for days, and the apples soften just enough to reheat beautifully. I’ve sent slices to work, packed them in lunches, and even frozen portions for lazy mornings. No waste, all win.
Step-by-step instructions for semi-homemade apple pie
This method keeps the magic of homemade filling while saving you crust-making time. Here's how to create a pie that tastes like it came from your grandma's kitchen.
Prepare the Apple Filling
In a large mixing bowl, combine the peeled and sliced 4 medium Granny Smith Apples and 4 medium Honeycrisp Apples. This combination gives you the perfect balance of tart and sweet flavors. Add the 1.25 cups Granulated Sugar, 0.5 cup Light Brown Sugar, 2 tbsp Ground Cinnamon, 0.5 tsp Ground Nutmeg, and 0.25 tsp Allspice. Mix gently but thoroughly to ensure every apple slice gets coated with the spice blend.
Next, stir in the 2 tbsp Lemon Juice and 1 tsp Vanilla Extract. The lemon juice brightens the apples, while the vanilla adds depth. Let the mixture sit for 10 minutes at room temperature—this helps the flavors meld together. You'll notice the apples start to soften slightly and release their juices, creating a thick, fragrant filling ready for baking.
Assemble the Pie Crust
Preheat your oven to 375°F. Unroll the 1 package Store-Bought Pie Crust onto a lightly floured surface. Gently press it into a 9-inch pie dish, making sure it fits snugly into the bottom and up the sides. Trim any excess dough hanging over the edges with a sharp knife. The crust should be smooth and even—this ensures even baking.
Place the pie dish on a baking sheet (this catches any drips) and blind-bake the crust for 12-15 minutes. To blind-bake, line the crust with parchment paper, fill it with pie weights or dried beans, and bake until the edges are lightly golden. Remove the weights and parchment, then prick the bottom of the crust all over with a fork to prevent puffing. Return it to the oven for 2-3 minutes to crisp up before filling.
Fill and Crimp the Pie
Spread the apple filling evenly into the pre-baked crust. Use a spoon to distribute it, leaving about ½-inch of space around the edges for the top crust. This prevents overflow and ensures the filling cooks through without spilling.
Roll out the second piece of 1 package Store-Bought Pie Crust and place it over the filling. Trim any excess dough, then crimp the edges using your fingers or a fork. For a decorative touch, cut a few slits in the top crust to allow steam to escape. Brush the entire surface with the beaten 1 whole Egg mixed with 1 tablespoon water for a golden, glossy finish. Sprinkle 0.25 cup Turbinado Sugar evenly over the top—this creates a beautiful caramelized crust during baking.
Bake to Golden Perfection
Place the pie on the middle rack of your oven and bake for 45-55 minutes until the filling is bubbly and the crust is deep golden brown. You'll know it's done when the filling is tender and the crust is crisp. If the edges start to brown too quickly, cover them loosely with aluminum foil to prevent burning.
During the last 10 minutes of baking, you might notice the filling bubbling up. This is normal—it just means your pie is cooking through. For the final touch, place the pie under the broiler for 1-2 minutes to intensify the caramelization on the crust. Let it cool for at least 2 hours before slicing—this ensures clean cuts and lets the flavors settle.
Pro Tips For Making Semi Homemade Apple Pie
- Preheat That Oven: I learned this the hard way—rolling out store-bought crust over a cold pie dish just makes it fight you. Preheat your oven to 375°F before you even peel your apples, then slide the assembled pie straight in. That 10-minute head start guarantees a flaky crust, not a soggy bottom.
- Slice Thin, Toss Fast: Granny Smiths and Honeycrisps both turn to mush if you overwork them. Use a sharp knife to cut them into ¼-inch slices (yes, measure it—your eyes lie), then immediately toss them with sugar and a squeeze of lemon juice. The acid keeps them bright, and the sugar prevents them from browning too fast while you prep.
- Vent the Top Crust: Here’s where most semi-homemade pies fail: a sealed top crust traps steam and turns your pie into a science experiment. Cut a 3-inch circle in the center of the top crust, then crimp the edges like you mean it. That vent lets moisture escape—no more weeping filling or a dense, gluey texture.
- Cold Butter Boost: Skip the melted butter in the filling—it’s a shortcut that makes the crust soggy. Instead, grate 2 tablespoons of cold butter into the sugar-apple mix. It adds richness without dissolving into a wet mess, and the tiny cold bits melt just enough to coat the apples as they bake. (Trust me, your pie will taste like it was made from scratch.)
Regional styles of this dish
Classic New England
In New England, apple pies often feature a double crust with a spiced lattice top for that rustic charm. I love using McIntosh apples here—they hold their shape beautifully and add a nice tartness that balances the sweet filling.
The secret is brushing the lattice strips with melted butter before baking for extra crispness. Serve it with vanilla ice cream for the ultimate autumn dessert. 🍁
Southern Comfort
Southern-style apple pies often include a touch of black pepper and a splash of bourbon in the filling for depth. I add ½ tsp black pepper and 1 tbsp bourbon to the spice mix for a smoky, warm flavor.
The crust gets a brown sugar crumble on top before baking, creating a caramelized crust that’s perfect with whipped cream or pecan ice cream. 🍯
Pacific Northwest Style
Out West, pies often incorporate local honey and a hint of lavender for a floral twist. Replace the granulated sugar with ½ cup local honey and add ¼ tsp dried culinary lavender to the filling.
The crust gets a drizzle of honey after baking for a glossy finish. Pair it with coconut ice cream for a tropical touch. 🌸
Midwest Homestyle
The Midwest keeps it simple with a generous crumb topping and extra cinnamon. Mix ½ cup old-fashioned oats, ½ cup chopped pecans, and ¼ cup brown sugar for the topping, then sprinkle it over the filled pie before baking.
The extra 1 extra tbsp cinnamon in the filling gives it that cozy, familiar taste. Serve warm with apple cider for dipping. 🍂
Modern Twist
For a contemporary take, try a nut-based crust made from almond flour or walnuts. I blend 1 cup walnuts with ½ cup melted butter and 2 tbsp maple syrup for a gluten-free crust.
The filling stays the same, but the nutty crust adds a sophisticated crunch. Garnish with edible flowers for a restaurant-worthy presentation. 🌿
Nutrition facts
Frequently asked questions
Can I use just one type of apple instead of Granny Smith and Honeycrisp?
Yes, but choose wisely! For best results, use a mix of tart (like Granny Smith) and sweet (like Honeycrisp) apples. If using only one variety, pick Fuji or Braeburn—they're versatile. Avoid mealy apples like Gala, as they won't hold up well in the filling. The tartness balances the sweetness, so if using all sweet apples, reduce sugar by 0.25 cup.
How do I prevent a soggy bottom crust?
Pre-baking the crust is key! Blind-bake the bottom crust for 12-15 minutes with pie weights before adding filling. This creates a sturdy base. Also, leave ½-inch of space between the filling and crust edges. If your crust still gets soggy, try sprinkling 1 tbsp cornstarch over the filling before adding the top crust.
Can I make this pie ahead of time?
This pie actually tastes better the next day. Assemble and bake it 1 day ahead, then store at room temperature. For longer storage, refrigerate for up to 4 days or freeze for 2 months. Reheat slices at 350°F for 10 minutes to restore that warm, gooey texture. The flavors deepen overnight!
What's the best way to store leftovers?
Keep leftovers fresh by storing them in an airtight container at room temperature for 2-3 days. For longer storage, refrigerate for up to 4 days or freeze for 2 months. To reheat, wrap slices in foil and warm at 350°F for 10-12 minutes until heated through. The crust will crisp up beautifully.
Why did my crust turn out pale instead of golden brown?
Pale crusts usually mean one of two things: Either the oven wasn't hot enough (375°F is crucial), or the egg wash wasn't applied properly. For next time, brush the crust with a second coat of egg wash and sprinkle with turbinado sugar before baking. Also, place the pie on the middle rack for even heat distribution.