
Desserts
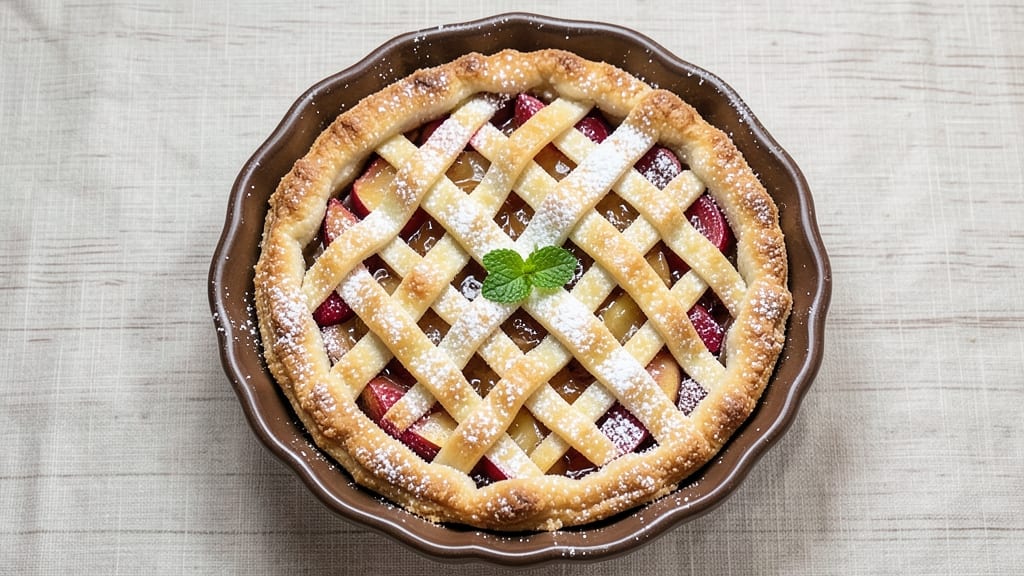
This Snow White apple pie recipe brings fairy-tale charm to your kitchen with a golden crust and cinnamon-spiced filling that tastes like childhood memories. The secret lies in a flaky, buttery crust that encases perfectly spiced apples—tender yet firm enough to hold their shape after baking.
I've perfected this recipe over years of baking, ensuring every slice delivers that perfect balance of sweet, spiced apple and crisp pastry.
The filling starts with a mix of tart and sweet apples, like Granny Smith and Honeycrisp, tossed in cinnamon, nutmeg, and a touch of lemon for brightness. A cornstarch slurry keeps the filling thick and glossy, while a sprinkle of brown sugar caramelizes beautifully during baking.
The crust gets an extra touch of vanilla sugar on top, adding depth and a subtle floral note that ties everything together.
What makes this pie truly special is its versatility—whether you prefer a classic double-crust design or a rustic lattice for easy serving.
The aroma of cinnamon and apples baking in the oven transforms any kitchen into a storybook scene, and the golden-brown crust with its flaky layers is worth every minute of prep. Each slice promises a perfect blend of textures and flavors that will have everyone asking for seconds.
Serve warm with a scoop of vanilla ice cream or whipped cream for the full experience. This pie is a showstopper for holidays, family gatherings, or simply satisfying a craving for something comforting and nostalgic. Let's get baking!
Ingredients for snow white apple pie
Golden crust meets spiced apples—here's what makes this pie taste like magic.
| Ingredient | Amount | Notes |
|---|---|---|
| All-Purpose Flour 🌾 | 3 ½ cups | Sifted for light texture |
| Unsalted Butter 🧈 | 1 ¼ cups | Cold, cubed for flaky crust |
| Granulated Sugar 🍚 | ¾ cup | Plus 2 tbsp for topping |
| Granny Smith Apples 🍎 | 4 medium | Peeled and sliced 1/4-inch thick |
| Honeycrisp Apples 🍎 | 4 medium | Peeled and sliced 1/4-inch thick |
| Light Brown Sugar 🍚 | ½ cup | Packed, for caramelization |
| Ground Cinnamon 🌿 | 2 tbsp | Freshly ground preferred |
| Ground Nutmeg 🌿 | ½ tsp | Freshly grated for warmth |
| Lemon Juice 🍋 | 2 tbsp | Freshly squeezed |
| Cornstarch 🌾 | 2 tbsp | For thick, glossy filling |
| Vanilla Sugar 🍯 | 1 tbsp | Or 1 tsp vanilla extract |
| Table Salt 🧂 | 1 tsp | Plus pinch for dough |
| Ice Water 💧 | ¼ cup | For dough binding |
The apples are non-negotiable—Granny Smith for tartness, Honeycrisp for sweetness. Local farmers markets often have the best selection, but grocery store bins work too—just pick firm ones (no bruises). Peeled or unpeeled? I peel for a cleaner look, but leave skins on for extra fiber. The butter matters too—Plugrá or Land O'Lakes unsalted are my go-tos, kept cold until mixing. For the crust, don't overwork the dough—handle it just enough to bring it together, or you'll end up with tough pastry instead of flaky layers.
No Granny Smith? Fuji or Braeburn hold up well, though they're less tart. Short on Honeycrisp? Gala or Pink Lady sweeten the deal. The vanilla sugar can be skipped if you've got extract (use 1 tsp), but that sprinkle on top adds a subtle floral note that ties everything together. Cornstarch is key for that glossy filling—don't substitute arrowroot. And if you're feeling fancy, toss the sliced apples in a little cold water for 10 minutes before draining to remove excess pectin (prevents a gummy filling).
Prep the dough first—it needs to rest while you handle the filling. Wrap it tightly and refrigerate for at least 1 hour (up to 2 days). The filling keeps 1 day in the fridge before baking, but assemble the pie right before baking for the crispiest crust. Leftovers? Store in an airtight container for 4 days, or freeze for 3 months. Reheat slices in a 350°F oven for 10 minutes to revive the crust.
Why You'll Love This Recipe
- No-Fuss Dough: I swear by this butter-and-flour crust—just mix, chill, roll. No food processor, no fuss, and it holds together like a dream (even if my hands get a little messy).
- Tart-Sweet Magic: Granny Smiths bring that bright, tangy bite while Honeycrisp adds juicy sweetness. Sprinkle a pinch of cinnamon on top, and you’ve got a flavor combo that’s ridiculously balanced.
- Weeknight Hero: This pie bakes while you’re still setting the table. Leftovers? Slice it up for breakfast toast the next morning—trust me, it’s a game-changer for lazy mornings.
- Budget-Friendly Crowd-Pleaser: Apples stay cheap, butter stretches far, and flour’s a pantry staple. Feed six for under $15, and everyone walks away happy (including your wallet).
Step-by-step instructions for Snow White apple pie
Here's how to build a pie that tastes like grandma's—flaky crust, spiced filling, and that perfect balance of tart and sweet.
Make the Perfect Double Crust
In a large bowl, combine the 3.5 cups all-purpose flour and 1 tsp table salt. Cut in the 1.25 cups unsalted butter using a pastry cutter or your fingers until the mixture resembles coarse crumbs with pea-sized butter pieces. This ensures a flaky texture rather than tough dough.
Gradually add the 0.25 cup ice water, 1 tablespoon at a time, mixing gently with a fork until the dough just comes together. Avoid overmixing—just until the dough holds when pressed. Divide the dough into two equal portions, flatten into disks, wrap in plastic, and chill for at least 30 minutes (or up to 24 hours). The cold dough prevents shrinking and makes rolling easier.
Prepare the Classic Apple Filling
Peel and slice the 4 medium Granny Smith apples and 4 medium Honeycrisp apples into ¼-inch thick slices. Toss them immediately with 2 tbsp lemon juice to prevent browning—this keeps your filling bright and fresh-tasting. In a large bowl, combine the sliced apples with 0.75 cup granulated sugar, 0.5 cup light brown sugar, 2 tbsp ground cinnamon, 0.5 tsp ground nutmeg, 2 tbsp cornstarch, and 1 tbsp vanilla sugar. The cornstarch helps thicken the filling for that perfect consistency.
Mix gently but thoroughly to coat all apple slices evenly. Let the mixture sit for 15 minutes—this allows the sugars and spices to penetrate the fruit, enhancing flavor. The filling should look glossy and well-distributed, with no dry spots.
Assemble the Pie with Precision
Preheat your oven to 375°F. On a lightly floured surface, roll out one dough disk into a 12-inch circle for the bottom crust. Transfer it to a 9-inch pie dish, pressing gently to fit the edges. Trim any excess dough, leaving a ½-inch overhang. Roll out the second dough disk for the top crust.
Pile the apple filling into the prepared crust, mounding it slightly in the center. Brush the edges of the bottom crust with a little ice water to help seal the top crust later. Place the second dough disk over the filling, trimming any excess. Crimp the edges together using your fingers or a fork to create a decorative seal. Cut 4-5 slits in the top crust to allow steam to escape—this prevents a soggy pie.
Bake to Golden Perfection
Place the assembled pie on a baking sheet (to catch any drips) and bake for 50-55 minutes until the crust is deep golden brown and the filling is bubbling through the slits. The edges should be set, and the filling should be thick enough to hold its shape when gently shaken.
For extra shine, brush the top crust with a simple glaze made by mixing 2 tbsp granulated sugar with 1 tbsp lemon juice (the extra sugar from the ingredients list). Return the pie to the oven for 5-10 minutes to caramelize the topping. Let the pie cool for at least 2 hours before slicing—this allows the filling to set properly and prevents a runny mess.
Pro Tips For Making Snow White Apple Pie
- Preheat to 375°F—no excuses: I learned this the hard way—starting at 350°F means a soggy bottom crust and undercooked filling. The butter in your crust needs that higher heat to crisp up properly while the apples soften just enough to hold their shape. Trust me, your pie’s texture depends on this.
- Toss apples in lemon juice: Granny Smiths and Honeycrisp turn brown fast, even when sliced. Toss them with 1 tablespoon of lemon juice right after cutting—it keeps them bright and prevents that dull, oxidized look. (Yes, even if you’re assembling the pie right away.)
- Vent the top crust: Skip the lattice or full top crust if you’re short on time, but always cut a few slits in the dough before baking. The steam needs an escape, or you’ll end up with a puffed, uneven crust that collapses halfway through. Two quick X’s in the center do the trick.
- Use cold butter in the crust: Cut the butter into the flour in small chunks and work it in with your fingers—don’t pulse it in the food processor. Cold butter creates flaky layers, and if it melts too soon, your crust turns out greasy instead of crisp. (I know, I know—it’s tempting to speed up the process, but resist.)
Common mistakes when making this recipe
Overworked Dough
I've made this mistake more times than I'd like to admit—overmixing the dough turns your flaky, buttery crust into a tough, dense brick. The key is to handle it minimally. Once the dough comes together after adding ice water, stop mixing immediately.
Overworking activates the gluten too much, creating a chewy texture instead of the delicate layers you want. If the dough feels sticky, chill it for 10-15 minutes before rolling—this helps it firm up naturally. 🧈
Skipping the Chill
Never skip chilling the dough before rolling or baking—this is non-negotiable for a perfect crust. Cold butter creates steam pockets during baking, which gives you those beautiful flaky layers. If you roll out unchilled dough, it'll shrink in the pie dish and lose its shape.
I always wrap the dough disks in plastic and refrigerate them for at least 30 minutes before using. For extra insurance, freeze the dough for 15 minutes right before rolling.
Uneven Filling Distribution
An unevenly distributed filling leads to a pie that's soggy in some spots and dry in others. The secret is to mound the filling slightly in the center—this prevents the crust edges from getting soggy while ensuring the middle cooks properly.
Also, don't pack the apples too tightly; they need room to soften and caramelize. I like to spread the filling evenly with a spatula, then gently press down with my fingers to create a smooth surface. This also helps prevent the top crust from puffing up unevenly during baking.
Forgetting Vent Slits
If you skip those 4-5 steam vents in the top crust, you're asking for trouble—a soggy pie with nowhere for the steam to escape. Without vents, the trapped steam creates pressure that can cause the crust to puff up unevenly or even burst.
I cut my slits about ½ inch apart and ¼ inch deep, making sure they're wide enough for steam but not so large that they let filling ooze out. These little cuts make all the difference in achieving that perfect golden crust.
Baking at Wrong Temp
The oven temperature can make or break your pie. Baking at 375°F gives you that ideal balance of a golden crust and perfectly set filling.
Too low (350°F) and your pie will be undercooked inside with a pale crust; too high (400°F+) and the crust burns before the filling sets.
I always use an oven thermometer to confirm my oven's accuracy—many home ovens run 25°F hotter or colder than they're set to. The 50-55 minute bake time assumes a preheated oven, so never skip that step!
Premature Slicing
This is a cardinal sin I've seen too often—cutting into a pie before it's properly cooled. The filling needs at least 2 hours to set completely, or you'll end up with a runny mess. The crust also needs time to firm up after baking.
If you're impatient, cover the pie loosely with foil and let it cool on a wire rack. Trust me, the wait is worth it for that perfect slice with clean edges and a thick, glossy filling. The first slice after cooling is always the best—save it for yourself! 🍎
Nutrition facts
Frequently asked questions
Can I make this pie with just one type of apple?
You can try, but I recommend using both tart and sweet apples for the best flavor balance. Granny Smith provides the necessary tartness to cut through the sugar, while Honeycrisp or Gala adds natural sweetness. If you only have one variety, use 6-7 medium apples and add an extra 2 tbsp lemon juice to enhance tartness.
How do I prevent a soggy bottom crust?
Prevent soggy bottoms by blind-baking the crust for 10 minutes before adding filling, or by sprinkling ½ cup cornmeal or crushed cookies in the bottom crust. Another trick is to pre-bake the bottom crust with a pie weight or dried beans for 15 minutes at 375°F before filling. This creates a barrier that keeps the crust crisp.
Can I use a lattice crust instead of a full top crust?
A lattice crust adds beautiful visual appeal while still allowing steam to escape. Use the same dough recipe but cut it into strips about ½ inch wide. Weave the strips over the filling in a classic lattice pattern, leaving the center open. Brush with egg wash for extra shine before baking. This works especially well for easier serving.
What's the best way to store leftover pie?
Store cooled pie in an airtight container at room temperature for up to 2 days. For longer storage, refrigerate for 4-5 days or freeze for 3 months. To reheat, wrap slices in foil and warm at 350°F for 10 minutes or until the crust is crisp again. The filling will soften slightly but still taste delicious.
Can I make this pie ahead of time?
Yes! Assemble the pie (unbaked) and refrigerate for up to 24 hours before baking. For a make-ahead dessert, bake the pie 1 day ahead, cool completely, then wrap tightly in plastic wrap. Reheat slices at 350°F for 10 minutes to restore crispness. The flavors actually improve after resting overnight!