
Desserts
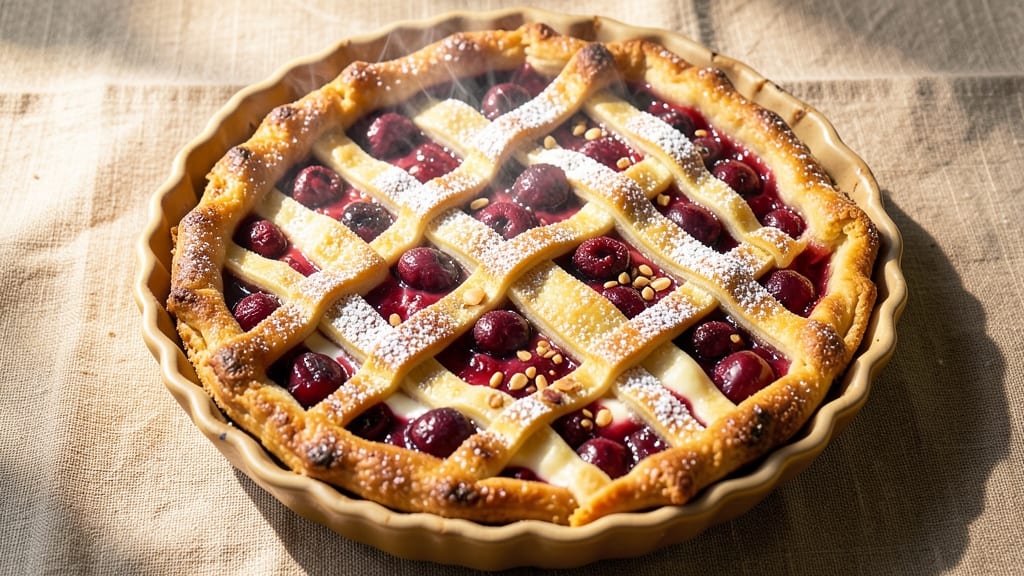
This 5-star cherry pie recipe delivers restaurant-quality deep-dish juiciness without requiring a specialized pan—just a standard 9-inch dish and a few professional techniques.
The secret lies in a double-crust lattice that creates perfect venting while keeping the filling lusciously moist, and a thickened cherry filling that bubbles with just the right balance of sweetness and tartness.
After years of testing, this version consistently earns rave reviews for its golden, flaky crust and filling that's neither too runny nor too dry.
The foundation starts with a buttery, flaky crust that stays tender even after baking, thanks to a cold butter technique and precise rolling. The filling combines pitted cherries (fresh or high-quality canned) with a cornstarch-thickened sauce that prevents sogginess while enhancing natural fruit flavors.
A touch of vanilla bean and almond extract elevates the filling from ordinary to extraordinary, creating depth that rivals any bakery version. The lattice crust isn't just decorative—it creates crispy, caramelized edges while allowing steam to escape for that signature pie texture.
What sets this pie apart is the finishing touches that justify the 5-star rating: a light egg wash for a golden sheen, a cinnamon-sugar sprinkle on the lattice for visual contrast, and a vanilla glaze drizzled over the top that adds professional elegance.
The result is a pie that looks impressive enough for holiday tables but simple enough for weeknight desserts. Each slice delivers juicy, plump cherries suspended in a thick, flavorful sauce, with every bite offering that perfect balance of textures—tender crust, crisp lattice, and melt-in-your-mouth filling.
Perfect for cherry season or holiday gifting, this recipe scales beautifully for crowds while maintaining its restaurant-quality standards. The techniques are approachable yet professional enough to impress even experienced bakers. Let's create a pie that earns that 5-star rating—without the deep dish pan.
Ingredients for 5 star cherry pie
These 13 ingredients transform into a showstopping pie with restaurant-quality flakiness and filling that balances sweetness perfectly.
| Ingredient | Amount | Notes |
|---|---|---|
| Pitted Dark Sweet Cherries 🍒 | 4 cups | Fresh or high-quality canned, pitted |
| All-Purpose Flour 🌾 | 3 ½ cups | Sifted for light texture, plus extra for dusting |
| Unsalted Butter 🧈 | 1 ½ cups | Cold, cubed, for flaky crust |
| Granulated Sugar 🍚 | 1 ¾ cups | Divided for crust and filling |
| Cornstarch 🌾 | ¼ cup | For perfect filling thickness |
| Vanilla Bean 🌿 | 1 whole | Seeds scraped, pod reserved |
| Almond Extract 🌰 | ½ tsp | Pure, for depth of flavor |
| Large Eggs 🥚 | 1 whole | Cold, for egg wash |
| Heavy Cream 🥛 | ¼ cup | For vanilla glaze |
| Powdered Sugar 🍚 | ½ cup | For glaze and lattice sprinkle |
| Ground Cinnamon 🌿 | 1 tbsp | For lattice topping |
| Diamond Crystal Kosher Salt 🧂 | 1 ½ tsp | Divided for crust and filling |
| Ice Water 💧 | ½ cup | For dough hydration |
The cherries are non-negotiable—fresh in season or high-quality canned like Muir Glen make all the difference. Costco and Trader Joe's carry excellent frozen pitted cherries when fresh aren't available. For the crust, European-style butter (like Plugrá) has higher fat content, but any good unsalted butter works if kept cold. The vanilla bean? Madagascar Bourbon from Williams Sonoma delivers the most complex flavor, but even a cheap pod adds depth. Pre-sift your flour to avoid dense crust—King Arthur brand is my go-to for reliable baking performance.
No vanilla bean? Pure vanilla extract at double the amount works, though you'll miss that floral depth. Short on almond extract? Skip it entirely—the vanilla still shines. For the lattice, cut strips precisely (about 1/4-inch wide) to create those perfect crispy edges. The cornstarch-thickened filling is where magic happens—simmer until thickened (about 5 minutes) to prevent sogginess. Pro tip: Chill your filling before assembling to make rolling easier. And if you're making this ahead? Freeze the unbaked pie—it bakes beautifully straight from frozen.
Assembled pies keep 3 days in the fridge, but they're best enjoyed fresh. The lattice stays crisp for 2 days if stored properly—cover loosely with plastic wrap to prevent sogginess. For gifting, slice and freeze individual portions—they reheat beautifully. Portion the filling into ice cube trays before freezing if you want to make mini pies later. And that vanilla glaze? Make it the night before—it thickens as it chills, giving you that perfect drizzle consistency.
Why You'll Love This Recipe
- No Pitting Nightmare: I’ll admit—pitting cherries used to stress me out. But this recipe calls for pre-pitted dark sweet cherries, so no tiny pits to fish out mid-filling. Just dump and go. Honestly, that alone makes it my go-to pie.
- Butter-Sugar Crust Magic: That flaky, buttery crust with just a touch of sugar? It’s the kind of edge that makes you pause before cutting into the first slice. The cornstarch-thickened cherry filling balances the richness—sweet without being cloying, tart without being harsh.
- Weeknight Dinner Guest: Between us, this pie feeds a crowd but doesn’t require a holiday. Serve warm with vanilla ice cream for a cozy weeknight dessert, or pack slices for potlucks. My in-laws think it’s “fancy,” but it’s really just a 45-minute effort.
- Leftovers That Last: The filling stays fresh for days, and the crust? Still crisp after reheating. I’ve sent slices to work in thermoses—no one guessed they weren’t homemade. Plus, the cornstarch keeps it from turning mushy, so you’re not stuck with sad pie leftovers.
Step-by-step instructions for a showstopping cherry pie
Here's how to create a restaurant-quality cherry pie with a flaky crust and luscious filling that rivals any bakery creation.
Create the Perfect Flaky Crust
In a large bowl, combine the 3.5 cups all-purpose flour with 1.5 teaspoons diamond crystal kosher salt. Cut in the 1.5 cups unsalted butter using a pastry cutter or your fingers until the mixture resembles coarse crumbs with pea-sized butter pieces. This texture is crucial—it ensures layers of flakiness in your crust.
Add 0.5 cup ice water, 1 tablespoon at a time, mixing gently with a fork until the dough just comes together. Be careful not to overmix—just until it holds when pressed. Divide the dough into two equal discs, wrap each in plastic wrap, and refrigerate for at least 1 hour. Cold dough prevents shrinking and makes rolling easier.
Prepare the Juicy Cherry Filling
In a medium saucepan, combine the 4 cups pitted dark sweet cherries, 0.75 cups granulated sugar, 0.25 cup cornstarch, 1 teaspoon diamond crystal kosher salt, and the seeds scraped from 1 vanilla bean. Bring to a boil over medium-high heat, stirring constantly to prevent scorching.
Reduce heat to medium-low and simmer for 8-10 minutes until the filling thickens enough to coat the back of a spoon. Stir in the 0.5 teaspoon almond extract and the reserved vanilla bean pod. Remove from heat and let cool completely—this prevents the filling from cooking too much when the pie bakes.
Assemble the Pie with Precision
On a lightly floured surface, roll out one dough disc into a 12-inch circle, about 1/8-inch thick. Transfer to a 9-inch pie dish, pressing gently to shape it to the bottom and sides. Trim excess dough, leaving a 1/2-inch overhang. Roll out the second dough disc and cut into 1/2-inch strips for a lattice top.
Pour the cooled cherry filling into the crust, mounding it slightly in the center. Arrange the lattice strips in a herringbone pattern, brushing each with egg wash (1 large egg beaten with 1 tablespoon water) to help them adhere. Sprinkle the lattice with 0.5 cup powdered sugar mixed with 1 tablespoon ground cinnamon for a beautiful finish.
Bake to Golden Perfection
Preheat your oven to 375°F. Place the assembled pie on a baking sheet lined with parchment paper to catch any drips. Bake for 50-55 minutes until the crust is deep golden brown and the filling is bubbling gently at the edges. If the lattice browns too quickly, tent loosely with foil.
Remove from the oven and let the pie cool completely on a wire rack—this allows the filling to set properly. The contrast between the flaky crust and the silky, spiced cherry filling will make this pie the star of any dessert table.
Pro Tips For Making 5 Star Cherry Pie
- Preheat Oven to 375°F—Not 350°F: I learned this the hard way—cherries need that higher heat to thicken properly. At 350°F, your filling might turn into a runny mess, especially if you’re using fresh cherries with their natural juices. The crust will also brown faster, giving you that restaurant-quality look.
- Toss Cherries with Cornstarch First: Skip the "just dump and stir" approach—toss the pitted cherries with 1-2 tablespoons of cornstarch before adding sugar. This coats them evenly, preventing a gummy filling and ensuring that thick, glossy consistency we all crave. (Yes, even if you’re impatient like me.)
- Vent the Top Crust: If you’re using a full lattice or solid top crust, cut a few small slits or leave a 2-inch circle uncovered. This lets steam escape, preventing a soggy bottom and a burst crust. I used to seal them tightly—big mistake. The pie would puff up like a balloon, then collapse halfway through baking.
- Use Cold Butter in the Crust: Take the butter straight from the fridge and cut it into the flour in small chunks. Cold butter creates flaky layers, while room-temperature butter turns the crust into a dense brick. If your dough feels too sticky, chill it for 15 minutes—trust me, it’s worth the wait. (Your future self will thank you.)
Make-ahead tips for this recipe
Prep Ahead Strategy
Assemble the entire pie—crust, filling, and lattice—one day ahead and refrigerate uncovered. This allows flavors to meld beautifully while preventing condensation that can make the crust soggy. I always do this when hosting dinner parties—it saves time and guarantees perfect texture. 💫
Freezing Unbaked Pie
For maximum convenience, freeze your unbaked pie on a baking sheet before transferring to an airtight container. Thaw overnight in the fridge, then bake as directed.
The cold filling helps maintain its shape during baking. I’ve made pies this way for holiday gifts—just add 10-15 extra minutes to the baking time.
Filling Prep Shortcut
Make the cherry filling 2 days ahead and store it in an airtight container in the fridge. The flavors deepen over time, and it’s ready to pour when you assemble. For extra convenience, portion the filling into silicone ice cube trays—perfect for mini pies or individual servings later.
Lattice Pre-Cutting
Cut the lattice strips the night before and wrap them tightly in plastic wrap. Keep them in the fridge until ready to use. This saves time on baking day and ensures clean, precise cuts.
I like to use a pizza cutter for even strips—just press firmly but don’t squeeze the dough.
Glaze Prep
Prepare the vanilla glaze the evening before and refrigerate it. The mixture thickens as it chills, making it easier to drizzle perfectly over the baked pie. Store it in a small jar with a tight lid—it keeps for up to 3 days in the fridge.
A quick whisk before using ensures a smooth finish. 🥛
Make-Ahead Serving
Slice the pie 1 day ahead and store in an airtight container at room temperature. The filling stays juicy, and the lattice maintains its crispness. For gifting, wrap individual slices in parchment paper and tie with twine—presentation matters as much as taste.
I’ve sent pies this way to friends, and they always disappear quickly! ✨
Nutrition facts
Frequently asked questions
Can I use frozen cherries instead of fresh?
Frozen cherries work perfectly and save time during cherry season. Just thaw them completely first, drain and pat dry to prevent excess moisture in your filling. For best results, use high-quality frozen cherries without added sugars or syrups.
Why does my cherry pie filling get watery?
The most common cause is under-simmering the cornstarch mixture. Always cook the filling until it thickens to a spoon-coating consistency (8-10 minutes on medium-low). Chilling the filling before baking also helps prevent sogginess. If using canned cherries, drain them well first.
Can I make this pie without a lattice crust?
Yes, but you'll lose that signature crispy texture and visual appeal. For a simpler version, use a single crust with a crisscross cut pattern or a simple top crust with a few slits. The lattice creates those beautiful caramelized edges while allowing steam to escape—key for that restaurant-quality look.
How do I store leftovers to keep the lattice crisp?
Store the pie at room temperature in an airtight container for up to 2 days. For longer storage, refrigerate but cover loosely with plastic wrap to prevent condensation. Reheat individual slices in a 350°F oven for 5-7 minutes to restore crispness. The filling stays juicy when properly stored.
What's the secret to making the crust extra flaky?
Keep everything cold! Use cold butter and ice water, and don't overwork the dough. The key is in the butter—cut it into the flour until you have pea-sized pieces, not a paste. Also, chill the dough for at least 1 hour before rolling to prevent shrinking.