
Desserts
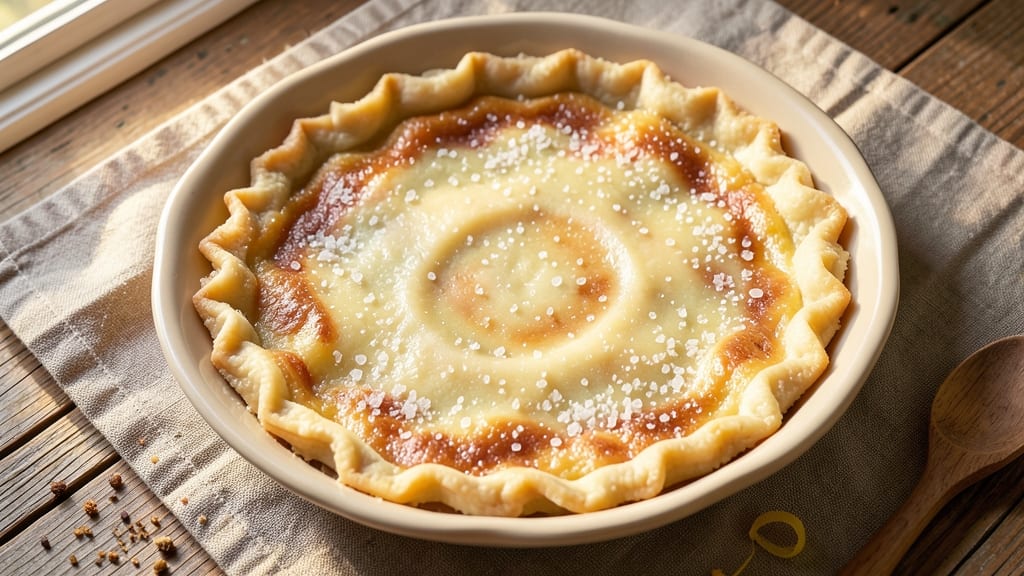
This all butter single pie crust recipe delivers the kind of golden, shatteringly flaky crust that makes every pie, tart, or quiche taste like it came from a bakery. The secret lies in the precise butter-to-flour ratio and proper chilling technique—no shortcut oils or margarine here.
I've perfected this method over years of testing, and it never fails to impress, whether you're making a classic apple pie or a savory quiche.
The dough comes together in just 10 minutes of prep work, but the real magic happens during the chilling time. Cold butter creates those signature flaky layers, while proper handling prevents tough crusts.
This recipe uses a 1:2 butter-to-flour ratio, which is the gold standard for all-butter crusts, delivering maximum flavor and texture without being overly rich.
What you'll end up with is a crust that's crisp at the edges, tender in the middle, and golden brown all over—no soggy bottoms or greasy textures.
The key techniques include cutting cold butter into flour efficiently, working quickly to avoid warming the dough, and blind-baking when needed for fillings that require a sturdy base.
This versatile crust works for both sweet and savory applications, making it perfect for everything from classic apple pies to spinach and cheese tarts. Once you master this method, you'll never buy pre-made crusts again. Let's get started on creating the foundation for your perfect pie.
Ingredients for all butter single pie crust
Four ingredients. One golden, shatteringly flaky crust. No oil shortcuts here.
| Ingredient | Amount | Notes |
|---|---|---|
| All-Purpose Flour 🌾 | 2 ½ cups | Sifted for light texture |
| Unsalted Butter 🧈 | 1 cup | Cold, cubed, high-fat (80%+) |
| Ice Water ❄️ | ⅓ cup | Chilled, for binding |
| Diamond Crystal Kosher Salt 🧂 | 1 tsp | Fine grain preferred |
| Granulated Sugar 🍚 | 1 tbsp | For slight sweetness |
The butter is non-negotiable—European-style (80%+ fat) makes all the difference. Plugrá or Land O'Lakes European Style are my go-tos, but any cold, cubed butter works. Keep it frozen until you're ready to cut it into the flour—this prevents melting and keeps those layers crisp. The flour? King Arthur or Gold Medal are my favorites for their consistency. Sift it first to avoid dense pockets in your crust. Pro tip: Use a food processor for the butter-flour mix—it's faster and more even than cutting by hand.
No ice water? Cold water from the fridge works, but ice keeps the dough colder longer. Running short on butter? Substitute with cold shortening like Crisco, but expect less flavor and flakiness. Salted butter? Reduce the added salt to 0.5 tsp—it's already got plenty. For a lower-fat option, swap half the butter for cold vegetable shortening, though I don't recommend it for this recipe. The sugar is optional but adds a subtle sweetness that pairs perfectly with savory fillings like spinach quiche.
This dough needs at least 2 hours in the fridge—don't rush it. Wrap it tightly in plastic and press it flat for even chilling. It keeps for up to 3 days in the fridge or 3 months frozen. For pre-baking (like blind-baking for custards), roll it out on parchment, chill again, then bake at 375°F for 15-20 minutes. Trust me, the extra time pays off for that bakery-style crust.
Why You'll Love This Recipe
- No-Fuss Assembly: I swear by this crust because it’s just flour, butter, ice water, and salt—no food processor, no fuss. Cold butter cubes cut into the flour with a fork? That’s it. Even my 10-year-old could handle it (and usually does).
- Butter’s Rich Payoff: That single ingredient—cold, unsalted butter—makes all the difference. The flaky layers? Pure magic. And the sugar? Just a pinch to keep the edges golden without overpowering. Honestly, it’s the kind of crust that makes store-bought look sad.
- Weeknight to Showstopper: Make a double batch on Sunday—this crust freezes like a dream—and pull it out for anything: pot pie, quiche, or even a quick galette. (Yes, even on a Tuesday night when you’re exhausted.) It’s my secret weapon for pretending I’m a fancy chef.
- Budget-Friendly Luxury: All butter, but it won’t break the bank. A stick of butter and a bag of flour stretch far, and the salt/sugar tweaks let you adjust to what you’ve got. Leftovers? I’ve turned them into crostini or fried them into chips—waste not, want not.
Step-by-step instructions for all butter single pie crust
Here's how to build a golden, shatteringly crisp crust using only butter—no oil shortcuts needed.
Cut and Chill the Butter
Take the 1 cup unsalted butter from the fridge and cut it into ½-inch cubes using a sharp knife. Place the cubes on a plate and refrigerate for 15 minutes while you prep the rest. This ensures the butter stays cold enough to create flaky layers when it melts during baking.
Cold butter is non-negotiable here. If your kitchen is warm, pop the butter back in the freezer for 10 minutes before cutting. You want cubes that feel firm to the touch—when pressed gently, they should hold their shape without leaving an immediate indentation.
Mix Dry Ingredients
In a large bowl, whisk together the 2.5 cups all-purpose flour, 1 teaspoon Diamond Crystal kosher salt, and 1 tablespoon granulated sugar. Sift the flour first if it's lumpy—this prevents dense pockets in your crust. The sugar adds a subtle sweetness that balances the butter's richness, while the salt enhances all flavors.
Use a fork or whisk to break up any flour clumps completely. The mixture should look uniform and fine, like powdered sugar. This step is your foundation—don't rush it. If you feel tempted to skip sifting, resist. A few lumps now mean a tough crust later.
Work the Butter into the Flour
Add the chilled butter cubes to the flour mixture and use your fingers or a pastry cutter to work them in. Press down on the butter with your fingertips, twisting slightly to coat each cube in flour. This creates tiny pockets that will turn into flaky layers when the butter melts in the oven.
Here's the thing—don't overwork the butter. You're aiming for pea-sized lumps throughout the dough, not a smooth paste. If the mixture feels too dry, that's normal. The ice water will bind everything together in the next step. Press the dough into a loose ball and flatten it into a disc.
Add Ice Water Gradually
Measure out the ⅓ cup ice water (yes, ice water—this keeps the dough cold and prevents premature melting). Sprinkle 1 tablespoon at a time over the dough while gently stirring with a fork. The water should be absorbed immediately, but don't add it all at once—this prevents a gummy texture.
After adding all the water, use your hands to bring the dough together. It should hold when pressed but still feel slightly crumbly. If it's too dry, add 1 teaspoon more water; if it's sticky, sprinkle in 1 tablespoon more flour. Wrap the dough in plastic wrap and chill for at least 1 hour (or up to 48 hours).
Roll and Blind-Bake for Perfect Crispiness
On a lightly floured surface, roll the chilled dough into a 12-inch circle, about ⅛-inch thick. Transfer it to a parchment-lined pie dish, gently pressing it into the edges to create a ½-inch rim. Crimp the edges with your fingers or a fork for that bakery-style finish.
Preheat your oven to 375°F. For a blind-baked crust, line the dough with parchment paper, fill it with pie weights or dried beans, and bake for 15 minutes. Remove the weights, prick the bottom with a fork, then bake for another 10-15 minutes until golden brown. The crust should be firm to the touch but still crispy—no soggy bottoms here!
Pro Tips For Making All Butter Single Pie Crust
- CHILL THE BUTTER FIRST: Cut your unsalted butter into ½-inch cubes and refrigerate them for 20 minutes before mixing with flour. Cold butter creates flaky layers—if it’s too soft, you’ll end up with a tough, dense crust instead of that perfect shatter.
- MEASURE WATER BY WEIGHT: Use a kitchen scale for ice water—aim for about 5-6% of your flour’s weight (so 3-4 tablespoons for 1 cup flour). Eyeballing leads to either a gummy mess or a dry, crumbly disaster, and nobody wants that.
- WORK FAST AFTER MIXING: Once you’ve combined butter and flour, stop fiddling. The moment you add ice water, form the dough immediately—no lingering. Warm hands or lingering in a bowl will melt the butter, and you’ll lose that crucial flakiness.
- REST THE DOUGH TWICE: Give it a 30-minute rest in the fridge after mixing, then another 15-20 minutes after rolling before baking. This relaxes the gluten and prevents shrinking—yes, even with all butter, which loves to fight back if you rush it.
Essential equipment for perfect results
Must-Have Tools
First, invest in a sharp chef's knife for cutting butter into precise cubes—dull blades make uneven pieces that melt inconsistently. I use an 8-inch Wüsthof for this job, but any high-quality knife works.
A pastry cutter (like the La Bounty brand) saves time when mixing butter into flour, though my fingers work just as well if you're patient. 🧈
Food Processor Advantage
A food processor (like the Cuisinart DFP-14BCNY) is a game-changer for this crust. Pulse the cold butter and flour together in 2-second bursts until pea-sized crumbs form.
This ensures even distribution and eliminates the guesswork of hand-cutting. Skip this step only if you're making a small batch or don't own one.
Rolling Pin Essentials
For rolling, a French-style rolling pin (like OXO Good Grips) gives you the best control over thickness. Keep it chilled in the freezer for 10 minutes before use—this prevents the dough from warming up.
A lightly floured surface is critical; I use a marble pastry mat for non-stick rolling. Never skip chilling the dough before rolling—warm dough stretches instead of rolling evenly.
Pie Dish Prep
Your pie dish matters too. A 9-inch glass or ceramic dish (like Pyrex) conducts heat evenly, while metal dishes can cause uneven browning. Always pre-chill the dish in the fridge for 15 minutes before filling to prevent the bottom from puffing up.
For blind-baking, use parchment paper cut to fit inside the crust—this prevents sticking and makes weight removal easy.
Chilling Containers
Proper chilling requires an airtight container—I use glass Pyrex bowls with snap-on lids. Press the dough into a flat disc and wrap it tightly in plastic wrap before placing it in the container.
This prevents air from circulating and keeps the butter cold. For longer storage, vacuum-seal bags work too, but plastic wrap is more accessible for short-term chilling.
Nutrition facts
Frequently asked questions
Why does this crust need to chill for so long?
The 2-hour chilling time is crucial for creating those signature flaky layers. Cold butter melts slowly during baking, creating steam that separates the dough into delicate sheets. Rushing this step means the butter will melt too quickly, resulting in a tough crust instead of the shatteringly crisp texture you want.
Can I make this crust ahead of time?
This dough keeps perfectly in the fridge for up to 3 days or 3 months in the freezer. Wrap it tightly in plastic and press it flat before storing. Just let it thaw in the fridge overnight before rolling. Prepping ahead saves time on busy baking days.
What's the best way to prevent a soggy bottom?
For fillings with high moisture (like berries or custards), always blind-bake the crust first. Line it with parchment, fill with pie weights, and bake at 375°F for 15 minutes before adding filling. Pro tip: Pre-cook fruit fillings to reduce excess liquid.
How do I fix a cracked crust?
Don't worry—cracks are normal! Brush the crust with a thin layer of egg wash before baking to create a golden finish. For larger cracks, gently press them closed with your fingers after rolling. The crust will still bake beautifully, and the cracks won't affect the flavor at all.
Can I use this crust for savory dishes too?
Yes! This all-butter crust works perfectly for savory pies, tarts, and quiches. The 1 tbsp sugar adds subtle sweetness that complements flavors like spinach, cheese, or mushrooms. For extra flavor, sprinkle the bottom with herbs or garlic powder before adding filling.