
Desserts
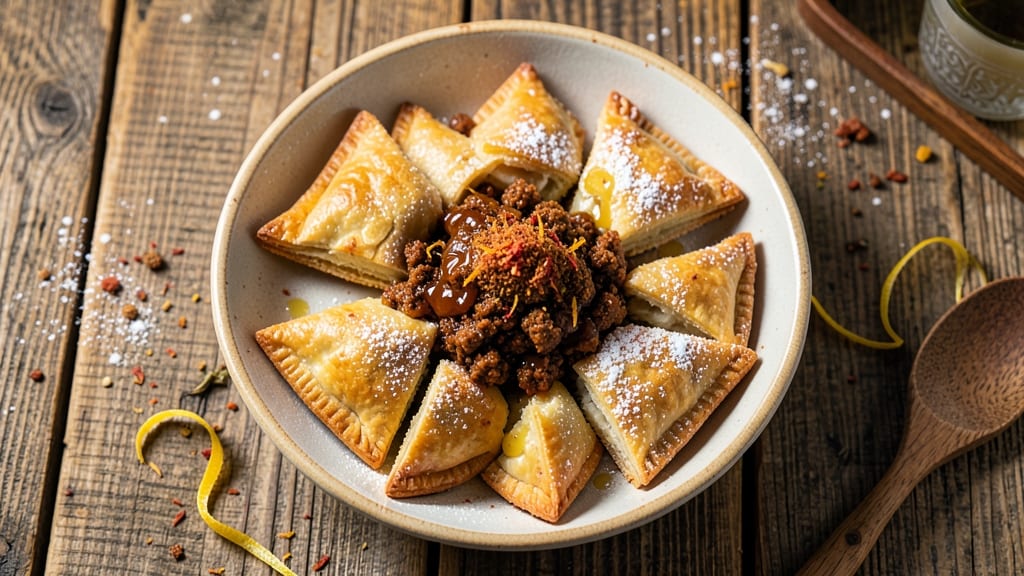
This Amish hand pie recipe brings rustic charm and tender fruit harmony to your kitchen with minimal fuss. The secret lies in a simple, flaky crust that encases spiced fruit fillings—perfect for breakfast or dessert.
I’ve perfected this recipe over years of baking, ensuring every bite delivers that golden, buttery crust with a melt-in-your-mouth texture.
The beauty of Amish hand pies is their versatility—whether you prefer classic apple, peach, or berry fillings, the technique remains the same. A 5-minute dough prep and 20-minute bake time make them ideal for busy days, yet the results feel like a homemade treat.
The crust stays crisp while the fruit filling stays tender, thanks to a few key tricks I’ll share.
What you’ll love most is how these hand pies taste fresh out of the oven—warm, fragrant, and just sweet enough. They’re perfect for picnics, church gatherings, or a cozy weekend breakfast. The filling options are endless, but the method stays simple, ensuring you’ll want to make them again and again.
Serve them warm with a dollop of whipped cream or a sprinkle of cinnamon for extra flair. Here’s everything you need to create these classic, comforting hand pies at home.
Ingredients for amish hand pie
Golden crust meets spiced fruit in these rustic hand pies, perfect for breakfast or dessert.
| Ingredient | Amount | Notes |
|---|---|---|
| All-Purpose Flour 🌾 | 3 cups | Sifted for flaky texture |
| Cold Unsalted Butter 🧈 | 1 cup | Cut into small cubes |
| Ice Water 💧 | ½ cup | Chilled for crisp crust |
| Granulated Sugar 🍚 | ½ cup | For filling sweetness |
| Ground Cinnamon 🌿 | 1 ½ tbsp | Warm spice for depth |
| Fresh Lemon Juice 🍋 | 1 tbsp | Brightens fruit flavor |
| Salt 🧂 | ½ tsp | Enhances all flavors |
| Peaches (or Apples) 🍑 | 4 cups | Peeled, sliced thin |
| Cornstarch 🌾 | 1 tbsp | Thickens filling nicely |
| Whole Milk 🥛 | ¼ cup | For tender filling |
| Egg 🥚 | 1 whole | For egg wash |
| Granulated Sugar (for sprinkle) 🍚 | 2 tbsp | Optional topping |
The butter matters most here—use cold, unsalted cubes from Land O’Lakes or Plugrá for that classic flaky texture. I always buy the European-style butter if I can find it, but any good brand works. The flour? King Arthur or Bob’s Red Mill all-purpose is my go-to—it’s finely milled and gives the best rise. If you’re in a pinch, any store-brand flour will do, but sift it well to avoid dense crusts. For the filling, peaches are my favorite, but apples or berries work beautifully too—just adjust the sugar to taste. The key is thin slices so they cook through perfectly.
No butter? Crisco or vegetable shortening works in a pinch, though the flavor won’t be quite the same. Short on milk? Heavy cream or even water will work, but the filling might be slightly less tender. The cornstarch is non-negotiable for that perfect thick consistency—it’s what keeps the filling from getting mushy. Fresh lemon juice is best, but bottled works if you’re in a hurry. For the fruit, canned peaches in juice save time, but fresh is always better. If you’re using apples, tart varieties like Granny Smith hold up best to baking.
The dough keeps best in the fridge for 2 days wrapped tightly in plastic. For longer storage, freeze the dough balls for up to 3 months—just let them thaw on the counter before rolling. The filled pies can be refrigerated for 12 hours before baking, which is great for making ahead. Once baked, they’re best eaten warm but reheat beautifully in a 350°F oven for 5-10 minutes. Store leftovers in an airtight container for 3 days—if they last that long!
Why You'll Love This Recipe
- No-Fuss Dough: I swear by that cold butter cut into flour—it’s the secret to flaky layers with zero fuss. No mixer, no waiting, just a fork and a bowl. Honestly, my hands are usually sticky, but the result? Crust so tender it melts in your mouth.
- Sweet Spice Magic: That cinnamon-sugar filling? It’s like dessert hugged you. The sugar caramelizes just enough to make every bite taste warm and homey, and the crust holds up—no soggy bottoms here. (Yes, even on a Tuesday night.)
- Picnic-Proof Perfection: These pies travel like champs—no plates, no mess, just grab-and-go goodness. I’ve packed them in lunchboxes, picnic baskets, and even as after-church treats. The filling stays intact, and the crust? Still crisp after hours.
- Budget Sweetness: A single pie costs me pennies but feels like a treat. Flour, butter, sugar—ingredients I already have. And leftovers? They disappear faster than I can say “second slice.” My kids beg for them, and my wallet thanks me.
Step-by-step instructions for Amish hand pies
Here's how to create those iconic golden crusts wrapped around spiced fruit—simple steps for perfect results.
Make the Crust Dough
In a large bowl, combine the 3 cups All-Purpose Flour and 0.5 tsp Salt. Cut in the 1 cup Cold Unsalted Butter using a pastry cutter or your fingers until the mixture resembles coarse crumbs with pea-sized butter pieces remaining. This texture is crucial for flaky layers.
Gradually add the 0.5 cup Ice Water, 1 tablespoon at a time, mixing gently with a fork just until the dough comes together. Avoid overworking—you want a slightly shaggy dough that holds when pressed. Wrap tightly in plastic wrap and chill for 30 minutes to firm up before rolling.
Prepare the Spiced Fruit Filling
In a medium saucepan, combine the 4 cups Peaches (or Apples), 0.5 cup Granulated Sugar, 1.5 tbsp Ground Cinnamon, and 1 tbsp Fresh Lemon Juice. Cook over medium heat for 5-7 minutes until the fruit softens and releases juices, stirring occasionally.
Remove from heat and stir in the 1 tbsp Cornstarch mixed with 0.25 cup Whole Milk. Return to low heat and cook for another 2-3 minutes until the filling thickens to a spoonable consistency. Let it cool completely before filling the pies—warm filling makes the crust soggy.
Roll and Cut the Dough
Divide the chilled dough into 8 equal portions (about 6 ounces each). On a lightly floured surface, roll each portion into a 6-inch circle about ⅛-inch thick. Keep the remaining circles covered to prevent drying.
Using a 3-inch round cutter, cut out circles for the pie bottoms. Place 1 tablespoon of cooled filling onto each circle, leaving a ½-inch border around the edges. Brush the edges with a bit of water to help seal.
Assemble and Crimp the Pies
Cut another 3-inch circle from the remaining dough for each pie top. Place it over the filled bottom, pressing gently to seal the edges. Fold the top and bottom crusts together at the edge, then use your fingers to crimp decoratively. Brush the tops with the beaten whole Egg for a golden finish.
Sprinkle with 2 tbsp Granulated Sugar (for sprinkle) if desired. Arrange the pies on a parchment-lined baking sheet, leaving 1 inch between them for even baking. Freeze for 15 minutes before baking to prevent spreading.
Bake to Golden Perfection
Preheat your oven to 375°F. Bake the pies for 20-25 minutes until the crusts are deep golden brown and the filling is bubbling through the slits. Rotate the pan halfway through for even browning.
Let the pies cool on the baking sheet for 5 minutes before transferring to a wire rack. Serve warm—the contrast of crispy crust and tender, spiced fruit is what makes these hand pies so special. Store leftovers in the fridge for up to 3 days or freeze for longer storage.
Pro Tips For Making Amish Hand Pie
- Chill the Butter Hard: Take your unsalted butter out of the fridge and let it sit for 10-15 minutes before cutting it into cubes—this prevents it from melting into a greasy mess when mixed with flour. I used to rush this step and ended up with dough that stuck to everything, no matter how much flour I added.
- Mix Dough by Hand: Skip the food processor for this recipe—use your fingers to work the cold butter into the flour until it resembles coarse crumbs. The friction from your hands helps distribute the fat more evenly, which is non-negotiable for that signature flaky, layered texture. (Yes, it’s a little messy, but worth it.)
- Pack the Sugar Tightly: When filling your pie cups, press the cinnamon-sugar mixture firmly into the bottom—don’t just spoon it in. This ensures even distribution and prevents the filling from spilling out when you bite in. I learned this after making a batch where half the filling ended up on my plate instead of in my mouth.
- Bake Until Golden, Not Just Brown: Pull the pies out when the edges are deep golden brown, not just light tan—this means they’ve fully set and won’t be gummy. If you’re unsure, wait an extra 2-3 minutes; underbaking is easier to fix than overbaking. (And trust me, you’ll know the difference.)
Make-ahead tips for amish hand pie
Dough Prep Ahead
Make the crust dough up to 2 days in advance and store it wrapped tightly in plastic in the fridge. I always divide it into portions right away—this saves time later.
For longer storage, freeze the dough balls for up to 3 months in a sealed container. Just let them thaw on the counter before rolling. 💫
Filling Prep
Prepare the spiced fruit filling 12 hours ahead and refrigerate it in an airtight container. The flavors meld beautifully overnight, and the filling stays cool enough to prevent soggy crusts. If using apples, add ¼ tsp ground cardamom for extra depth—it pairs perfectly with cinnamon.
Filled Pies Storage
Assemble the pies with filling and refrigerate them covered for up to 12 hours before baking. I like to make these the night before—just pop them in the oven in the morning for a fresh-from-the-oven breakfast.
For extra insurance, freeze the filled (but unbaked) pies for 1 month—thaw in the fridge overnight before baking.
Baking Flexibility
Bake the pies straight from the fridge for 25-30 minutes if they’re cold, or from room temperature for 20-25 minutes. The extra time compensates for the cold start. Use a pie cooling rack to prevent soggy bottoms—it’s worth the small investment for crispy results every time. 🔥
Reheating Leftovers
Reheat individual pies in a 350°F oven for 5-10 minutes until warm through. For microwave reheating, cover with a damp paper towel and heat on 50% power for 30-45 seconds. The crust stays crispy if you avoid direct microwave heat—this is key for maintaining that hand pie perfection.
Freezing Baked Pies
Let baked pies cool completely before freezing in a single layer on a tray. Once frozen solid, transfer to an airtight container or freezer bag for up to 3 months.
To reheat, bake from frozen at 375°F for 10-15 minutes with a splash of water in the pan to restore moisture. They’ll taste almost as good as fresh! ✨
Nutrition facts
Frequently asked questions
Can I make Amish hand pies with savory fillings instead of fruit?
While fruit is traditional, savory fillings like seasoned chicken, beef, or even cheese and herb work beautifully. For meat fillings, use 1 cup cooked meat per 2 pies mixed with 1 tbsp gravy or broth>, then season with salt, pepper, and a pinch of thyme. The same crust technique applies—just skip the sugar in the egg wash for a neutral flavor.
Why did my crust turn out tough instead of flaky?
Overworking the dough or using warm butter are the most common culprits. Keep your butter cold> (not softened) and cut it into the flour quickly with a pastry cutter. Also, avoid adding extra water—measure carefully. If the dough feels too dry, add just 1 tsp ice water> at a time until it holds together.
How do I make these hand pies without a pie cutter?
No problem! Use a glass or bowl> (6-8 inches) to trace circles on your rolled dough. For tops, cut slightly smaller circles than the bottoms. A butter knife works too—just press firmly around a marked circle. If you don't have measuring tools, eyeball 3-inch> circles by comparing to a quarter or small apple.
Can I bake these hand pies from frozen?
Yes, but with adjustments. Place unbaked pies on a tray and freeze for 15 minutes> first. Then bake at 375°F> for 25-30 minutes>, adding 5 minutes> if they're completely frozen. For baked pies, freeze cooled pies in a single layer, then reheat at 350°F> for 10-15 minutes> with a splash of water in the pan to restore moisture.
What's the best way to serve Amish hand pies?
Warm pies taste best straight from the oven! For fruit pies, serve with whipped cream or vanilla ice cream. Savory versions pair perfectly with a side of gravy or fresh garden salad. The contrast of crisp crust and warm filling makes them ideal for breakfast, brunch, or even dessert. Store leftovers in an airtight container for 3 days> at room temperature.