
Desserts
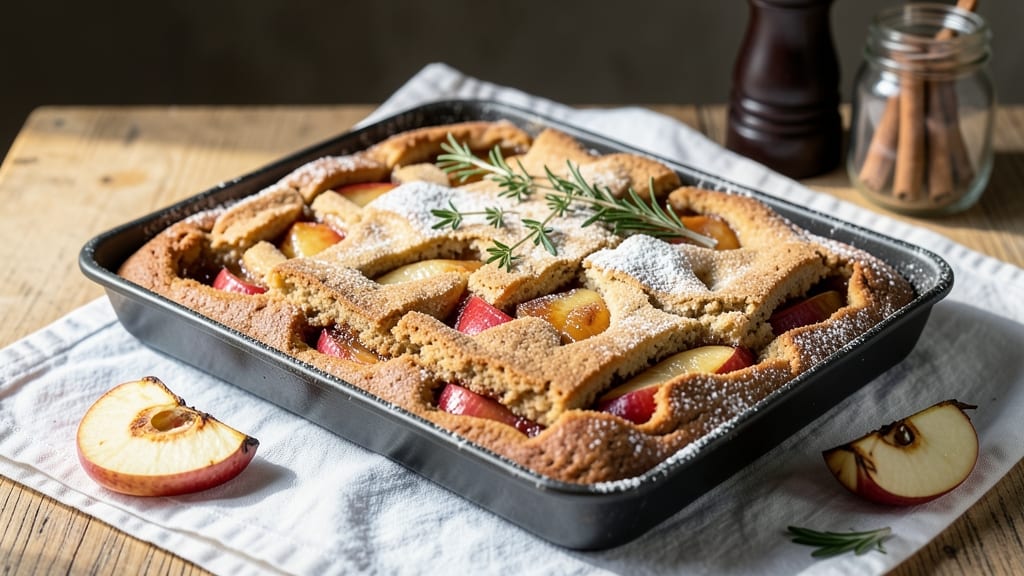
Apple pie cookie bars bring the cozy comfort of a classic dessert into a convenient, crowd-pleasing format—no pie dish required. 🍏 The secret lies in a buttery shortbread crust layered with spiced apple filling that bakes into caramelized clusters, while a cinnamon-sugar swirl adds that signature piehouse aroma. I developed this recipe after years of testing, balancing texture and flavor to create bars that are sturdy enough to cut but still melt-in-your-mouth tender.
The magic starts with the dough—a simple blend of flour, butter, and sugar that forms the sturdy base, while the apple filling transforms into a jammy, spiced layer with just the right amount of chunkiness.
Baking at the right temperature ensures the edges get crispy while the center stays soft, creating that perfect contrast. This isn't just a cookie bar; it's a dessert that captures the essence of apple pie in every bite.
What makes these bars special is their versatility—they're perfect for potlucks, holiday gatherings, or a quick treat when pie seems like too much work. The cinnamon-sugar swirl adds visual appeal and that unmistakable pie flavor, while optional toppings like caramel drizzle or chopped nuts can elevate them even further.
Once you try these, you'll never go back to store-bought dessert bars again.
Whether you're baking for a crowd or treating yourself to a single slice, these apple pie cookie bars deliver all the warmth and nostalgia of a homemade pie without the fuss.
The recipe is designed to be foolproof, with clear steps that ensure perfect results every time. Let's get started on creating your own batch of these irresistible treats.
Ingredients for apple pie cookie bar
Buttery crust meets jammy apple filling with a swirl of cinnamon-sugar magic—no pie dish needed!
| Ingredient | Amount | Notes |
|---|---|---|
| All-Purpose Flour 🌾 | 2 ½ cups | Sifted for even texture |
| Unsalted Butter 🧈 | 1 cup | Cold, cubed for even baking |
| Granulated Sugar 🍚 | 1 cup | White or light brown |
| Packed Brown Sugar 🍚 | ½ cup | Light or dark variety |
| Large Eggs 🥚 | 2 whole | Room temperature for blending |
| Vanilla Extract 🌿 | 1 tbsp | Pure extract preferred |
| Ground Cinnamon 🌶️ | 1 ½ tsp | Freshly ground for warmth |
| Ground Nutmeg 🌶️ | ¼ tsp | Freshly grated preferred |
| Apples 🍏 | 4 medium | Peeled, cored, diced small |
| Lemon Juice 🍋 | 1 tbsp | Freshly squeezed for brightness |
| Salt 🧂 | ½ tsp | Fine sea salt preferred |
| Cinnamon-Sugar Mix 🍚 | ½ cup | Equal parts sugar and cinnamon |
| Optional Caramel Sauce 🍯 | ½ cup | Store-bought or homemade |
| Optional Chopped Walnuts 🌰 | ¼ cup | Toasted for extra crunch |
The apples are everything here. Honeycrisp or Granny Smith work best—they hold their shape while baking into caramelized clusters. I always grab mine at Whole Foods when they're in season, but the regular grocery store apples (like Gala or Fuji) work too. Peel and dice them small—about 1/4-inch pieces—so they cook evenly. The lemon juice keeps them from browning too fast while adding that bright piehouse tang. Pro tip: Toss the diced apples with a pinch of salt and let them sit for 10 minutes before baking—they'll release more juice and caramelize better.
No vanilla extract? Almond extract at half the amount works in a pinch, but trust me, pure vanilla makes all the difference. Running short on butter? Coconut oil works, but it adds a slight coconut flavor. The cinnamon-sugar mix is where the magic happens—don't skip it! If you're feeling fancy, swap the granulated sugar for turbinado sugar in the crust for a subtle crunch. And if you're making these for a crowd, double the cinnamon-sugar mix—people will go crazy for the extra swirls. The optional caramel sauce? Store-bought Karo or Trader Joe's work great, but homemade is always better if you've got the time.
These bars reheat beautifully—just pop them in the oven at 350°F for 5-10 minutes until warmed through. Store in an airtight container with parchment paper between layers for up to 5 days. Freeze for 3 months by wrapping individual bars in plastic wrap. I always make a double batch—one for the freezer and one for snacking. The crust stays crispy for days, but the filling softens slightly, making them even more delicious. Cut into squares or rectangles—whatever you prefer!
Why You'll Love This Recipe
- No Rolling Required: I swear by this trick—just mix the dough with cold butter until it’s crumbly, then press it into a pan. No chilling, no fuss, and those buttery chunks melt into pure cookie heaven while baking.
- Spiced Like Fall: That combo of brown sugar and cinnamon in the filling? It’s like biting into a warm pie, but in cookie form. Honestly, the moment the edges get golden and the apples turn tender, I forget it’s not dessert.
- Crowd-Pleaser Flex: Serve it at picnics, potlucks, or even as a snack for the kids after school. Between us, I’ve sent these to work with a coworker and they’ve vanished in minutes—no one turns down a cookie bar that tastes like nostalgia.
- Zero-Waste Win: The dough’s rich enough to make one big batch, and the leftovers? They’re even better the next day. I’ll be real: I’ve reheated slices in the oven just to relive that crispy-but-soft magic, and it’s always a hit.
Step-by-step instructions for apple pie cookie bars
Here's how to create the perfect blend of crispy cookie base and gooey apple filling—every bite tastes like autumn!
👨🍳 Step 1: Make the Cookie Base
Preheat your oven to 350°F and line a 9x13-inch baking pan with parchment paper. In a large bowl, combine the 2.5 cups all-purpose flour, 1.5 teaspoons ground cinnamon, 0.25 teaspoon ground nutmeg, and 0.5 teaspoon salt. Whisk until evenly distributed—this ensures no pockets of flour remain when you add the wet ingredients.
In a separate bowl, cream together the 1 cup unsalted butter, 1 cup granulated sugar, and 0.5 cup packed brown sugar on medium speed until light and fluffy, about 3-4 minutes. You'll see the mixture nearly double in volume and become pale. This step is crucial—it incorporates air for that perfect crumbly texture.
Add the 2 whole large eggs, one at a time, mixing well after each. Stir in the 1 tablespoon vanilla extract and then gradually mix in the dry ingredients until just combined. Don't overmix—you want to preserve those air pockets for a tender cookie base. Spread half of this dough evenly into the prepared pan, pressing down firmly with your fingers.
🍳 Step 2: Prepare the Apple Filling
While the oven preheats, peel, core, and dice the 4 medium apples into small, even pieces—about ¼-inch cubes. Toss them with the 1 tablespoon lemon juice to prevent browning and add a bright, fresh flavor. In a small bowl, mix together the 0.5 cup cinnamon-sugar mix and, if using, the 0.25 cup chopped walnuts.
Spread the apple mixture evenly over the cookie dough in the pan. Here's the thing—don't be afraid to press down gently on the apples to create a compact layer. This prevents the filling from sinking too much during baking. Sprinkle the cinnamon-sugar-walnut mix evenly over the top for that classic apple pie flavor and texture contrast.
Spread the remaining cookie dough evenly over the apple filling, pressing down gently to seal. This top layer will create that perfect cookie crust we all love. Use a fork to create a crisscross pattern on top—it looks beautiful and adds extra crunch!
🔥 Step 3: Bake to Golden Perfection
Bake in the preheated oven for 40-45 minutes until the edges are golden brown and the center is just set. You'll know it's done when a toothpick inserted in the center comes out with a few moist crumbs but no wet filling. The bars should look beautifully browned with those crispy edges.
Real talk: Don't overbake! These bars are best when they're slightly underdone in the center—they'll firm up as they cool. If you're worried about the top browning too quickly, tent the pan with aluminum foil after 25 minutes.
Let the bars cool completely in the pan for at least 1 hour before slicing. This resting time allows the layers to set properly and prevents the filling from oozing out when you cut them. Once cooled, use a sharp knife to cut into 16 equal bars—the perfect size for sharing with friends or enjoying as a satisfying treat.
🍽️ Step 4: Serve and Enjoy
For that restaurant-quality touch, drizzle each bar with the 0.5 cup caramel sauce right before serving. The warm caramel contrasts beautifully with the spiced apple and crunchy cookie layers. Serve at room temperature for the best texture—warm bars can be a little messy with the gooey filling.
These bars taste even better the next day as the flavors meld together. Store them in an airtight container at room temperature for up to 5 days or freeze for up to 3 months. Trust me, they'll disappear quickly—they're that good!
Pro Tips For Making Apple Pie Cookie Bar
- CHILL THE DOUGH: Mix the butter and sugars first, then add eggs one at a time—this keeps the dough from getting gummy. After combining, wrap it tightly in plastic and refrigerate for at least 2 hours (overnight is better). I used to skip this, and the bars always turned out dense and dry.
- USE COLD BUTTER: Cut the unsalted butter into small cubes and keep them in the freezer while mixing. The dough will handle better, and the final bars stay crisp instead of greasy. I learned this the hard way after one batch turned out like a sad, buttery brick.
- DON’T OVERMIX: Once you add the flour, stop mixing as soon as it comes together—overworking it makes tough bars. Use a spatula to gently fold in the flour until just combined. I was aggressive for years until I realized the recipe doesn’t need brute force.
- BAKE IN STAGES: Spread the dough evenly on the pan and bake at 350°F (175°C) for 12 minutes—this sets the base. Then, add the apple filling and bake another 15–18 minutes until golden. Rushing the second bake leads to soggy centers. Patience here guarantees perfect texture.
Creative variations of this apple pie cookie bar
Spiced Apple Variations
Swap the classic cinnamon for cardamom or allspice—just ½ teaspoon each—to create a Middle Eastern-inspired twist. I love adding 1 teaspoon orange zest to the filling for a bright citrus note that pairs beautifully with the apples.
For a smoky depth, try ½ teaspoon smoked paprika mixed into the cinnamon-sugar topping. 🌶️
Nutty Add-Ins
Beyond walnuts, experiment with pecans or hazelnuts for richer flavor. Toast them in a dry pan for 3-5 minutes until fragrant, then chop and sprinkle over the filling. For a decadent touch, mix in ¼ cup chopped dried cranberries with the nuts—they add tartness that balances the sweetness perfectly.
Gluten-Free Adaptation
Replace the all-purpose flour with a 1:1 gluten-free baking blend (like Bob's Red Mill) and add ½ teaspoon xanthan gum to improve texture. The crust will still hold together beautifully, though it may be slightly denser.
I've tested this version with great success—just press the dough firmly into the pan to compensate for the difference in binding.
Vegan Twist
Use vegan butter (like Miyoko's) and flax eggs (mix 2 tablespoons ground flaxseed with 6 tablespoons water per egg). For the filling, swap honey for maple syrup (reduce liquid by 1 tablespoon since maple is thicker). The texture stays delightfully crispy, and the flavor remains rich and satisfying.
Seasonal Fruit Swaps
In summer, replace apples with peaches or plums—just reduce lemon juice to 1 teaspoon since stone fruits are less acidic. For winter, try pear or cranberry—the cranberries add a festive pop of color and tartness. Always adjust sugar slightly based on fruit sweetness—taste the filling before baking!
Boozy Enhancements
Add 1 tablespoon bourbon or apple brandy to the filling for depth. For a caramel apple vibe, mix ½ teaspoon vanilla bean paste into the cookie dough instead of regular extract.
The vanilla's intensity elevates the piehouse aroma—trust me, it's worth the extra step. Serve with a scoop of vanilla ice cream for the ultimate grown-up dessert. 🍷
Nutrition facts
Frequently asked questions
Can I make these bars without a 9x13-inch pan?
Use an 8x8-inch pan for a taller, denser bar or a 10x15-inch pan for thinner slices. Adjust baking time by 5-10 minutes—smaller pans need more time, while larger ones bake faster. Line any pan with parchment for easy removal.
Why does my filling ooze out when cutting?
This happens when the bars cool too quickly or aren't rested long enough. Always let them cool 1+ hours in the pan before slicing. For extra stability, chill in the fridge for 30 minutes after cooling. The filling will firm up beautifully!
How do I make these gluten-free or vegan?
For gluten-free, swap flour for a 1:1 blend (like Bob's Red Mill) and add ½ tsp xanthan gum. For vegan, use vegan butter and flax eggs (2 tbsp ground flax + 6 tbsp water). Both versions work perfectly—just press the dough firmly into the pan.
Can I add other fruits to the filling?
Yes! Try peaches, pears, or cranberries—just adjust lemon juice (stone fruits need less) and sugar to taste. For tartness, add ¼ cup dried cranberries with nuts. Always dice fruit small (¼-inch) for even baking.
How do I store or reheat leftovers?
Store in an airtight container for 5 days at room temp or freeze for 3 months. Reheat individual bars at 350°F for 5 minutes until warmed through. The filling softens slightly when reheated—best enjoyed at room temperature!