
Desserts
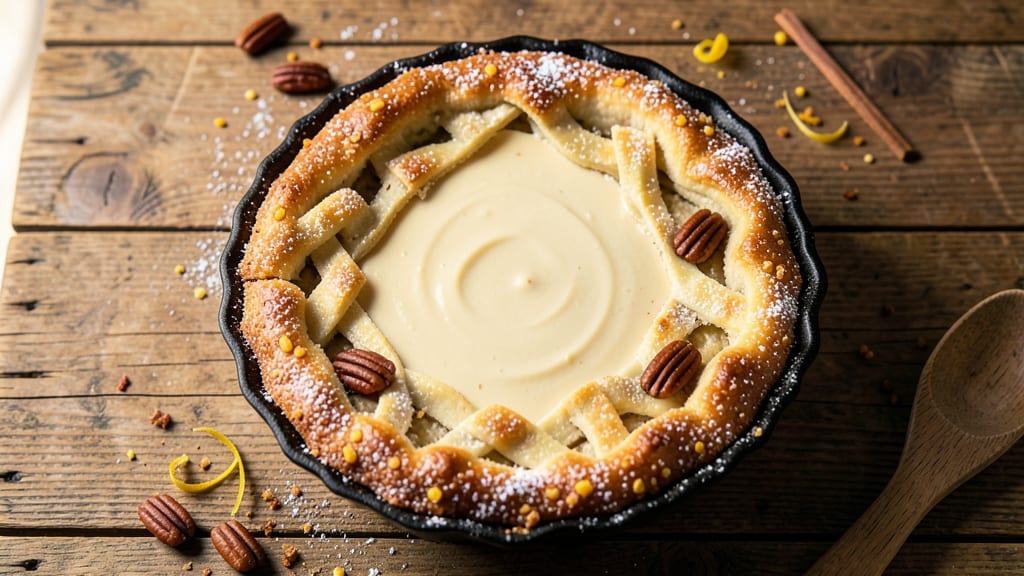
This soul food buttermilk pie delivers the perfect balance of crispy cornmeal crust and velvety vanilla custard that’s been a Sunday tradition in kitchens for generations. The secret lies in the cornmeal crust—its golden, shatteringly crisp edges contrast beautifully with the creamy, tangy buttermilk filling.
I’ve perfected this recipe over years of baking, ensuring every slice delivers that comforting, nostalgic flavor that makes it a showstopper at any gathering.
The filling starts with a rich blend of buttermilk and eggs, creating a custard that’s both tangy and sweet, with just the right amount of vanilla to tie everything together. The cornmeal crust adds a rustic texture that’s impossible to resist, while the custard stays silky smooth—no lumps, no graininess.
This pie isn’t just dessert; it’s a taste of home, with layers of flavor that make it worth every minute of baking.
What you’ll end up with is a pie that’s golden on top, crisp at the edges, and perfectly set in the center—each slice offering a harmonious bite of creamy custard and crunchy crust.
The buttermilk adds a subtle tang that cuts through the sweetness, while the vanilla infuses warmth and depth. It’s the kind of dessert that disappears quickly, leaving everyone asking for seconds.
Serve it warm with a dollop of whipped cream or a handful of fresh berries for a touch of brightness. This pie is ideal for family dinners, holiday feasts, or whenever you need a taste of comfort. Let’s get baking!
Ingredients for soul food buttermilk pie
Twelve simple ingredients for a pie that tastes like Sunday dinner every time.
| Ingredient | Amount | Notes |
|---|---|---|
| All-Purpose Flour 🌾 | 2 cups | For crust structure |
| Yellow Cornmeal 🌽 | 1 cup | Fine grind for texture |
| Unsalted Butter 🧈 | 1 cup | Cold and cubed |
| Granulated Sugar 🍚 | ¾ cup | White or light brown |
| Large Eggs 🥚 | 2 whole | Room temperature |
| Buttermilk 🥛 | 1 ½ cups | Full-fat preferred |
| Pure Vanilla Extract 🌿 | 2 tsp | High-quality brand |
| Salt 🧂 | ½ tsp | Fine sea salt |
| Baking Powder 🍞 | 1 tsp | Aluminum-free |
| Ground Nutmeg 🌶️ | ¼ tsp | Freshly grated ideal |
| Heavy Whipping Cream 🥛 | ½ cup | Optional for serving |
| Fresh Berries 🍓 | 1 cup | For garnish |
The cornmeal is non-negotiable here—it’s what gives this crust that signature shatteringly crisp texture. Bob’s Red Mill is my go-to brand, but any fine-grind cornmeal works. The buttermilk? Full-fat is key—it adds that tangy richness that makes this pie special. I always buy mine from the dairy section at Whole Foods or Kroger—their selection is reliable. For the crust, keep everything cold until you mix it, or you’ll end up with a gummy mess instead of flaky layers. And trust me, room-temperature eggs blend in smoother than cold ones.
No buttermilk? Mix 1.5 tbsp lemon juice or vinegar with 1.5 cups milk—it’s a classic swap. Running out of vanilla extract? Vanilla bean paste works too, just use half the amount. The nutmeg is optional but adds that warm, cozy depth—if you skip it, don’t worry, the vanilla will still shine. For the crust, if you don’t have cornmeal, half the flour for all-purpose gets you close. And if you’re feeling fancy, add a pinch of cinnamon to the filling for extra warmth. The berries? Fresh or frozen work—just toss them in a bowl of cold water to thaw if using frozen.
This pie keeps beautifully—3 days in the fridge wrapped tightly, or 2 months in the freezer if you’re planning ahead. I like to reheat slices in a 350°F oven for 10 minutes to bring back that crispy crust. For serving, a dollop of whipped cream or a sprinkle of powdered sugar elevates it to next-level comfort food. And if you make extra? Portion it into single slices for easy grab-and-go dessert. Trust me, you’ll want leftovers.
Why You'll Love This Recipe
- No-Fuss Crust: I swear, this crust comes together faster than a Sunday morning sermon—just mix the flour, cornmeal, and cold butter until it’s crumbly, then press it into the pan. No rolling, no fuss, and that yellow cornmeal gives it a texture so satisfying, you’ll forget how easy it was.
- Sweet-Tart Magic: The buttermilk filling is where the soul food love happens—creamy, tangy, and just sweet enough to make you reach for seconds. That sugar-butter balance? It’s like a hug in dessert form, especially when the crust’s golden edges melt into the first bite.
- Weeknight Workhorse: Between us, this pie is my go-to for potlucks, family dinners, or when I just need something sweet without the drama. Make a double batch—it reheats beautifully and turns into breakfast pastries in minutes. (Yes, even on a Tuesday night.)
- Pantry Staple Power: Honestly, you’re using things you already have: flour, sugar, butter. No specialty ingredients, no last-minute grocery runs. And if you’ve got leftover filling? Whip up a quick galette or dump it into a skillet for a rustic tart. Zero waste, all win.
Step-by-step instructions for soul food buttermilk pie
Here's how to create that perfect balance of crispy cornmeal crust and velvety vanilla custard.
Prepare the Crispy Cornmeal Crust
In a large bowl, combine the 2 cups all-purpose flour and 1 cup yellow cornmeal. Cut in the 1 cup cold unsalted butter using a pastry cutter or your fingers until the mixture resembles coarse crumbs with pea-sized butter pieces. This texture is crucial for achieving that signature crispiness.
Add the 0.75 cup granulated sugar, 0.5 teaspoon salt, and 1 teaspoon baking powder to the flour mixture. Stir gently with a fork until just combined. The sugar will help create a golden-brown crust, while the baking powder ensures proper rising. Sprinkle in the 0.25 teaspoon ground nutmeg and mix one last time.
Press two-thirds of the crust mixture firmly into a 9-inch pie dish, creating an even layer about ¼-inch thick. The bottom should be completely covered with no gaps. For the top crust, roll the remaining mixture into a ball and flatten it slightly. You'll use this later to create the lattice pattern.
Make the Vanilla Custard Filling
In a medium bowl, whisk together the 2 whole large eggs, 1.5 cups buttermilk, 2 teaspoons pure vanilla extract, and 0.25 teaspoon ground nutmeg until completely smooth. The mixture should have a creamy, slightly thick consistency. This is your custard base that will give the pie its signature soul food richness.
Gradually whisk in the 0.5 cup heavy whipping cream until fully incorporated. The cream adds a luxurious texture that balances the tangy buttermilk. Pour the custard filling into the prepared pie crust, spreading it evenly. Don't worry if it doesn't fill the crust completely - it will puff up beautifully during baking.
Create the Signature Lattice Topping
Roll out the remaining crust mixture between two sheets of parchment paper to about ⅛-inch thickness. Cut the rolled-out dough into 1-inch wide strips using a sharp knife or pizza cutter. The strips should be about 3 inches long. This lattice design allows steam to escape while keeping the filling moist.
Arrange the strips in a herringbone pattern over the custard filling, alternating the direction of each row. Press the strips gently but firmly against the edges of the pie dish to seal. The lattice should cover about ⅔ of the filling, leaving the center exposed. This creates that beautiful golden-brown contrast when baked.
Bake to Golden Perfection
Preheat your oven to 375°F. Place the assembled pie on a baking sheet lined with parchment paper to catch any potential spills. Bake for 45-50 minutes until the crust is deep golden brown and the custard is set but still slightly jiggly in the center. The edges should pull away from the pie dish slightly when gently tugged.
If the crust begins to brown too quickly, tent loosely with aluminum foil. The key is achieving that crispy texture while keeping the custard perfectly set. For the final touch, brush the top lattice strips with a little melted butter using a pastry brush. Return to the oven for 5-10 minutes until the butter has melted and the lattice is beautifully golden.
Cool and Garnish
Remove the pie from the oven and let it cool completely on a wire rack for at least 2 hours. This resting period allows the custard to fully set and the flavors to meld together. The contrast between the crispy crust and creamy filling develops during this time.
Once cooled, garnish with 1 cup fresh berries arranged decoratively on top. The berries add a fresh contrast to the rich custard and make the pie visually stunning. Serve slices warm or at room temperature, with a dollop of whipped cream if desired. Each bite should deliver that perfect combination of crispy, creamy, and tangy soul food flavors.
Pro Tips For Making Soul Food Buttermilk Pie
- Preheat That Pan: Soul food buttermilk pie needs a hot cast-iron or heavy skillet—350°F for 10 minutes minimum. I learned this the hard way after my first pie came out flat and greasy. The crust needs that initial shock to crisp up before the filling sets.
- Whisk Eggs Like Mad: Beat those eggs until they’re frothy and pale yellow—no streaks of white. I was skeptical until I tried it; the texture of the pie filling changes from grainy to silky smooth. Use a whisk, not a fork, and don’t rush it.
- Skip the Overmixing: Once you add the flour and cornmeal to the wet ingredients, stir just until combined—lumps are fine. Overmixing makes the pie dense and tough, and that’s a flavor killer. Think "rough but together," not "perfectly smooth."
- Butter the Pan Well: Use about 2 tablespoons of unsalted butter, melted and spread evenly on the bottom and sides. Soul food buttermilk pie relies on that golden crust, and dry spots mean dry pie. Don’t skimp—this isn’t the time to be frugal.
Essential equipment for perfect results
Pie Dish Essentials
Start with a 9-inch glass or ceramic pie dish—it distributes heat evenly and prevents burning. I swear by Corelle stoneware for its durability and heat retention. Avoid metal dishes if possible, as they can cause the crust to brown too quickly.
If you must use metal, opt for a dark-colored dish like Wilton’s Heavy Gauge to prevent hot spots. 🌟
Crust Tools
For the crust, a pastry cutter or your fingers work best for cutting cold butter into flour. I love the OXO Good Grips pastry cutter—it’s sturdy and makes quick work of the job.
A rolling pin with a marble surface (like Norpro’s) helps prevent sticking when rolling out the lattice strips. Keep everything cold by chilling your dough scraps between uses. ❄️
Mixing & Measuring
Precision matters with custard, so grab a stainless steel whisk (like OXO’s) for smooth blending. A digital kitchen scale ensures accurate measurements for the custard—gram precision prevents a runny filling.
For the cornmeal, a fine-mesh sifter (such as Microplane’s) keeps the texture consistent. I also recommend a liquid measuring cup with a pour spout for the buttermilk and cream. 🥄
Baking & Finishing
An oven thermometer (like Thermoworks’) is a must—home ovens often run hot or cold. For the lattice, a pizza cutter or sharp chef’s knife makes clean cuts. A pastry brush (I use Westcott’s) helps brush melted butter on the lattice for that golden finish.
Don’t skip the parchment-lined baking sheet—it catches spills and ensures even baking. 🔥
Cooling & Serving
A wire cooling rack prevents soggy bottoms while the pie sets. For serving, a pie server (like Wilton’s) ensures clean slices. Store leftovers in an airtight container with parchment between layers to maintain crispness. A small whisk and bowl come in handy for quick whipped cream garnishes. 🍽️
Nutrition facts
Frequently asked questions
Why does this pie need cornmeal in the crust?
The cornmeal creates that signature shatteringly crisp texture that soul food pies are famous for. It adds a subtle nutty flavor and prevents the crust from becoming too dense. Without it, you’d miss that perfect contrast between the creamy custard and the crunchy edges.
Can I make this pie ahead of time?
This pie actually tastes better the next day. Assemble it up to 24 hours ahead and refrigerate uncovered, then bake when ready. For longer storage, bake it fully, cool completely, and refrigerate in an airtight container for up to 5 days. Freeze for 2 months if needed—just thaw overnight in the fridge.
What if my custard looks too thick or too thin?
If it's too thick, whisk in 1 tablespoon of milk or cream at a time until smooth. Too thin? Add 1 tablespoon of cornstarch mixed with 1 teaspoon cold water and whisk vigorously. The custard should coat the back of a spoon but still pour easily. The texture is everything for that perfect soul food mouthfeel!
Can I substitute the buttermilk?
Yes! Mix 1.5 tablespoons lemon juice or white vinegar with 1.5 cups milk and let sit for 5 minutes to curdle. This creates the same tangy richness. For a dairy-free option, use 1.5 cups coconut milk with 1.5 tablespoons apple cider vinegar, though the texture will be slightly lighter.
How do I know when the pie is fully baked?
The edges should pull away slightly from the pie dish when gently tugged, and the custard should be set but still slightly jiggly in the center (like Jell-O). The lattice should be golden brown, and the crust should be deep golden—not burnt. If unsure, check the internal temperature with a thermometer—it should reach 170°F. Let it cool completely before slicing!