
Desserts
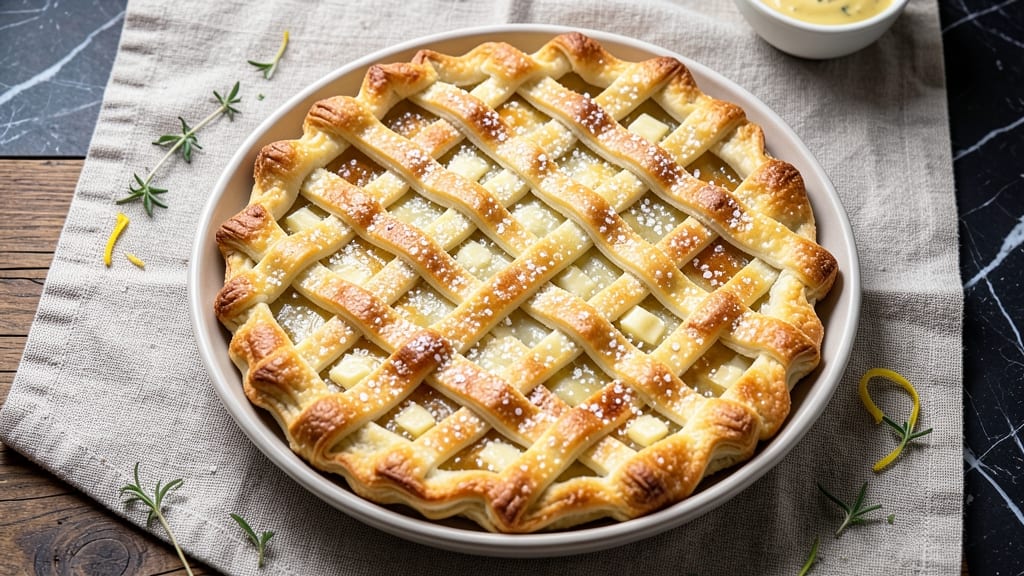
This Amish flaky pie crust recipe delivers the kind of shatteringly crisp layers that make every bite feel like a revelation. The secret lies in cold butter cut into flour with precision, creating delicate pockets that puff into golden perfection when baked.
I've perfected this method over years of testing—no more tough, greasy crusts or frustrating roll-out struggles.
The foundation starts with cold ingredients and a minimalist approach: just flour, butter, salt, and ice water. The butter is cut into the flour using a pastry cutter until the mixture resembles coarse crumbs—this is where the magic happens.
Chilling the dough between folds ensures those signature flaky layers that separate cleanly from the pan, creating a crust so delicate it practically dissolves in your mouth.
What makes this crust truly exceptional is its versatility—use it for sweet apple pies, savory chicken pot pies, or even quiches. The high fat content creates a rich, buttery flavor that pairs beautifully with both sweet and savory fillings.
When baked properly, it achieves that golden-brown hue with just a hint of caramelization, while remaining tender enough to contrast perfectly with any filling.
Once you master this technique, you'll never buy pre-made crust again. The process may seem simple, but the attention to detail—especially the chilling steps—is what transforms good into extraordinary. Let's get started on creating a crust that will have everyone asking for your recipe.
Ingredients for amish flaky pie crust
Four ingredients, expert technique—this crust delivers restaurant-quality flakiness every time.
| Ingredient | Amount | Notes |
|---|---|---|
| All-Purpose Flour 🌾 | 2 ½ cups | Sifted for even texture |
| Unsalted Butter 🧈 | 1 cup | Cold, cubed into 1/2-inch pieces |
| Ice Water 💧 | ⅓ cup | Chilled thoroughly |
| Diamond Crystal Kosher Salt 🧂 | ½ tsp | Fine grain preferred |
| Granulated Sugar 🍚 | 1 tbsp | For subtle sweetness |
The butter is non-negotiable here. European-style unsalted butter (like Plugrá or Land O'Lakes European Style) has the highest fat content, which is key for those signature layers. Keep it frozen until ready to cut into the flour—this ensures it stays cold and creates those perfect pockets. The flour should be sifted before measuring to eliminate any lumps, which can disrupt the delicate crumb structure. For the salt, Diamond Crystal is ideal because it dissolves more easily than table salt, but any fine-grain kosher salt will work.
No ice water? Cold tap water from the fridge works in a pinch, but the ice helps regulate the temperature more precisely. Running short on butter? Lard or shortening can substitute at the same weight, though the flavor won't be as rich. The sugar is optional but adds a subtle sweetness that balances savory fillings beautifully. For a vegetarian or vegan version, use vegan butter and ensure the flour is certified gluten-free if needed. The key to success is maintaining cold ingredients throughout the process—never let the butter soften before baking.
This dough must rest. Wrap it tightly in plastic wrap and refrigerate for at least 2 hours before rolling. For longer storage, freeze the dough between parchment paper for up to 3 months. Thaw in the fridge overnight before using. The crust can be pre-baked for 10-12 minutes at 375°F (190°C) before adding fillings to prevent sogginess. For best results, bake the pie directly on the crust—it creates a crispier base than pre-baking. Any leftovers can be reheated in a 350°F (175°C) oven for 5-10 minutes.
Why You'll Love This Recipe
- No-Fuss Technique: I swear by the cold butter cut into flour—it’s the secret to that legendary flakiness. No food processor, no stress, just your hands and a pastry cutter (or a fork, if you’re in a hurry).
- Butter-Sugar Magic: That tiny pinch of sugar in the dough? It caramelizes just enough to give every bite a subtle sweetness. Honestly, it’s the kind of detail that makes a pie taste like a bakery’s, not your kitchen.
- Pie Pan or Skillet: Use it for pies, of course, but also for hand pies, pot pies, or even a quick skillet dessert. Between us, I’ve even pressed it into a tart shell for breakfast—crispy, buttery, and always a win.
- Pantry Staples Only: Five ingredients, zero specialty items. The butter stays cold, the dough comes together fast, and you won’t break the bank. Leftovers? Roll them into balls, freeze them, and bake later—no waste, all flavor.
Step-by-step instructions for Amish flaky pie crust
A few simple techniques make all the difference in achieving that legendary shatter-with-a-touch texture.
Cut the Cold Butter into the Flour
Place the 2.5 cups all-purpose flour in a large bowl and whisk in the 0.5 tsp Diamond Crystal kosher salt and 1 tbsp granulated sugar until evenly distributed. Add the 1 cup cold cubed butter and toss to coat each piece thoroughly in the flour mixture. This step is critical—don't skip it.
Using your fingertips or a pastry cutter, work the butter into the flour until you have pea-sized crumbs with some slightly larger pieces remaining. The goal is to create a texture that resembles coarse sand with visible butter pieces. This ensures maximum surface area for the butter to melt and create steam during baking, which is what makes the crust flaky. Work quickly but gently to avoid warming the butter.
Add Ice Water Gradually
Measure out the 0.33 cup ice water into a small pitcher or measuring cup. Add the water 1 tablespoon at a time to the flour-butter mixture, gently stirring with a fork or wooden spoon after each addition. The dough should come together just enough to hold when pressed, but don't overmix—you want to preserve those butter pockets.
Here's the thing—this dough is delicate. You're looking for a texture that resembles wet sand when pressed. If it feels too dry, add another tablespoon of water. If it feels too sticky, add a bit more flour. The key is to work quickly; the butter will start to soften as you handle it, which can compromise the flakiness. Once the dough comes together, turn it out onto a lightly floured surface and gently shape it into a disk.
Chill the Dough Thoroughly
Wrap the dough disk tightly in plastic wrap and refrigerate for at least 2 hours, or up to 48 hours for best results. This chilling step is non-negotiable. It allows the gluten to relax and the butter to firm up, which prevents the crust from shrinking during baking and ensures those beautiful flaky layers.
I know it's tempting to skip this step, especially if you're eager to bake, but trust me—rushing here will result in a tough, dense crust. The longer you chill the dough, the better the final texture will be. If you're short on time, place the wrapped dough in the freezer for 30 minutes to speed up the process, but don't skip the chilling entirely.
Roll and Transfer Without Overhandling
On a lightly floured surface, roll the chilled dough into a 12-inch circle, about 1/8-inch thick. The secret here is to keep the dough as cold as possible. If it starts to stick or feel too soft, return it to the refrigerator for 10-15 minutes to firm up. You want the dough to be cool to the touch—this ensures the butter stays solid and creates those signature flaky layers.
Gently transfer the rolled dough to your pie dish by carefully lifting it and draping it over the rim. Press it into the bottom and sides, being careful not to stretch the dough. If it cracks, don't worry—just gently press it back together. The goal is to create an even, smooth surface without overhandling. The dough will shrink slightly as it bakes, so there's no need to force it into every corner.
Blind-Bake for a Perfect Foundation
Preheat your oven to 375°F. Line the crust with parchment paper and fill it with pie weights or dried beans. Bake for 15 minutes, then remove the weights and bake for another 10-12 minutes until the edges are lightly golden. This blind-baking step prevents a soggy bottom and ensures your crust holds its shape when filled.
Here's where precision matters: the crust should be fully set but not browned. You want it to be firm enough to support your filling without becoming crispy. If the edges brown too quickly, cover them loosely with a piece of aluminum foil. Once blind-baked, remove the parchment and weights and let the crust cool slightly before adding your filling. This step is the foundation of your flaky masterpiece—don't rush it.
Pro Tips For Making Amish Flaky Pie Crust
- Chill the Butter Hard: Take that unsalted butter out of the fridge and pop it in the freezer for 20-30 minutes before cutting. Cold butter = smaller, more uniform pieces that melt cleanly during mixing, which actually makes the flakiness work better than pre-shredded shortcuts. I learned this the hard way when my first batch turned out more like a dense biscuit than a layered dream.
- Cut Butter in Small Batches: Don’t dump all the flour into the bowl at once—work in thirds. Mix each batch until you see pea-sized butter pieces, then add the next. This keeps the butter cold longer and prevents the dough from getting gummy. Yes, it’s more steps, but it’s the thing that matters most for that signature Amish shatter.
- Skip the Overmixing: Once the dough comes together, resist the urge to knead it like bread dough. Just press it gently into a disc, wrap it, and chill. Overworking develops gluten, which kills flakiness. I was skeptical until I tried it—my crust went from tough to tender in one chilling cycle.
- Use Ice Water, Not Cold: Fill your measuring cup with ice cubes and water, let it sit for 5 minutes, then use that. The slushy consistency hydrates the flour without warming the butter. I used to use cold tap water and wondered why my crust never got that perfect separation between layers. This makes a real difference.
Creative variations of these flavors
Sweet vs. Savory
This crust shines equally in sweet and savory pies—it's all about the filling. For apple pies, I brush the baked crust with a thin layer of egg wash (1 egg + 1 tbsp water) before adding the filling.
The wash creates a golden, glossy finish that contrasts beautifully with the fruit. For savory pies, like chicken pot pie, I skip the egg wash and focus on a buttery crust—the high fat content makes it rich enough to stand up to hearty fillings like cream-based sauces. 🍏
Herb-Infused Twist
Add 1 tbsp fresh rosemary or thyme to the flour mixture for a fragrant twist that pairs perfectly with roasted vegetable pies or savory galettes. The herbs blend right into the dough without overpowering the buttery flavor.
I like to finely chop them first to ensure even distribution. For a garlic twist, mix 1 tsp garlic powder into the flour—it adds depth to savory pies without being overpowering. 🌿
Double-Crust Magic
For double-crust pies, use the same dough recipe but divide it in half. Roll one disk for the bottom and one for the top. After filling, I like to crimp the edges with a fork by pressing the tines into the dough to create a decorative pattern.
For extra flakiness, brush the top crust with melted butter before baking. This technique works wonders for pecan pies or pumpkin pies—the top becomes crispy while the bottom stays tender. 🥧
Gluten-Free Adaptation
Swap the all-purpose flour for a 1:1 gluten-free flour blend (like Bob's Red Mill) and reduce the ice water to 2 tbsp. The texture won't be exactly the same—it'll be slightly denser—but it still delivers impressive flakiness.
For best results, chill the dough for 30 minutes extra to compensate for the lack of gluten structure. This version works beautifully for fruit tarts or quiches. 🌾
Shortcut for Busy Days
Make ahead dough disks and freeze them between parchment paper. When ready to bake, thaw in the fridge for 1 hour, then proceed with rolling and blind-baking. I keep a stash of these in my freezer for last-minute pies—no need to start from scratch.
For a no-chill crust, use shortening instead of butter and skip the chilling step, but expect slightly less flakiness. 🕒
Nutrition facts
Frequently asked questions
Why does this Amish crust turn out flakier than store-bought?
The secret lies in the cold butter cut into flour using a pastry cutter, creating pea-sized crumbs. This method preserves the butter's integrity until baking, when it melts into steam pockets that separate the layers. Store-bought crusts often use lard or shortening, which creates less flakiness. The 2-hour chilling also relaxes gluten for a tender texture.
Can I make this crust without a food processor?
Use your fingertips or a pastry cutter to work the cold butter into the flour until you get pea-sized crumbs. The key is to keep everything cold—work quickly and avoid overmixing. A fork works too for mixing in the ice water. The manual method just requires patience and gentle handling.
What's the best way to fix a cracked crust?
Gently press the cracks back together with your fingers or a fork. For extra strength, brush the cracks with a little egg wash (1 egg + 1 tbsp water) before baking. If the cracks are deep, chill the dough for 10 more minutes to firm it up. The crust will shrink slightly during baking, so minor cracks are normal and won't affect the final result.
How do I prevent a soggy bottom in fruit pies?
Always blind-bake the crust for 10-12 minutes at 375°F before adding filling. For extra insurance, sprinkle 1 tbsp cornmeal or crushed graham crackers on the bottom before filling. The cornmeal absorbs moisture beautifully. Let the filling cool slightly before adding to the crust to minimize steam buildup.
Can I use this crust for hand pies?
Perfectly! Roll the dough to 1/8-inch thickness and cut into circles using a glass or cookie cutter. Fill with apple slices, peanut butter, or chicken and veggies, then seal by pinching the edges with a fork. Brush with egg wash for a golden finish. The high butter content makes it sturdy enough for handheld pies without being tough.